
Sandpaper


Sandpaper is a tool used to smooth and refine surfaces; it is essential for:
– preparing a surface for painting,
– mitigating damage caused by debris that marks and scratches the part of a plastic frame in contact with the road surface and
– restoring a rigid body made of styrene or ABS.
Sandpaper is a sheet covered with abrasive material, distinguished by the size of the grit attached to the paper itself. These abrasive layers smooth the surface when the sandpaper is rubbed against it.
Work Environment and Choosing Sandpaper
Work in well-lit and ventilated spaces to avoid inhaling the dust generated during the process.
Use warm water and kitchen degreasing soap to wash the surface to be sanded—it must be clean and free of dust. The presence of debris, whether large or small, affects the quality of the sanding process, as debris can interfere with the treatment by scratching the surface more or less deeply.
Before describing the steps to follow, it is necessary to understand some technical aspects of sandpaper, which is categorized by its grit number: the higher the number, the finer the grit. The general rule is:
– sandpaper with a low number removes a significant amount of material, leaving visible scratches and marks, while
– sandpaper with a high number removes minimal material, eliminating scratches and marks slowly.
Sanding a surface involves multiple stages using sandpaper with different grits. These steps must be repeated until the final result is satisfactory—the sequence involves transitioning from coarser sandpaper to finer sandpaper, utilizing all available grit grades.
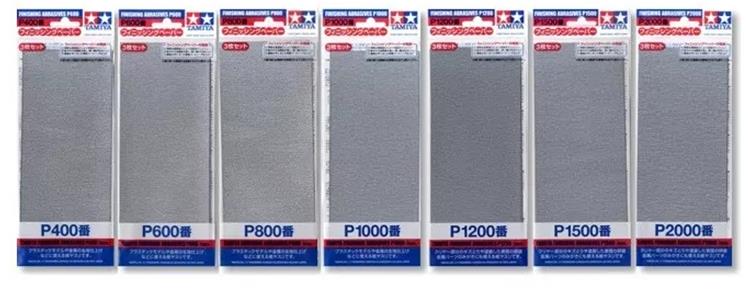
For working on the bodies of radio-controlled models, it is recommended to use sandpaper with a grit number of 180 or higher. To navigate the various options available on the market:
– Sandpaper with grits of 180, 240 and 320: These coarse-grit papers are suitable for repairing styrene or ABS bodies damaged by accidents, scraping against the track, or failed jumps. In such cases, it is always advisable to assess whether it would be preferable to rebuild the damaged part using acetone and ABS solutions. See the dedicated section for working with acetone and ABS solutions. From experience, these grades of sandpaper leave too many marks on plastic surfaces and may worsen the condition of tub chassis when the shell has been scratched after hitting the track. Coarse grit is best for removing large defects and irregularities from the surface, but at the end of the process, it leaves many scratches that need to be treated with finer sandpapers.
– Sandpaper with grits of 400, 600, 800 and 1,000: These medium-grit papers are best suited for working on surfaces that need to be refined before achieving a smooth texture. They help eliminate impact marks from obstacles on the underside of tub chassis and repair minor collision damage on the body. If a coarse-grit sandpaper was previously used, medium-grit sandpaper serves to remove imperfections and marks left by the coarser paper.
– Sandpaper with grits of 1,200, 1,500 and 2,000: These very fine grits smooth and polish surfaces, fully refining them to prepare the part for painting or polishing.
There are two available construction solutions: sandpaper sheets and abrasive sponges. Both are equivalent in terms of surface finish. Sponges can be reused multiple times, whereas sandpaper wears out more quickly. Choosing between one or the other is purely a matter of personal preference.
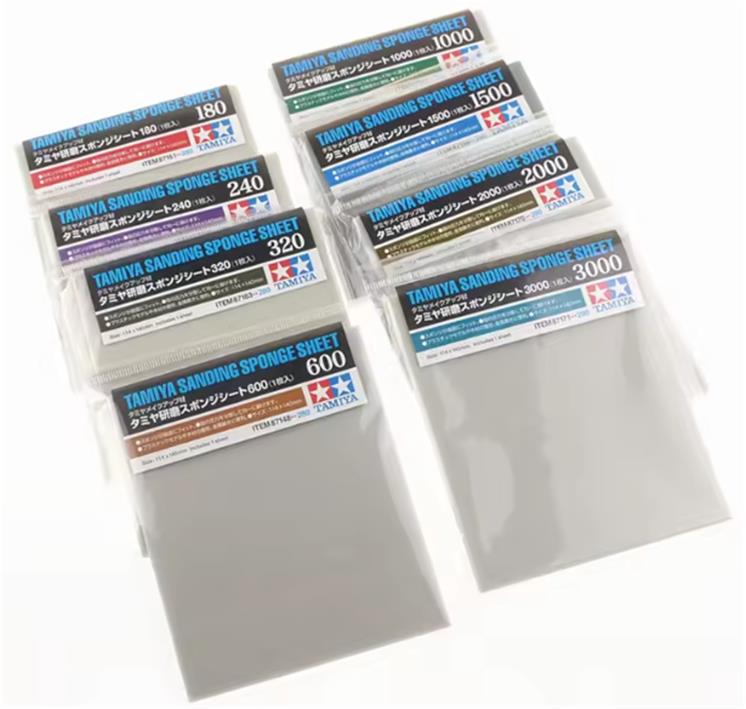
The challenge lies in determining the appropriate grit of sandpaper to begin the treatment. This is the most complex phase, where experience plays a crucial role, as coarse sandpaper can further damage the surface by increasing scratches. The general rule for selecting the correct sandpaper to start with is to choose a corner of the part to be repaired and conduct some grit performance tests. If the scratches are deep, consider starting with 600-grit sandpaper.
Dry or Wet Sanding
Sandpaper can be used either dry or wet. The dry method involves treating surfaces directly with sandpaper. The dust generated aids the sanding action, contributing to the process.
However, there is a risk that dust particles may be overly abrasive, damaging the treated surface rather than making it more uniform. Additionally, greater force must be applied due to the high friction between the surface and the sandpaper. Dry sanding is more aggressive and effective at removing material from the surface.
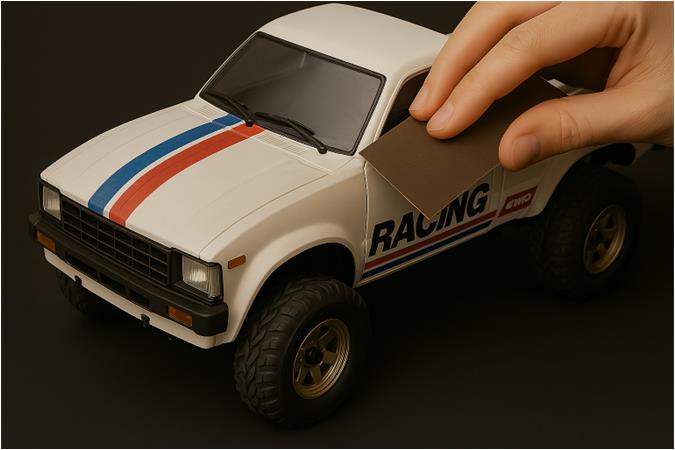
The wet sanding method is likely the most suitable for modelers restoring styrene car bodies or plastic parts. Wet sandpaper produces less dust and is less aggressive—the dust generated during sanding is absorbed by the water, forming a slurry. This slurry does not damage the treated surface.
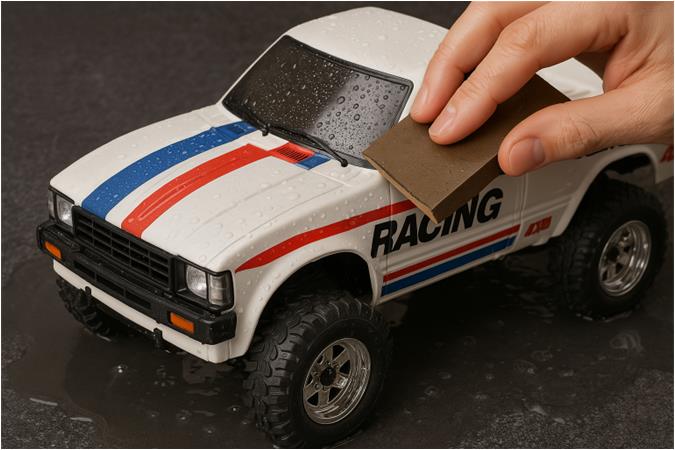
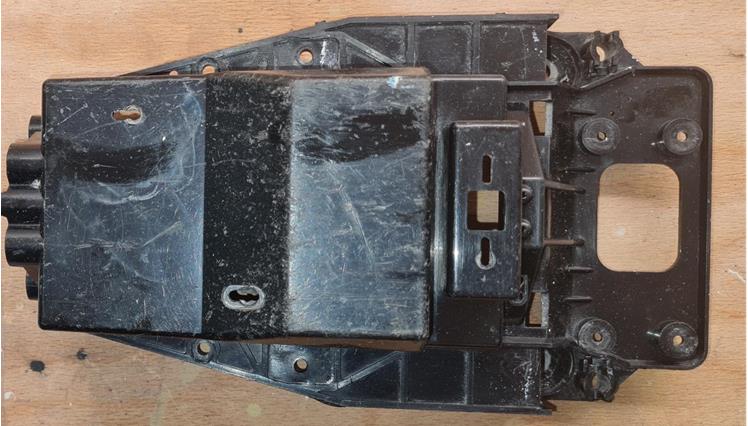
Example of treatment for a Wild Willy series tub chassis that has numerous impact marks that have scraped the underside of the tub (see image). Given the condition of the marks, which are numerous and relatively deep, it was decided to start with 600-grit sandpaper and work with wet sanding.
– Completely immerse the sandpaper in water.
– Wet the surface to be treated.
– Work the surface using regular circular motions until the sandpaper dries. A sign indicating when to rewet the treated areas is the increasing friction between the surface and the sandpaper.
– Reimmerse the sandpaper in water and restart the process from the first step.
– If the sandpaper loses effectiveness, meaning it no longer has sufficient grit, replace the current sandpaper piece and begin again from the first step.
Repeat the steps above until the surface improves. When 600-grit sandpaper no longer results in visible improvements, it is time to change the grit and move to the next stage with 800-grit sandpaper.
In this second phase, repeat the steps above until the surface improves. When 800-grit sandpaper no longer yields visible improvements, proceed to the next stage with 1,000-grit sandpaper.
In this third phase, repeat the steps above until the surface improves. When 1,000-grit sandpaper no longer produces visible improvements, transition to the next stage using 1,200-grit sandpaper.
In this fourth phase, repeat the steps above until the surface improves. When 1,200-grit sandpaper fails to achieve further visible enhancements, move to the next stage with 1,500-grit sandpaper.
In this fifth phase, repeat the steps above until the surface improves. When 1,500-grit sandpaper no longer yields improvements, proceed to the final stage with 2,000-grit sandpaper.
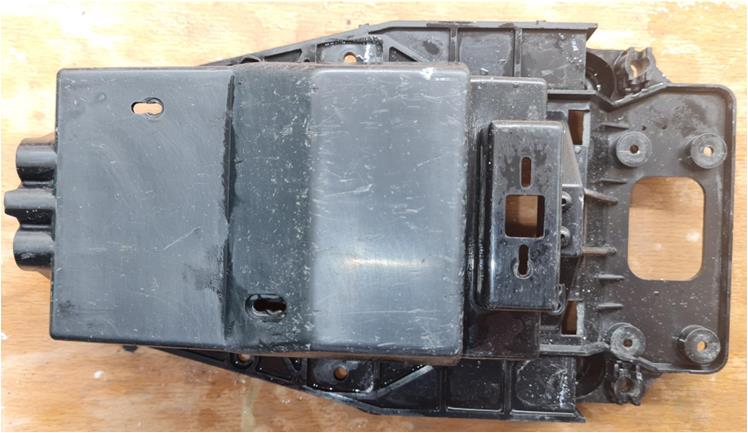
Experience suggests that after sanding with 2,000-grit, the surface is completely smooth to the touch and appears matte (see image below). The success of this sequence depends on choosing the correct initial grit, as an overly coarse grit worsens the condition, while an excessively fine grit fails to eliminate wear marks.
There are also abrasive sponges available on the market that can be used to further even out the surface. These sponges have a surface grit that can reach 8,000, 10,000, or even higher.
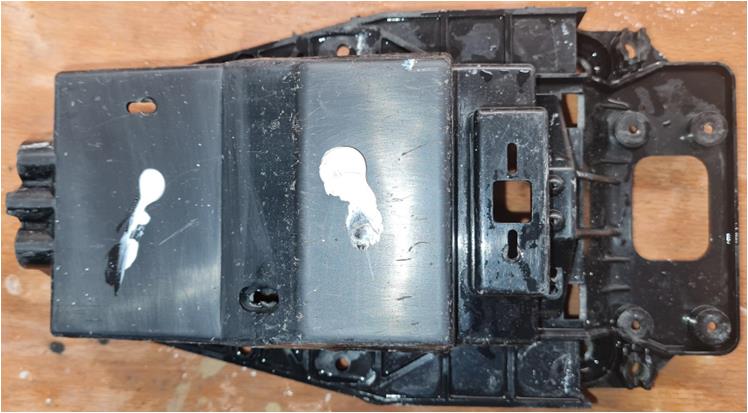
To optimize the treatment and achieve a glossy finish, polish the surface with a polishing compound (in the image below, two small amounts of polish are applied). The polish should be worked in using a clean microfiber cloth, buffing the area until the cream disappears. Perform regular circular motions with the cloth to spread the polish evenly across the surface. Many polishes actually come as a complete set of two, three, four, or more types of compounds, applied in sequence according to their abrasiveness.
These should be used following the same logic as sandpaper: starting with the most abrasive polish (which is more aggressive on surface irregularities) and moving to the least abrasive (which provides a glossy finish). Do not skip any steps and use all available grit levels.
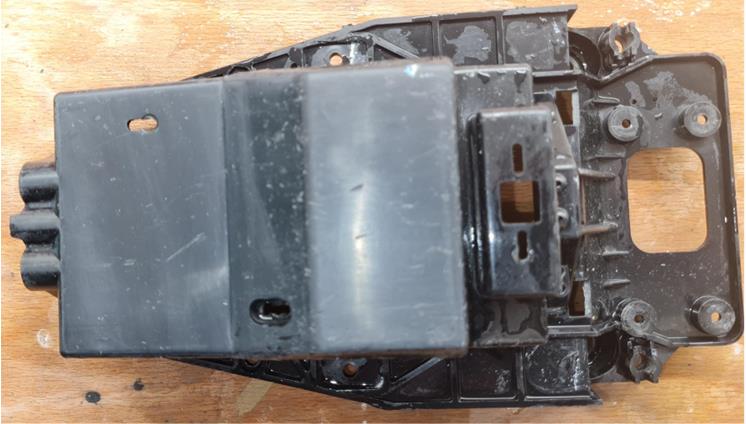
Toothpaste has the same mechanical effect as polish because it contains microbeads designed to treat tooth enamel. This effect is also needed for refining styrene or plastic surfaces. At the end of the sanding and polishing process, the treated part takes on the appearance shown in the image below: many marks have been erased or are significantly less visible. The more worn the part is, the harder it becomes to restore it to factory condition. It is possible to repeat the entire process, starting from the first step with 800-grit sandpaper up to the fifth step with 2,000-grit sandpaper, to further improve the final result. However, deep scratches or gouges cannot be completely removed.
How to Use Sandpaper
Sandpaper can be used without any support, applying pressure with fingers at the specific point where sanding is needed. For complex surfaces with unique shapes, fingers can provide the best control over sanding.
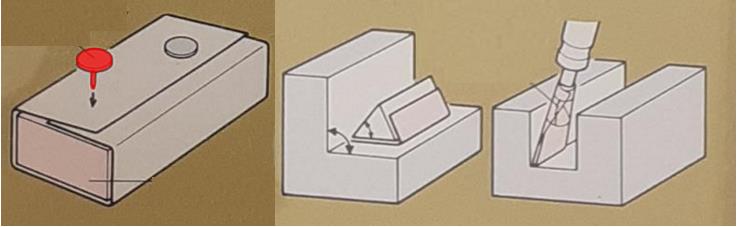
If the surface to be treated is flat, it is preferable to use a wooden block in the shape of a parallelepiped. Cut a strip of sandpaper so that it completely wraps around the wooden piece, overlapping on the long side. Secure the sandpaper to the wooden block using two drawing pins, as highlighted in red in the image below.
If sanding a right or obtuse angle, replace the parallelepiped-shaped wooden block with a wedge, as illustrated in the central image below. Fix the sandpaper onto the wedge using drawing pins.
For sanding a sharp angle or a groove, switch to using a spatula as the support, as seen in the right image below. Attach the sandpaper to the spatula using tape.
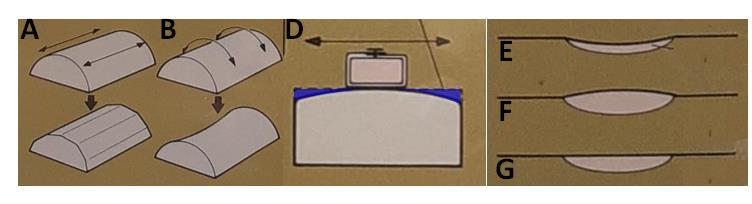
Sandpaper should be applied to the surface with a continuous and repetitive mechanical motion, preferably circular. Linear sanding tends to wear down the surface unevenly, altering its shape.
In the image on the left, Example A shows a linear motion along the object’s axis, modifying the surface and changing its cross-section from circular to polygonal. This type of motion consumes the surface irregularly, distorting its shape.
In Example B, a linear motion perpendicular to the object’s axis reshapes the surface, turning it into a saddle-like or concave cylinder. The central portion wears down more than the edges.
In Example D, a linear movement transforms the surface from flat to convex, wearing down the sides more than the central area.
Circular motions help minimize these defects, making sanding more uniform. However, circular movements are less efficient than linear ones in removing material, resulting in longer processing times.
Properly adjusting the pressure applied on the sandpaper is crucial:
– If working with putty or acetone-ABS solutions, excessive pressure creates depressions (Example E, right image).
– If pressure is too light, a bulge remains (Example F, right image).
– Correct sanding leaves a perfectly smooth surface (Example G, right image).
The best verification test is running a fingertip over the treated surface. The fingertip is highly sensitive—if no ridges, depressions, or bumps are detected, the job has been successfully completed.
Once sanding is complete, prepare for the next steps by washing the part with warm water and kitchen degreasing soap.