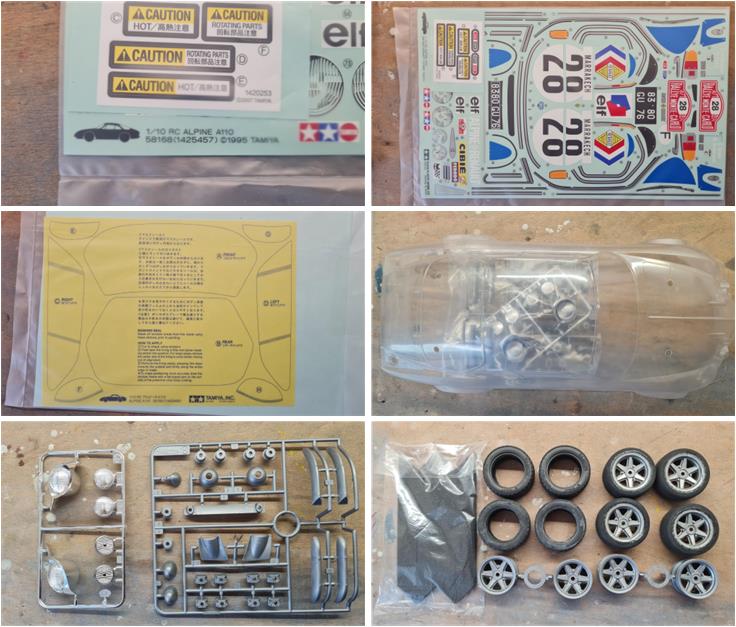
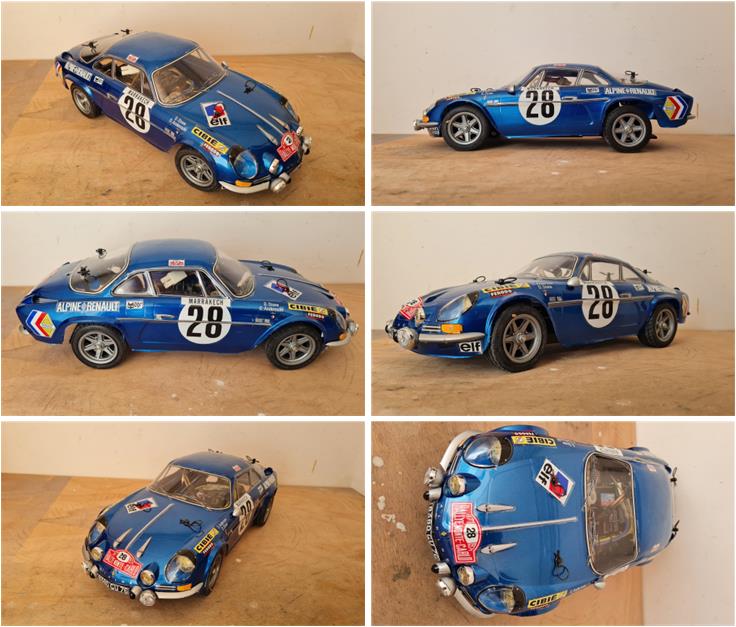
Tamiya Alpine A110, item number 58168 released in 1995 and available on the market until 2000. Lexan body completed with various styrene accessories, some of which are chrome-plated while others require painting. M-02 chassis, 210 mm wheelbase.
Analysis of the model to be restored
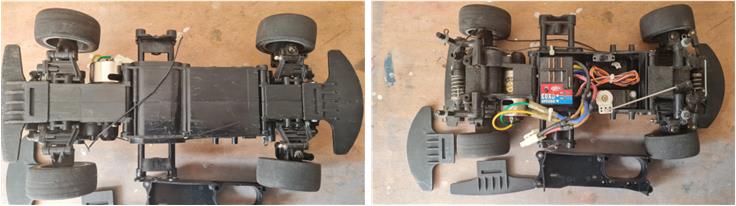
The purchased lot includes a chassis that is in very poor condition (left image, the underside has suffered several impacts with the road surface, leaving multiple marks), but it is complete. There are some spare parts such as the front and rear bumpers that appear new and a half shell of the central section that looks worn.
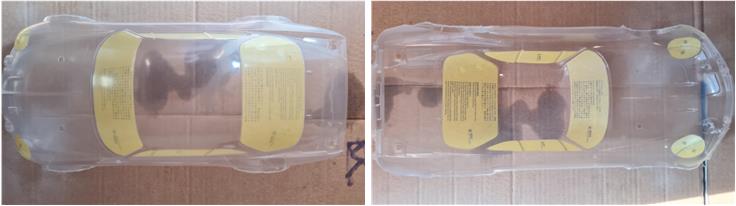
The body is complete with accessory parts such as four rims, four tires, a set of decals and masking for the cockpit windows and front lights. All these parts are new. This body is also included in set 58591 with M-06 chassis released in 2014, so it’s difficult to determine whether it belongs to the original M-02 chassis or to the M-06 chassis. All the parts that complete the body, as well as the body itself, are identical for both models; they also retain the same numbering. Presumably, being part of the same lot, the body should also belong to model 58168. The set of new wheels is in addition to those installed on the chassis, which are in the same condition as the chassis: heavily used.
Chassis restoration
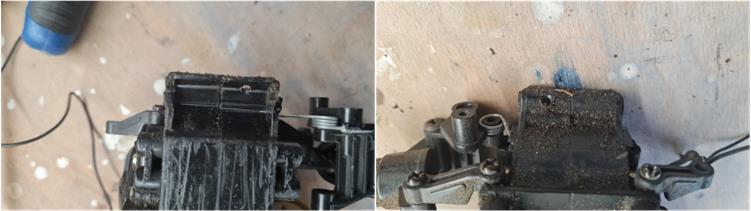
First, disassemble the chassis to look for broken or missing parts. Given the level of wear, surprises are very likely. In fact, the front shell shows two distinct damages; the first is the breakage of the slot used to hold the front bumper in place. The second damage is less visible; to compensate for the fact that the bumper could not stay in position, the previous owner drilled the left shell to insert a screw that secures the bumper to the chassis. These two parts need to be replaced. From the listing photos, this damage was not highlighted and was not mentioned by the previous owner; for this reason, a proper restoration of a model always includes disassembling the chassis to search for hidden faults.
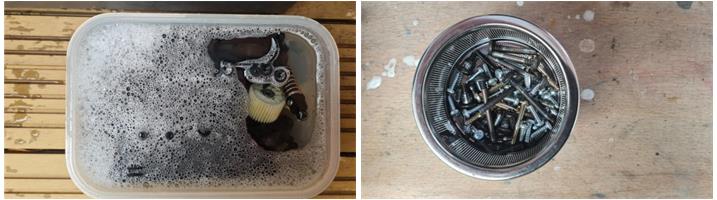
Separate the parts based on their material and proceed with cleaning. Plastic parts should be washed with warm water, degreasing dish soap and a stiff-bristled toothbrush (left image). Metal parts should be immersed in diesel fuel, which chemically dissolves grease, dirt and oxidation. Once the parts have undergone this treatment, they should be dried with a paper kitchen towel by rubbing them together so that the mechanical action of the towel removes the last particles of dirt.
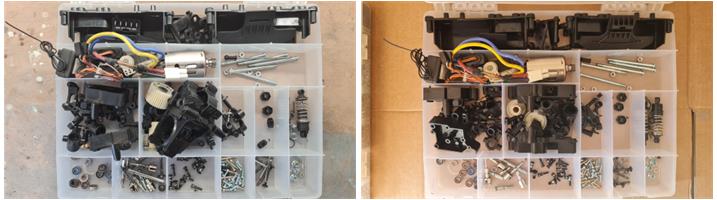
Separate the parts based on where they will be installed; in the left image, the parts are shown before restoration and in the right image after treatment. The pieces have been cleaned; this has highlighted that some parts are heavily worn and marked by use. Particular attention should be paid to the shells that make up the front, rear and central sections of the chassis, which are in very poor condition.
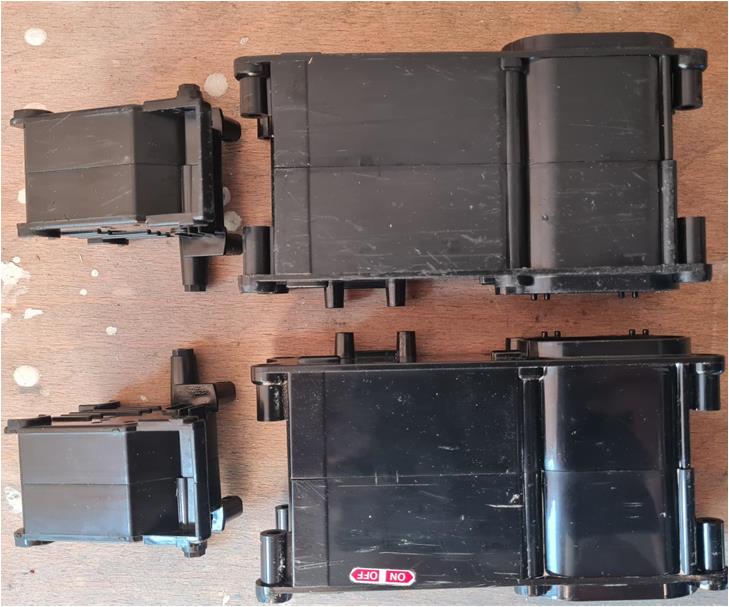
For this reason, the central section previously replaced during the restoration of the Alfa Romeo Giulia Sprint GTA model number 58187 and the front section previously replaced during the restoration of the Rover Mini Cooper model number 58149 were retrieved. These two plus two shells are not perfect (bottom in the image), but they are in better condition than the parts belonging to the original chassis (top in the image).
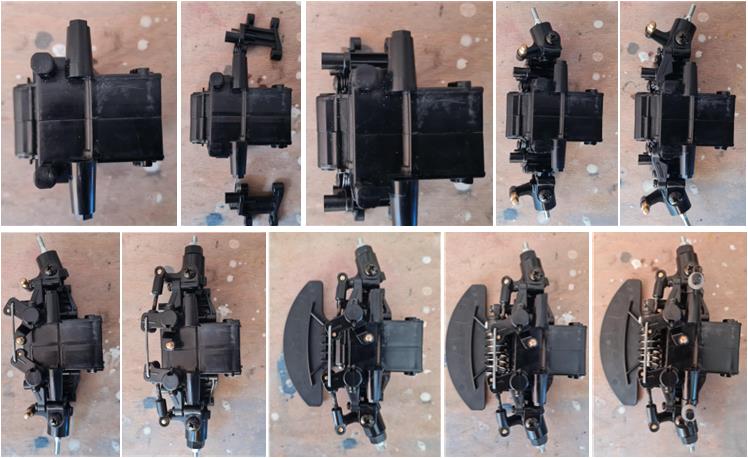
After evaluating the best parts, identifying those to be completely replaced and restoring the original chassis components, it’s time to reassemble the model. The front section of the M-02 chassis includes a dual-link steering system. The Alpine A110 model is distinguished by its crescent-shaped front bumper, setting it apart from all other M-01 and M-02 models released to date, which feature a rectangular front bumper design.
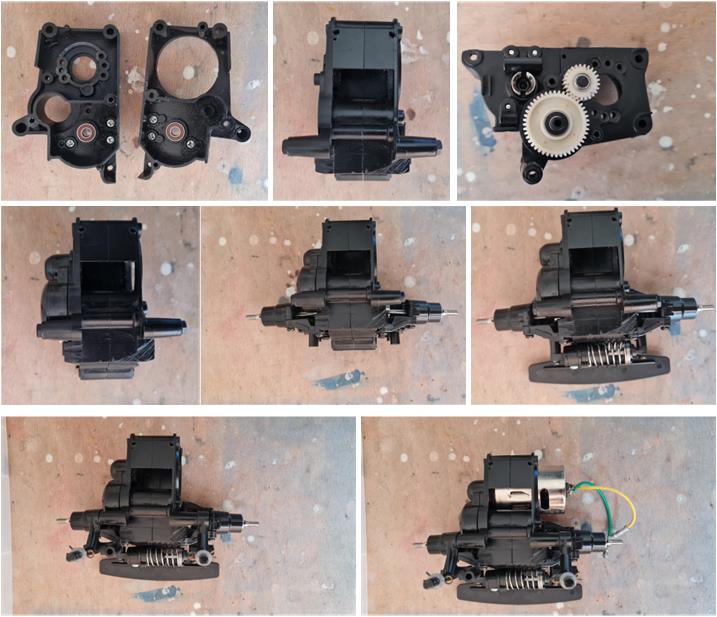
The rear section includes the gearbox; this model was equipped with ball bearings. To improve performance, two carbon shafts were installed, accessory number 53237 known as the “M-Chassis hollow Carbon gear shaft set.” If unavailable, this part can be fabricated; follow the online guide that explains how to work with carbon components.
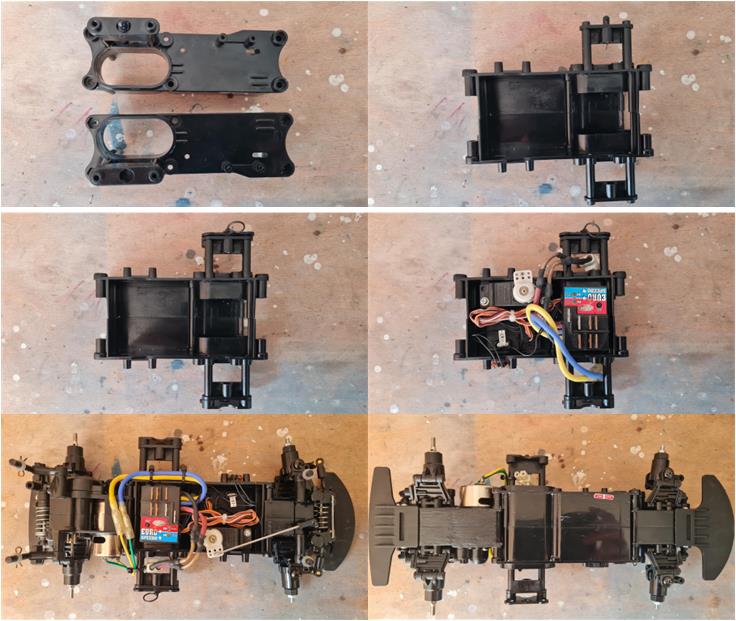
The central section includes electronics with a speed controller. Once the three subassemblies are completed, they can be easily joined using 4 mm nuts and bolts. In the bottom right image, the underside of the model is highlighted, making it easy to assess the condition of the chassis.
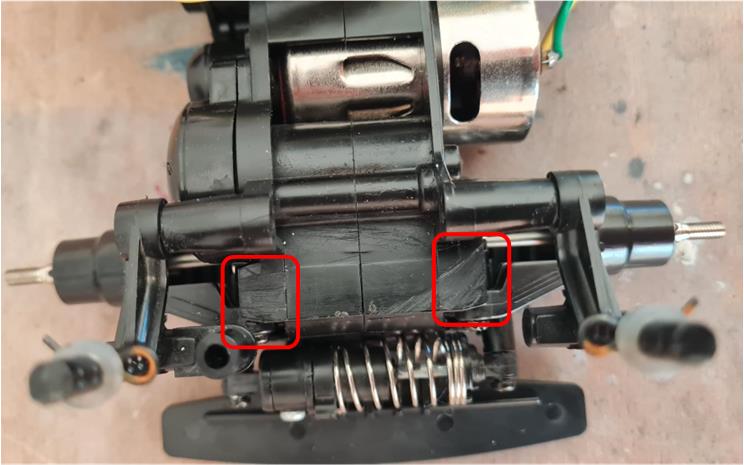
For this restoration, it was necessary to use two rear half-shells taken from unused parts from the lot that enabled the assembly of the Volkswagen Beetle model 58173. These parts had been modified by the previous owner, who cut the two towers intended for installing the dual-link steering system (highlighted by the red boxes in the image). These parts are not needed in the M-02 configuration because the drive is rear-wheel and the steering is located in the other shell. These two shells are the worst-preserved components in the restoration; it was not possible to find others in better condition.
Body restoration
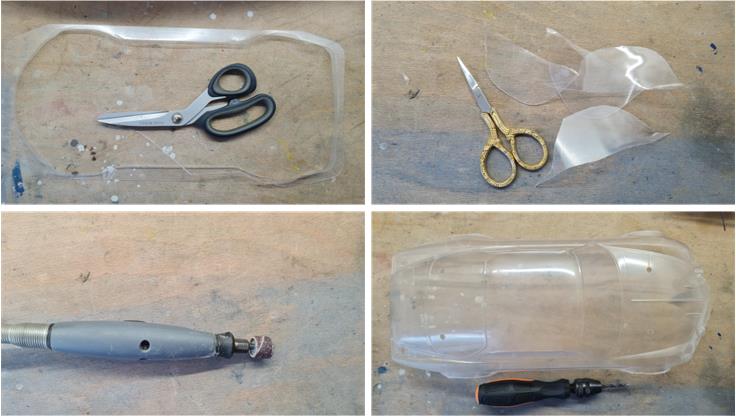
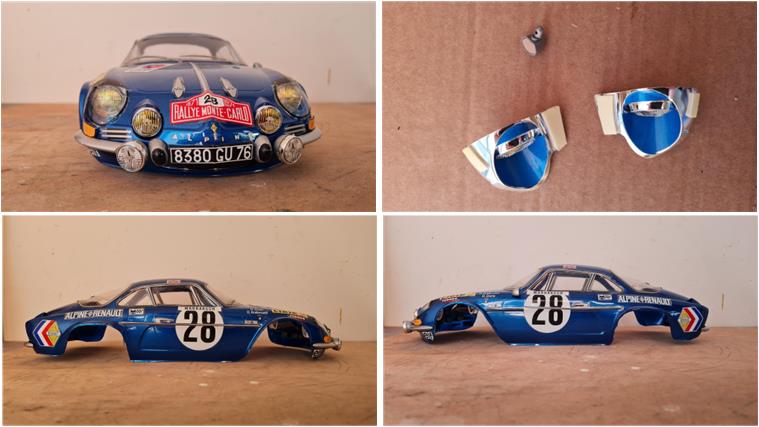
The body is completely new and includes decals and styrene parts, both chrome-plated and to be painted. First, cut the straight sections with long-blade scissors (left image in the first row) and the short curved sections with short-blade scissors (right image in the first row). To finish the arches, use a hobby drill with a cylindrical burr, taking care not to damage the interior of the body (left image in the second row). To complete the body, drill the parts using a hand drill (right image in the second row).
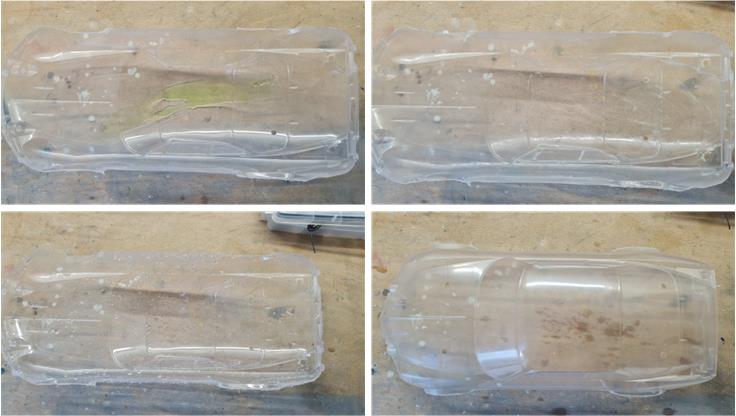
To obtain a body from a Lexan sheet, the process involves the use of lubricants; lubricants that react poorly chemically with paints. Use degreasing dish soap (left image in the first row) to eliminate all traces of lubricants and additives, spread the soap over the entire inner surface (right image in the first row), rinse thoroughly with warm water (left image in the second row) and dry with a kitchen towel (right image in the second row) to prevent the formation of limescale stains when the water evaporates.
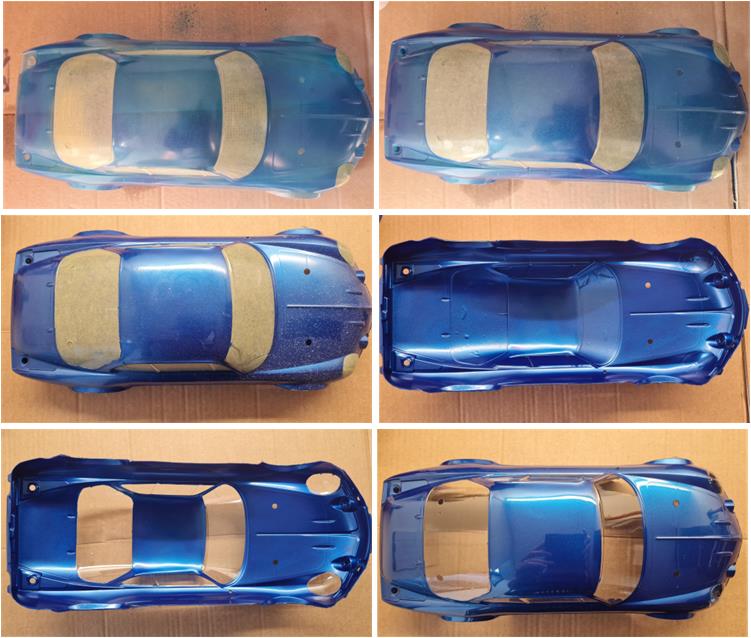
Now it is possible to apply the masking for the cockpit windows and front lights. The masking is part of the decal set; the headlights have a complex masking due to their very rounded shape. The masking consists of two overlapping parts. First apply the larger part, then apply the smaller part by overlapping the highlighted strip in the masking that serves as the boundary between the two sections.
Apply several coats of PS16 paint described as “metallic blue”; the first coats should be light and only afterward can heavier coats be applied. After completing the painting process, wait between two and four hours before removing the masking. Removing the masking before two hours risks pulling off pieces of paint with it, while removing it after four hours risks chipping the paint, leaving a jagged edge along the boundary.
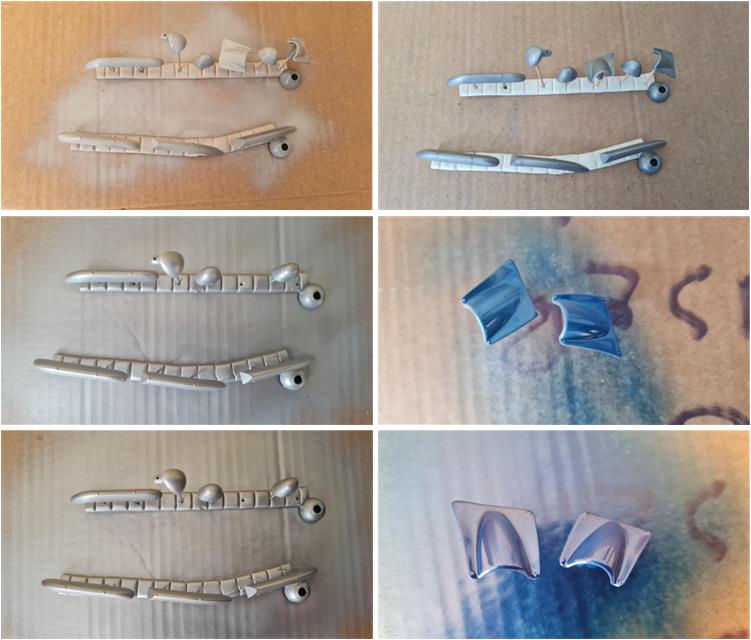
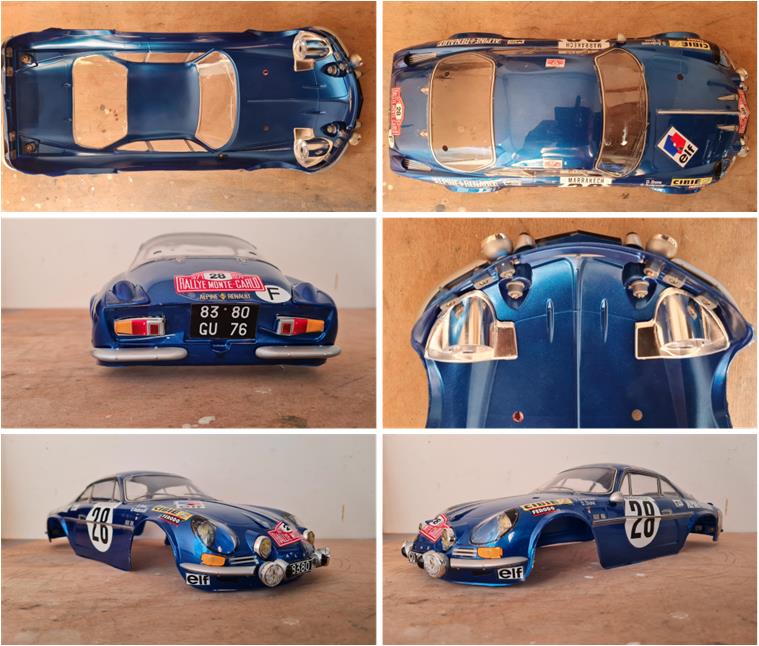
The non-chrome accessories of the body cannot be installed until the correct color has been applied: prepare these parts for painting by applying primer (images in the first row). Except for the two air intakes on the rear section of the body, paint all parts with TS30 defined as “silver leaf.” Paint the air intakes using TS19 defined as “metallic blue,” which matches the color of the Lexan body.
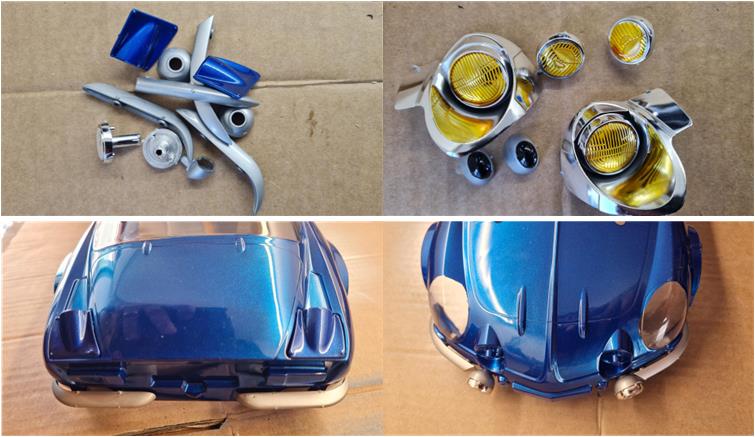
The body accessories are ready to be installed (left image, first row) and the headlight lenses have been painted with X24 yellow (right image, first row). The blue styrene parts have been installed on the body: the TS19 color of the styrene parts matches the finish of the PS16 used on the Lexan (left image, second row).
Completing the body with accessories and applying the decals takes about five hours. The bumpers are screwed in, the main front lights (to be finished with decals) are attached to the body using double-sided tape and the driver’s side mirror is secured to the body with a clip (right image, first row).
There are nearly a hundred decals of various shapes and sizes; the shape of the body prevents overly tight curves, so the decals can be easily applied to flat or slightly curved surfaces without the risk of wrinkling.
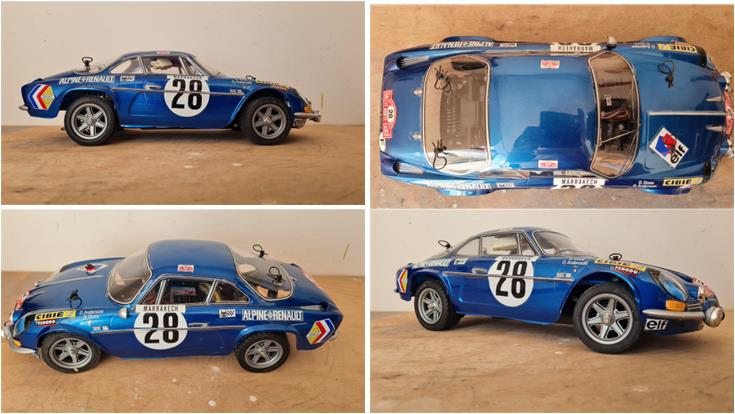
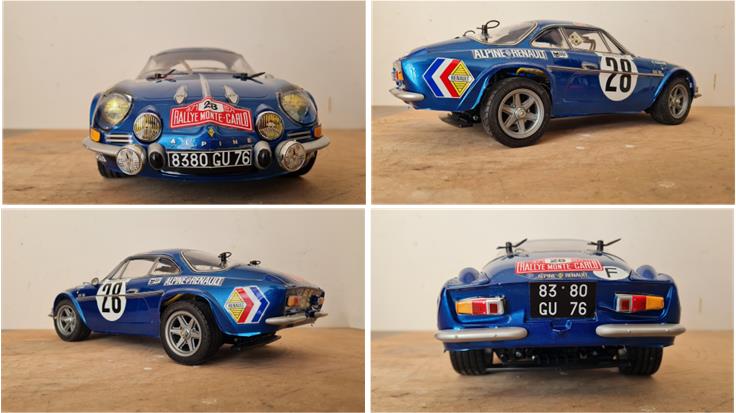
Restored model with body
Images showing the completed model with bodywork.
Tamiya, original figure, box art, guide book and catalogue are of TAMIYA INC, which does not endose or sponsor www.tamiyaclassic.com. Any brands, logos and trademarks represented on this website are the copyright of their respective owners.