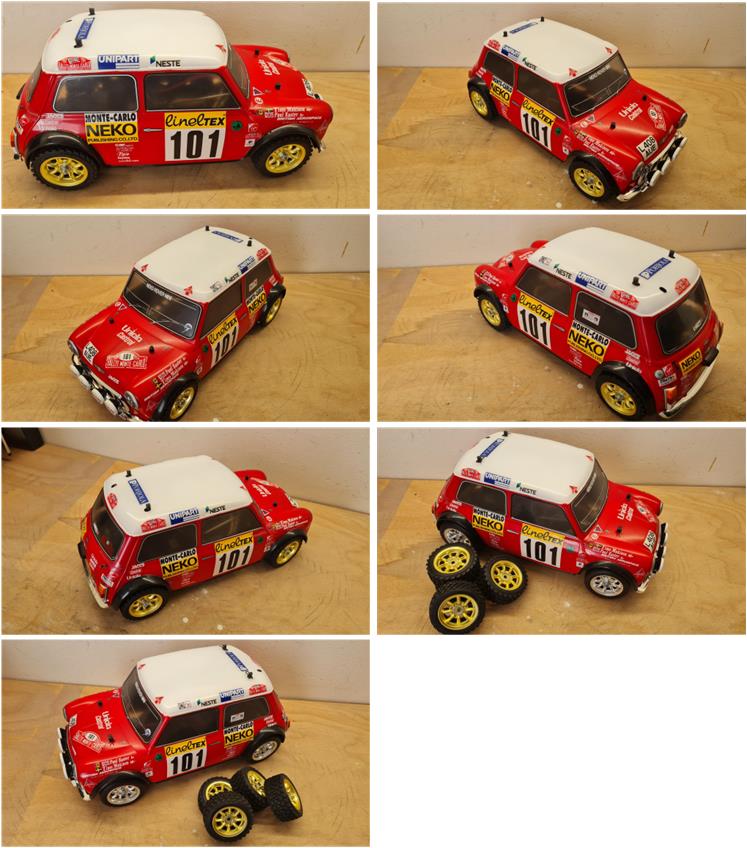
Tamiya Rover Mini Cooper 1994 Montecarlo, item number 58163 released in 1995 and available on the market until 2000 Lexan body M-01 chassis with front-wheel drive
Analysis of the model to be restored
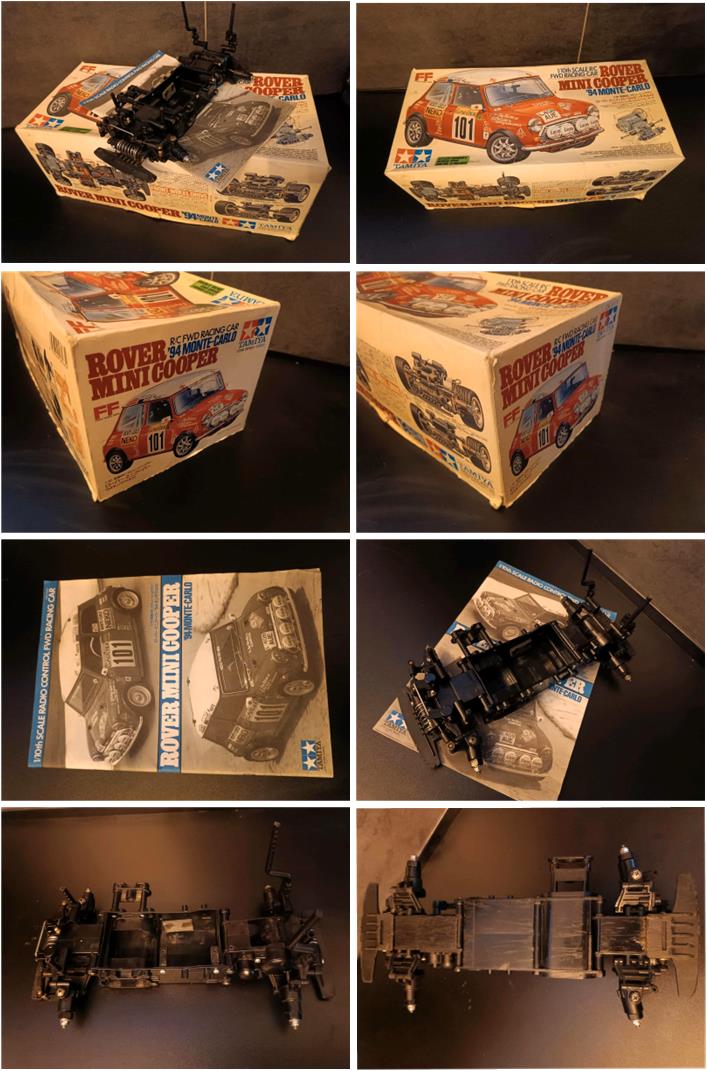
This set is perhaps rarer than its twin model (they share chassis and Lexan body), set number 58149 described as Mini Cooper in road version. The rally model that raced in Montecarlo in 1994 was released for sale one year later than the road version. However, it remained in production for the same number of months because it was withdrawn from the market one year later than the road version. Today (2025) a complete set is only occasionally found online. The one under analysis includes box, instruction manual and chassis; the images below come from the online listing. The analysis of these parts reveals that:
– the box (images in the first and second row) has definitely seen better days, with evident signs of prolonged use; however, there are no tears or breaks – the instruction manual (image on the left of the third row) is intact and in good condition – the chassis appears clearly in poor shape; there are several signs of impact with the ground, the tires with rims are missing, the parts look worn and in very bad condition – the body is completely missing
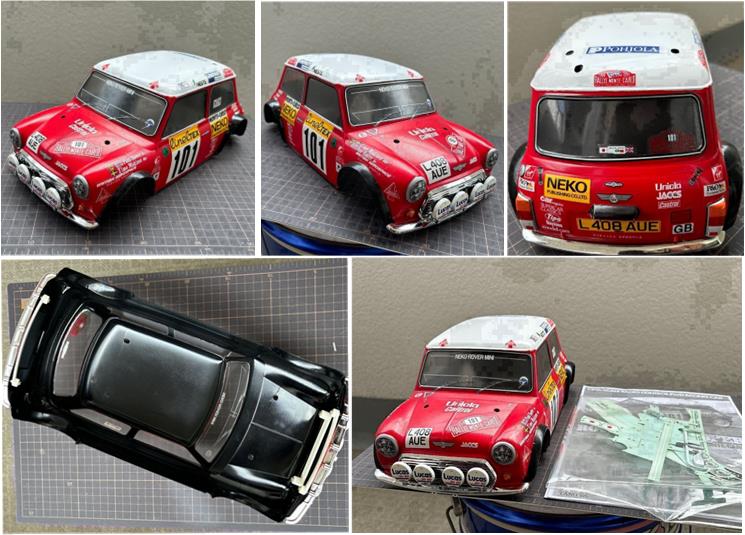
To complete this set, it was necessary to wait for the purchase of the body; the images below come from the online listing. The photos do not do justice to the condition of this body, which is like new. The two rearview mirrors are missing and are provided separately; along with the mirrors, there are some unused stickers (image on the right in the second row). The person who painted this body has excellent skills and knowledge of Lexan painting techniques. An additional layer of black paint was applied, serving the dual purpose of protecting the red paint and enhancing the red color. Front bumper, radiator, rally four-light cluster and rear bumper are intact and in perfect condition.
The condition of the body (perfect) contrasts with the condition of the chassis (in need of complete overhaul), so for this restoration it was decided to use some new parts:
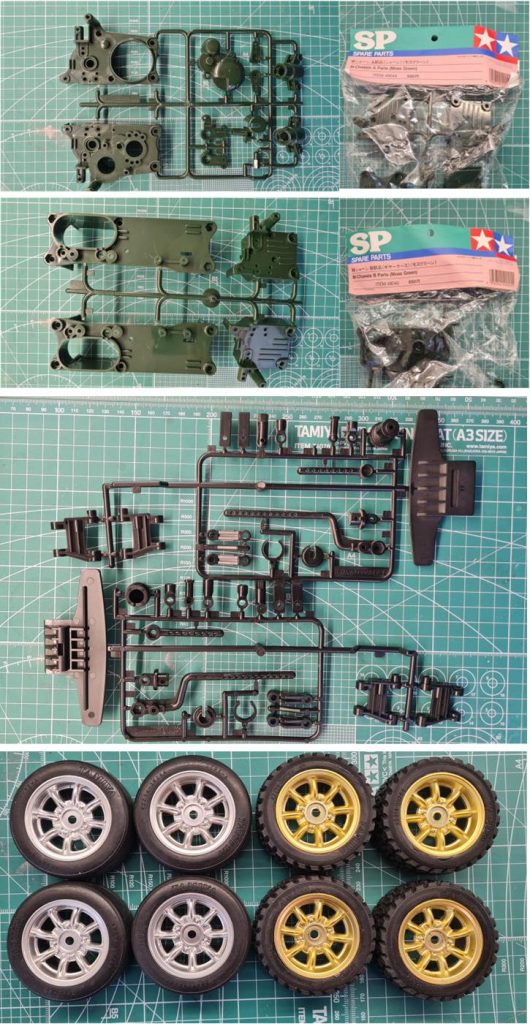
– code 49044 defined as “M-Chassis, A Part, Moss Green” (first row of the image below) – code 49045 defined as “M-Chassis, B Part, Moss Green” (second row of the image below) – code 50654 defined as “M-Chassis, D Parts, Black”, two pieces available (third row of the image below). These parts are made of more flexible plastic compared to the material used for parts A and B; they are not available in olive green, only in black – code 56766 defined as “1/10 Scale RC Rover Mini Cooper 1994 Montecarlo plated wheel”, two complete sets available for a total of four rims. This set today (2025) is practically impossible to find (left side of the last row of the image below) – code 53215 defined as “M-Chassis slick”, two complete sets available for a total of four tires for the 56766 rims (right side of the last row of the image below) – unknown code that we could define as “1/10 Scale RC Rover Mini Cooper 1994 Montecarlo plated gold wheel”, two complete sets available for a total of four rims. This set is definitely Tamiya; it was not possible to find information online or in Tamiya documentation. It can be inferred that it is even rarer than set 56766, presumably distributed during some event in Japan (the set comes directly from Japan). The four rims are complete with rally treaded tires with the Tamiya logo stamped on the sidewall (left side of the last row of the image below) – code 53246 defined as “M-Chassis turnbuckle steering rod set” – code 53237 defined as “M-Chassis hollow Carbon gear shaft set”, if not available follow the online guide that explains how to build it – code 53308 defined as “Aluminum servo stay” – code 53155 defined as “Low friction aluminum damper set (1 pair)” – complete set of ball bearings consisting of 10 bearings size 1150 and 3 bearings size 850 – new gear and differential set
These parts are all new, so the chassis from the original set becomes a donor only for components that are not available as new.
Chassis restoration
Disassemble the donor chassis to separate the various parts by material type. Proceed with regenerating the parts to restore them to like-new condition and search for missing or broken pieces:
– wash the hard plastic parts with hot water and kitchen soap. This solution regenerates the plastic by removing layers of dust. Hot water combined with soap restores elasticity to the plastic, which over the years has suffered from sunlight and airborne scents (perfumes – detergents) in our homes. The soap degreases the surfaces and restores shine – soak the metal hardware for one week in diesel fuel, which removes grease and oxidation. At the end of the process, a thin oily layer remains on the surface, protecting the metal from oxygen and making it shiny
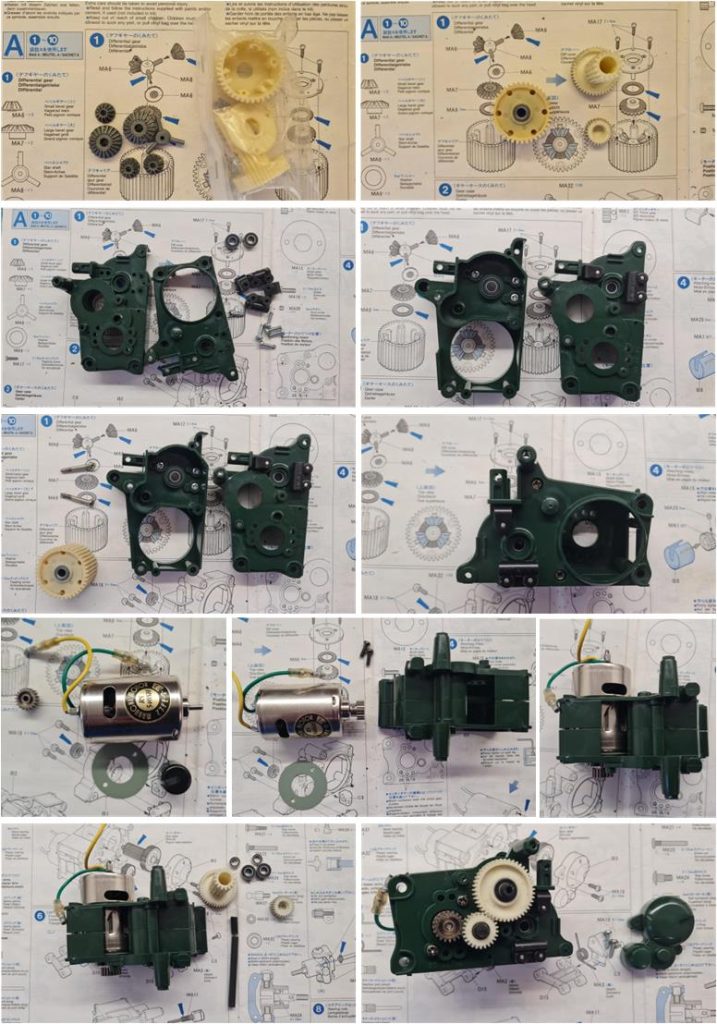
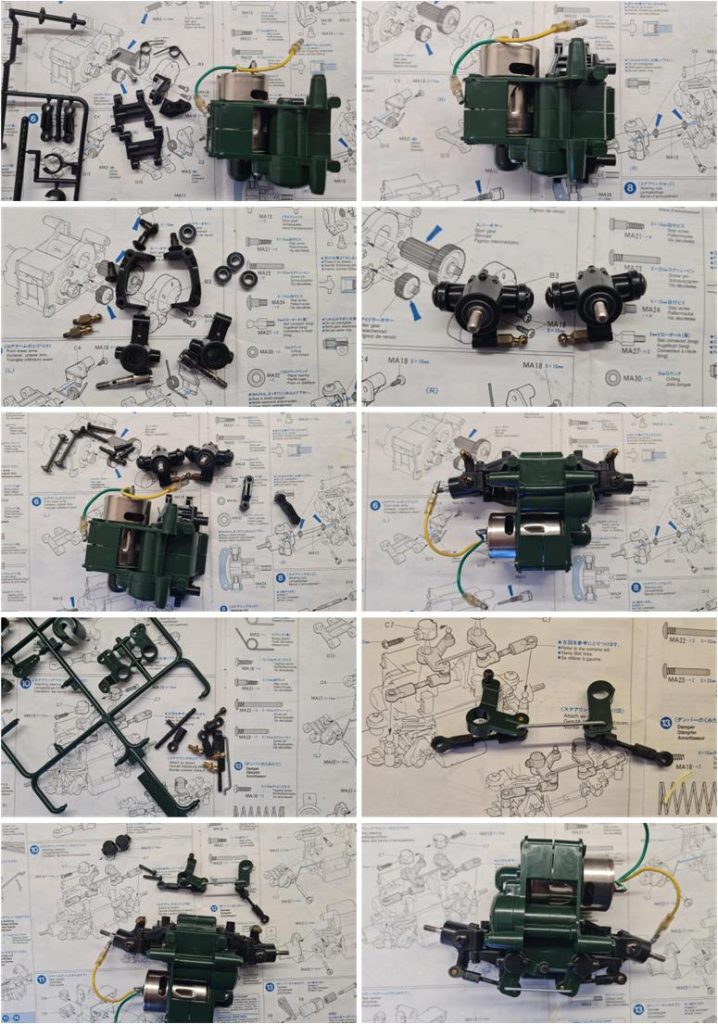
At this point, the chassis can be assembled following the manual; start with the front section composed of the gear housing, electric motor, dual-lever steering system and single-shock suspension. The images below illustrate the sequence to follow:
– assemble the differential with metal satellite gears (image on the left in the first row shows the components and image on the right in the second row shows the gears with the assembled differential) – from set 49044, prepare the right and left shell of the front housing. Before joining the two shells to form the front housing, install one 1150-size ball bearing and two black plastic suspension mounts in each shell (image on the left in the second row) – the two half shells equipped with black plastic parts and ball bearings (image on the right in the third row) are to be joined together with two screws, installing the assembled differential inside (image on the right in the third row) – connect the electric motor to the 20-tooth pinion using the spacer included in set 49044 (image on the left in the fourth row). Prepare the electric motor with pinion and plastic guide to join them to the front housing (image in the center of the fourth row). Install the motor into the front housing (image on the right in the fourth row) – prepare carbon shafts, ball bearings and gears (image on the left in the last row) to be assembled inside the front housing. Install the transmission guard (image on the right in the last row)
– prepare the two lower suspension arms from the first of the two 50654 Part D sets of the M-01 chassis and assemble the suspension arms to the central body of the front housing (images in the first row) – assemble the front suspension uprights complete with wheel axles (images in the second row). To improve system efficiency, install two ball bearings per side to replace the 1150-size bushings – assemble the previously prepared parts to obtain the nearly complete front section of the chassis – to complete the front section, install the dual-lever steering system whose plastic components are included in set 50654 (image on the left in the fourth row)
The front housing (see image on the right in the last row) is ready for the next steps: set it aside temporarily to focus on the rear section.
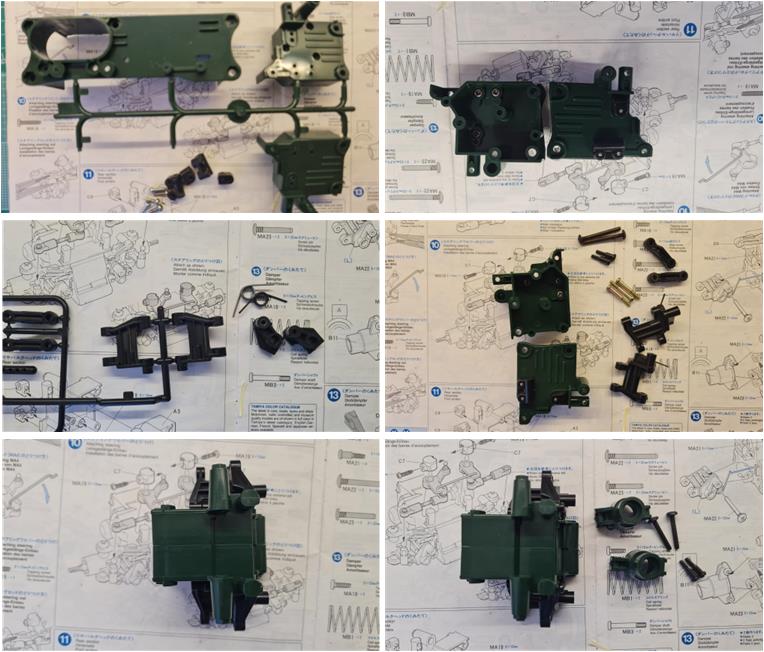
The next steps involve building the rear housing composed of two half shells and the suspension system; the images below illustrate the sequence to follow:
– the rear housing is made up of the two half shells from set 49045 “M-Chassis, B Part, Moss Green” (image on the left in the first row). For each shell, install the two black plastic suspension mounts (identical to those used in the front section, image on the right in the first row) – prepare the two lower suspension arms from the second 50654 Part D set of the M-01 chassis (image on the left in the second row) – assemble the suspension arms to the central body of the rear housing (images on the right in the second row) – complete this section with the green plastic rear wheel uprights, installing two ball bearings per side to replace the 1150-size bushings (image on the right in the last row)
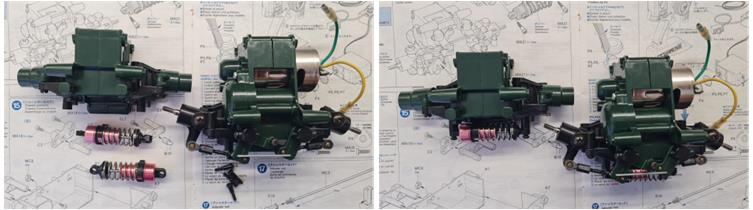
Resume work on the rear section that was previously set aside. The next steps involve both housings just assembled. The M-01 front-wheel drive chassis and its twin M-02 rear-wheel drive chassis are mainly composed of three parts: front housing, central section and rear housing. The front and rear sections include the suspension system with single shock absorbers. To complete the work done in the previous steps, install the lightweight alloy shock absorbers (image on the left below) on both the front and rear sections (image on the right).
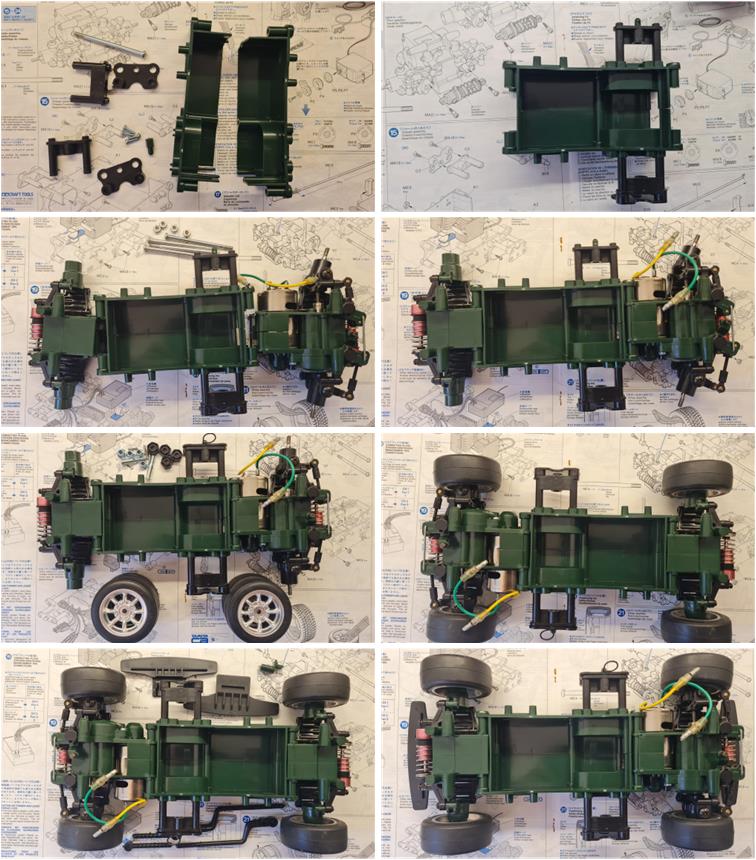
The front and rear housings are ready for the next steps: set them aside temporarily to focus on the central section of the chassis. The images below illustrate the sequence to follow: the central section of the chassis is an open tub formed by two half shells and houses the electronics and battery. The green plastic shells are included in set 49045 “M-Chassis, B Part, Moss Green” and must be joined with the structure that allows the battery to be removed from the model (image on the left in the first row). The central section is now assembled and ready to be joined with the front and rear housings (image on the right in the first row). Resume work on the front and rear sections that were previously set aside. The front, rear and central sections are joined using four nuts and bolts (image on the left in the second row) to form a single structure (image on the right in the second row). The chassis is now ready to receive the tires and rims; for the initial installation, the rims specified in the factory configuration were chosen. The rims are silver plated (image on the left in the third row): set number 56766 defined as “1/10 Scale RC Rover Mini Cooper 1994 Montecarlo plated wheel”. These rims come complete with tires; set number 53215 defined as “M-Chassis slick”. To complete the chassis, install the two bumpers included in set 50654 defined as Part D of the M-01 chassis.
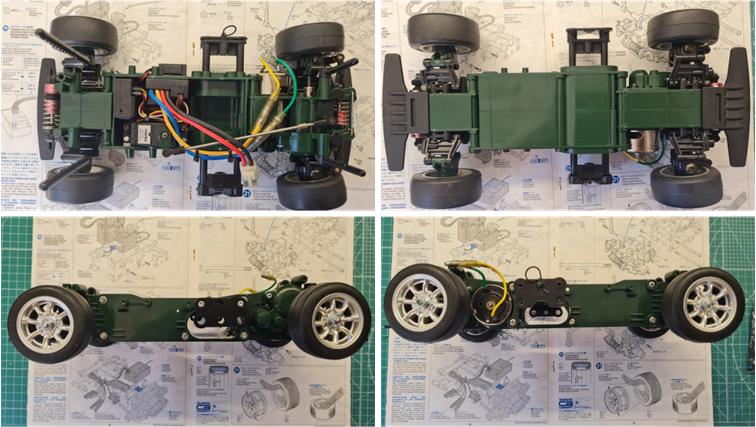
In the images below you can see the complete chassis with silver plated rims and slick tires along with the body post mounts: top view (image on the left in the first row), bottom view (image on the right in the second row), side view (images in the last row).
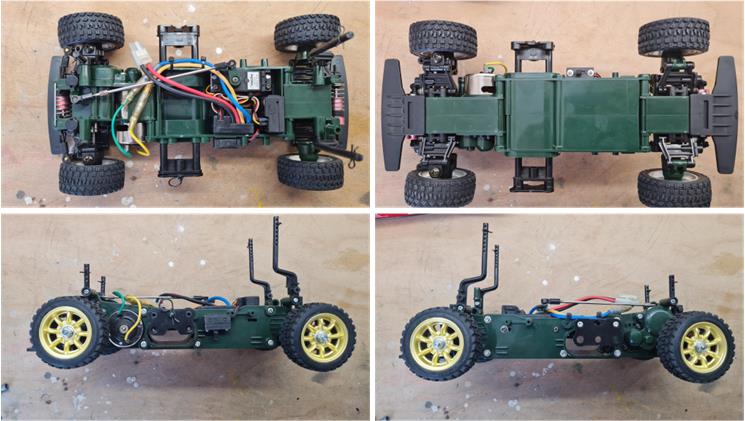
In the images below you can see the complete chassis with gold plated rims and rally treaded tires, fully equipped with electronics: top view (image on the left in the first row), bottom view (image on the right in the second row), side view (images in the last row).
Body restoration
The body is in perfect condition and no operations are planned. The rearview mirrors are present but have not been installed, as is customary for the full-scale model when racing in rallies.
Restored model
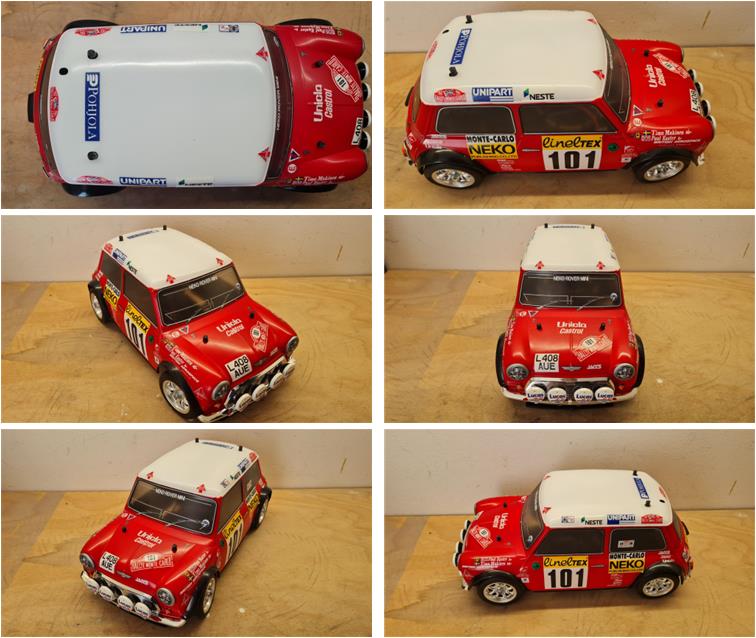
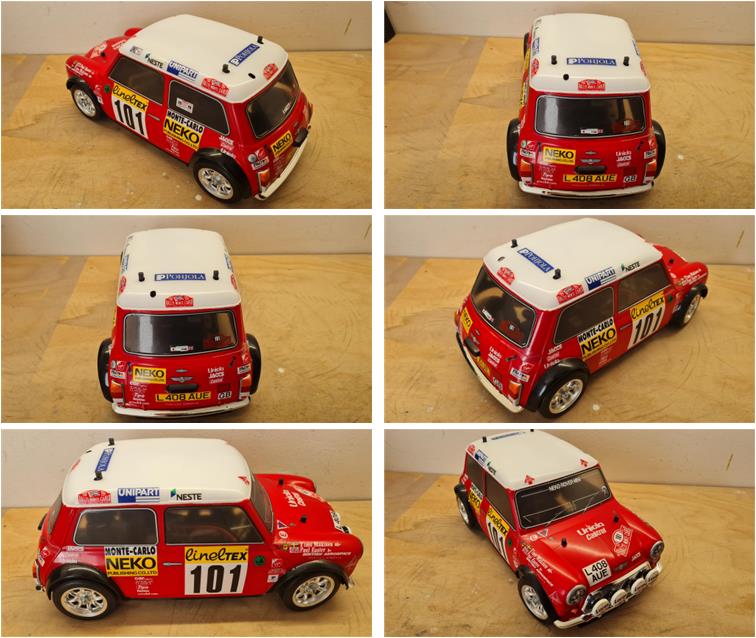
Images showing the finished model with body mounted and silver plated rims.
Images showing the finished model with body mounted and gold plated rims.
Update for the gold-colored rims
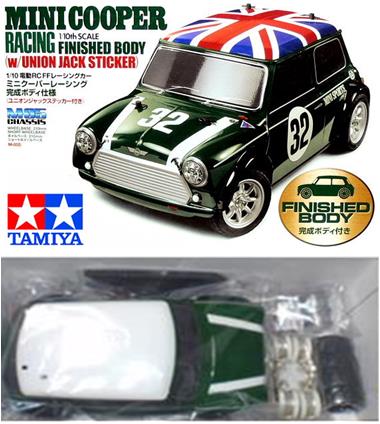
The four rims were included as an additional accessory in the limited edition M05 model number 84183, intended exclusively for the Japanese market. In the factory packaging, along with the four gold-colored rims, there are four silver-colored rims, a factory pre-painted British green body and a Union Jack decal on the roof.
Tamiya, original figure, box art, guide book and catalogue are of TAMIYA INC, which does not endose or sponsor www.tamiyaclassic.com. Any brands, logos and trademarks represented on this website are the copyright of their respective owners.