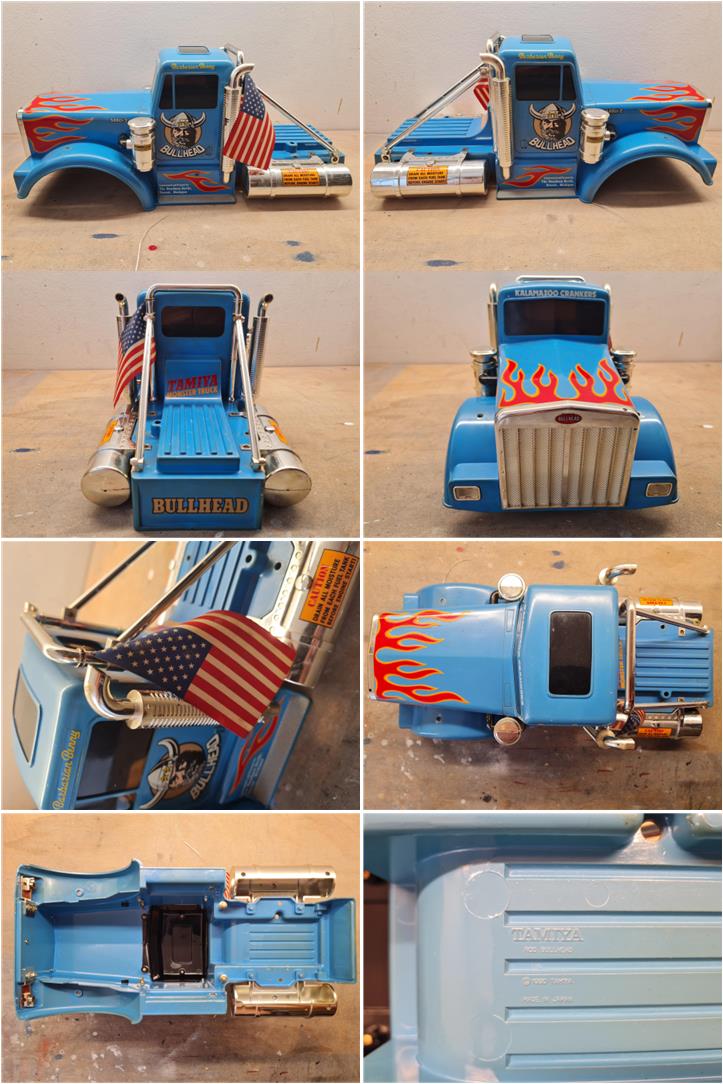
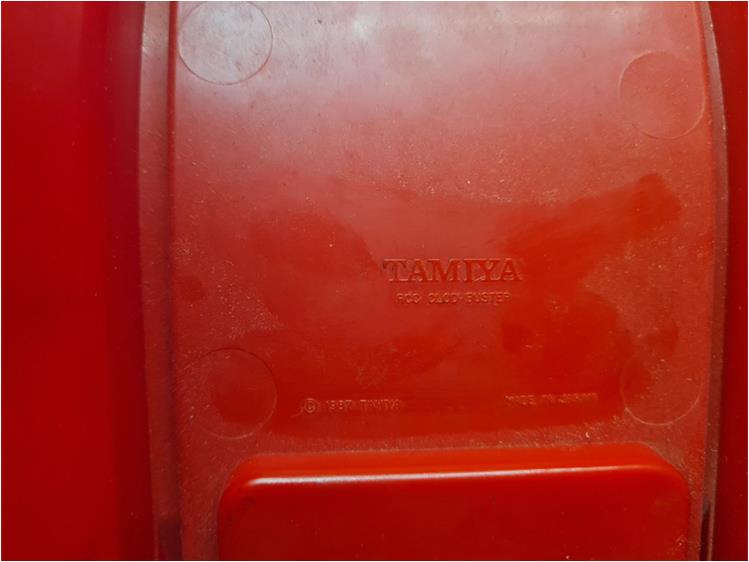
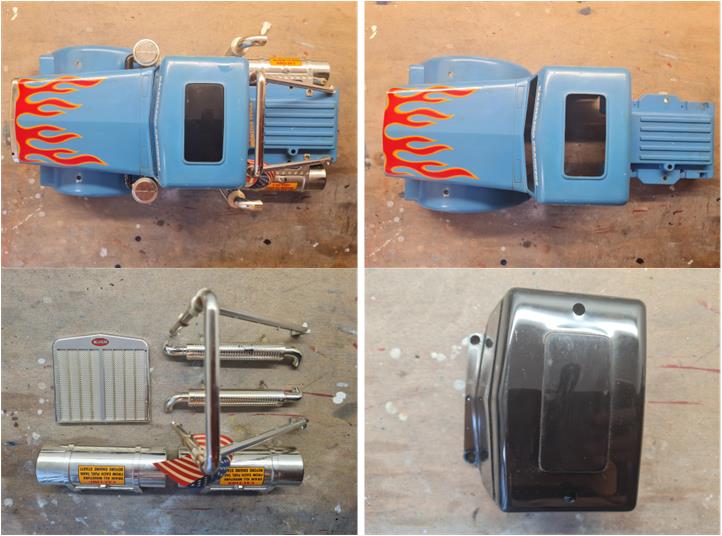
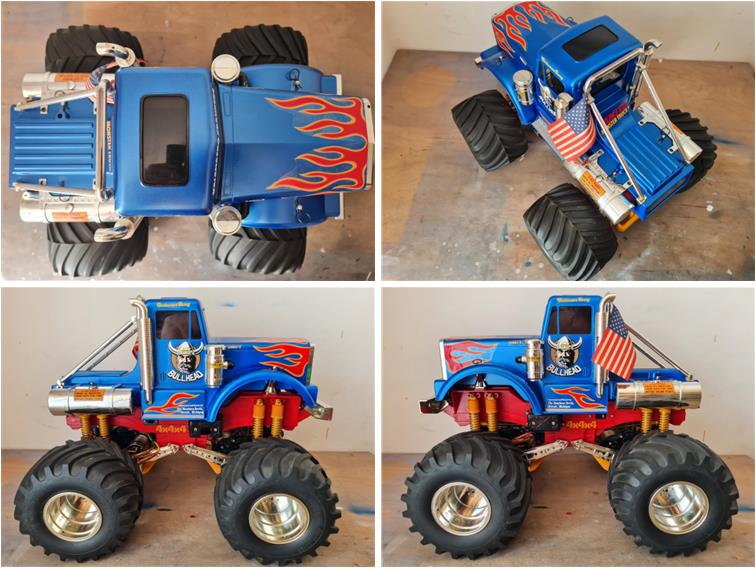
Tamiya Bull Head, item number 58089, released in 1990 and available on the market until 2003. Body in styrene with several chrome‑plated ABS details: the two side tanks mounted at the rear, the two exhaust pipes installed behind the cab, the two filters placed just in front of the cab, the front grille, the front bumper mounted on the red plastic tub chassis, the two front lights and the rear roll bar. The kit also includes a fabric American flag to be mounted on the roll bar. Clod chassis
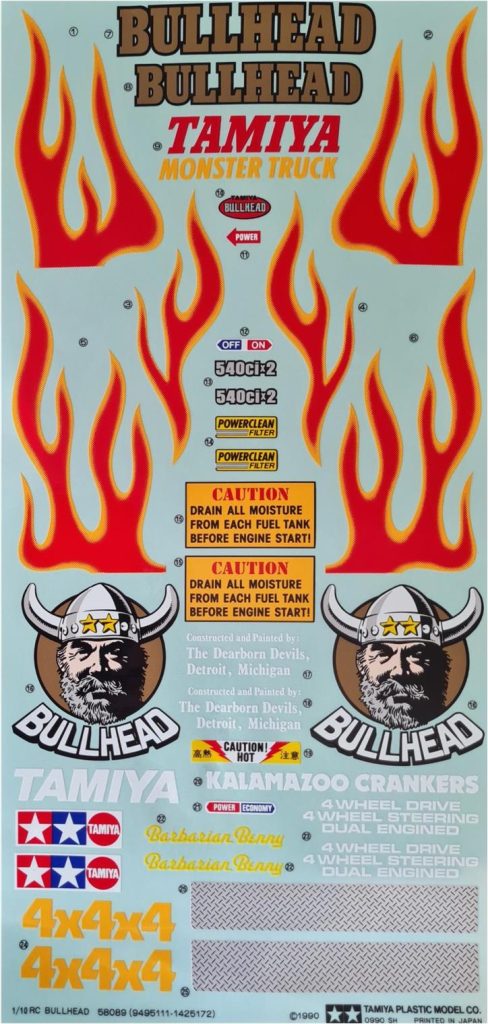
In addition to the complete model, a spare decal sheet is included. Today (2026) this sheet is available on the market because Tamiya reprinted it for the re‑release, model number 58535. The decal sheet carries code 11425172 or 1425172. On the sheet included in the lot, the marking “1/10 RC BULLHEAD 58089 (9495111‑1425172)” is visible in the lower right corner and “1990” is visible in the lower left corner. It is not possible to distinguish a Tamiya‑reprinted sheet from an original 1990s sheet.
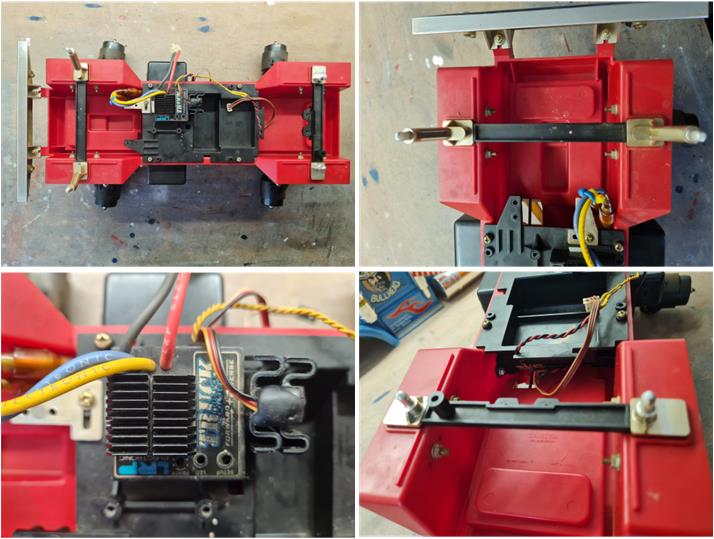
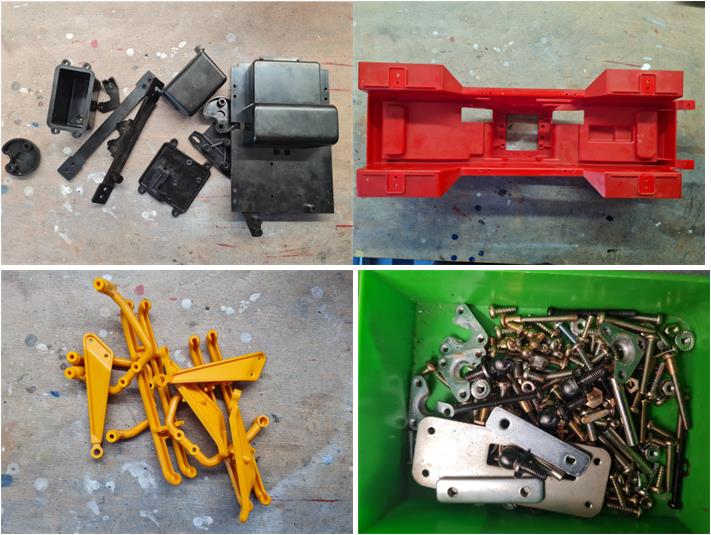
The chassis appears to be in excellent condition and retains all its parts. The presence of the L‑shaped chrome‑plated plastic bracket (left image of the first row) confirms that this is a first‑series model sold in the 1990s. This bracket is used to install the servo for the mechanical speed controller; in this chassis, an electronic speed controller has been installed instead (left image of the second row). All four chrome‑plated ABS body‑mount towers are present, allowing the chassis to support the body shell (right image of the first row for the front towers and right image of the second row for the two rear towers).
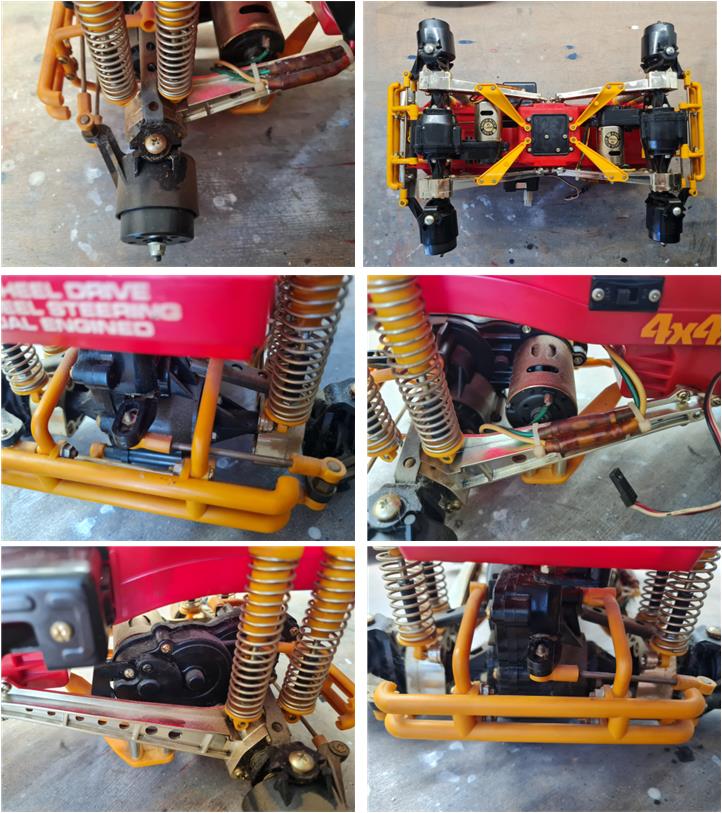
The underside of the chassis is intact and in perfect condition: the drivetrain components are covered by a layer of dust and the electrical connectors have yellowed. This confirms that the model was not used extensively, but was stored in a place where sunlight caused the plastic of the electrical connectors to yellow. Dust accumulated where the grease adhered to the plastics of the two axles, but it actually helped preserve the color of the plastics themselves, which are covered by a thin protective film.
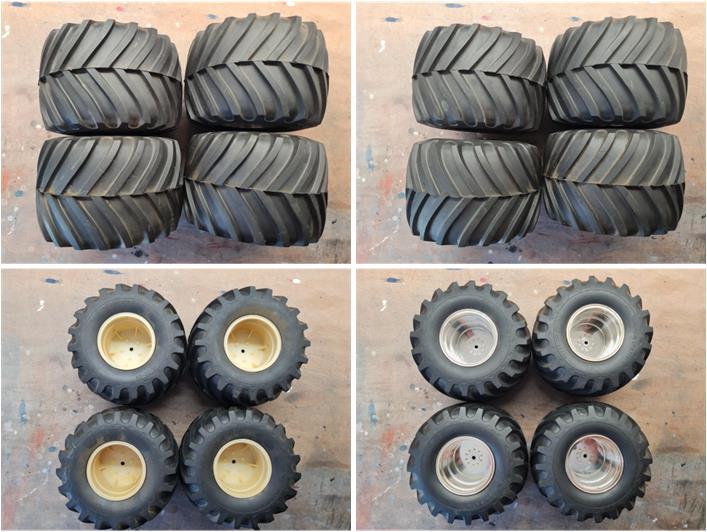
The tires are practically new and show no cuts or signs of wear (first‑row images). To the touch, the rubber feels soft and elastic, just as it should when freshly produced and it is not deformed in any way: it retains its original shape. The wheels are new and show no marks. The chrome finish is also perfectly preserved (second‑row images).
Restoration Given the condition of the chassis, no special operations are required other than restoring the chassis itself by disassembling and reassembling it. During this process, it is possible to check whether any parts are missing or broken and need replacement. Conversely, the body paint must be redone using the correct color tone.
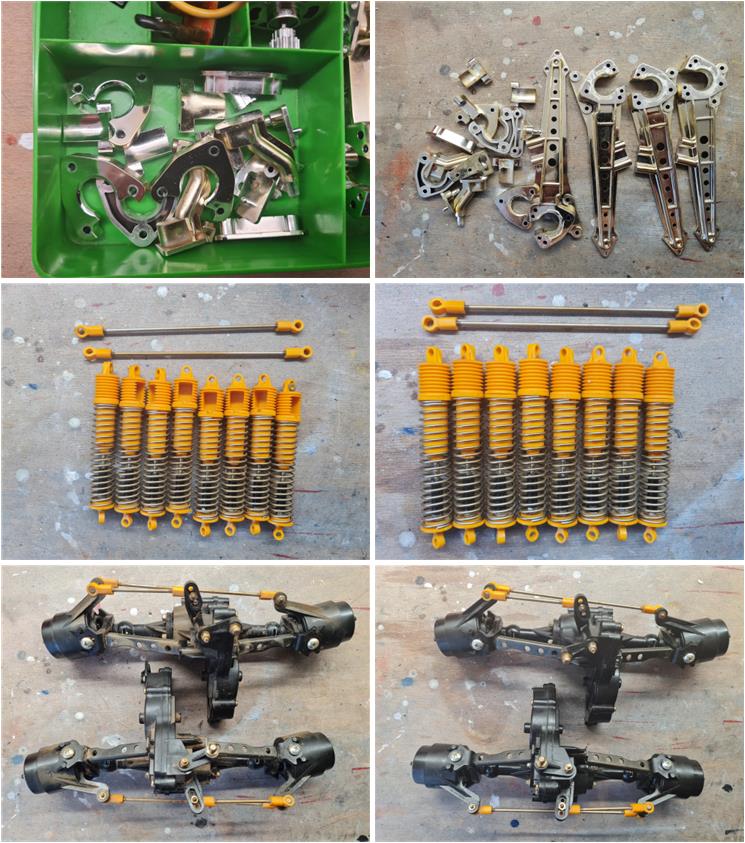
After disassembling the parts, the accumulated layer of dust on some surfaces can be removed with a kitchen paper towel. In the images below, on the left are the parts before treatment and on the right the parts after treatment: in the first row the chrome‑plated parts can be seen, in the second row the eight shock absorbers with the two steering arms and in the last row the two front and rear drivetrain sub‑assemblies are shown.
Separate the plastic parts, the metal parts and the chrome‑plated parts so they can be treated and restored accordingly. The situation is optimal, as the various materials are in excellent overall condition: very few operations are needed to regenerate the components. Wash the plastic parts with hot water and dish soap; a toothbrush helps remove the most stubborn dirt. Wash the chrome‑plated parts with lukewarm water and dry them with a kitchen paper towel. Immerse the metal hardware in diesel fuel for two days and dry the parts in the sun for half a day.
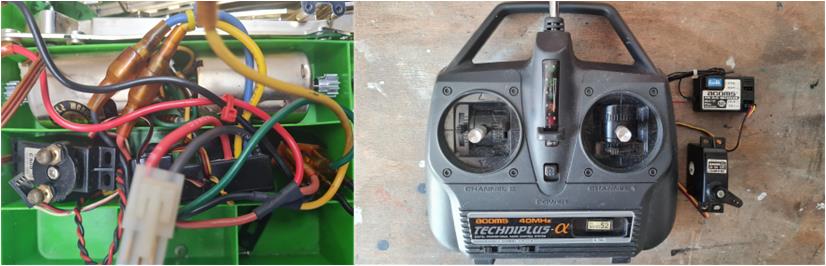
The electronics include a speed controller and to complete the setup an Acoms Techniplus series transmitter has been selected. The wiring is tidy and allows choosing between dual‑motor drive or single‑axle drive.
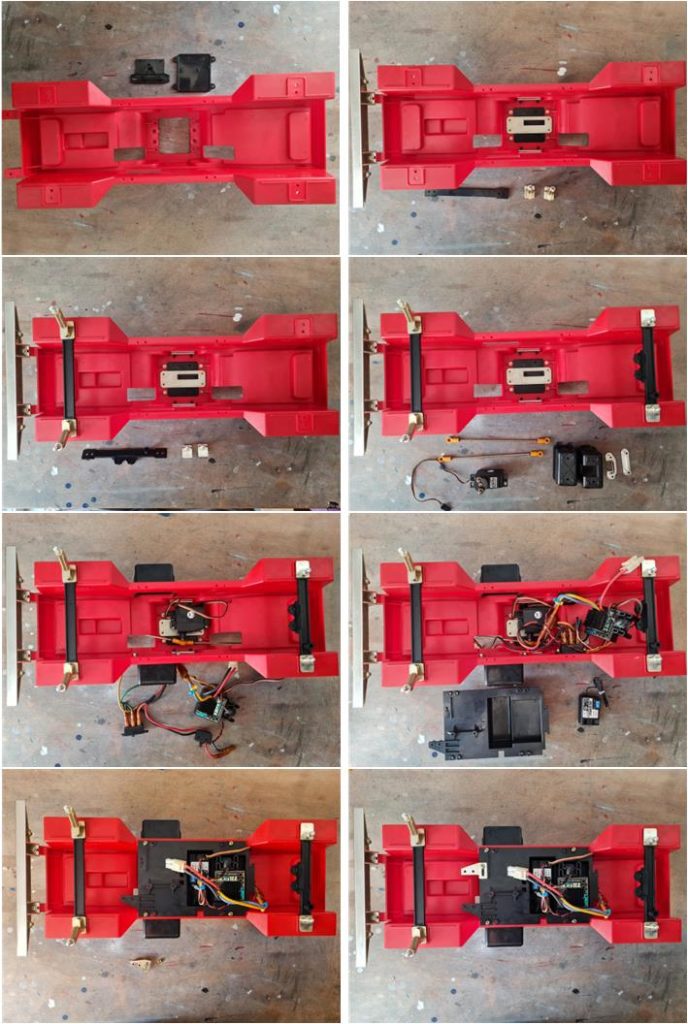
Now all parts have been serviced and restored: the model can be reassembled. The Clod chassis is built entirely around the central tub, which for the Bull Head is red. Assemble the chassis starting from the red plastic tub, which houses the electronics, steering system, shock absorber mounts and suspension arms. When wiring the electronics, pay particular attention to the switch that allows selecting dual‑axle drive or single‑axle drive. The steering links must reach both the front and rear axles to allow all four wheels to steer in unison.
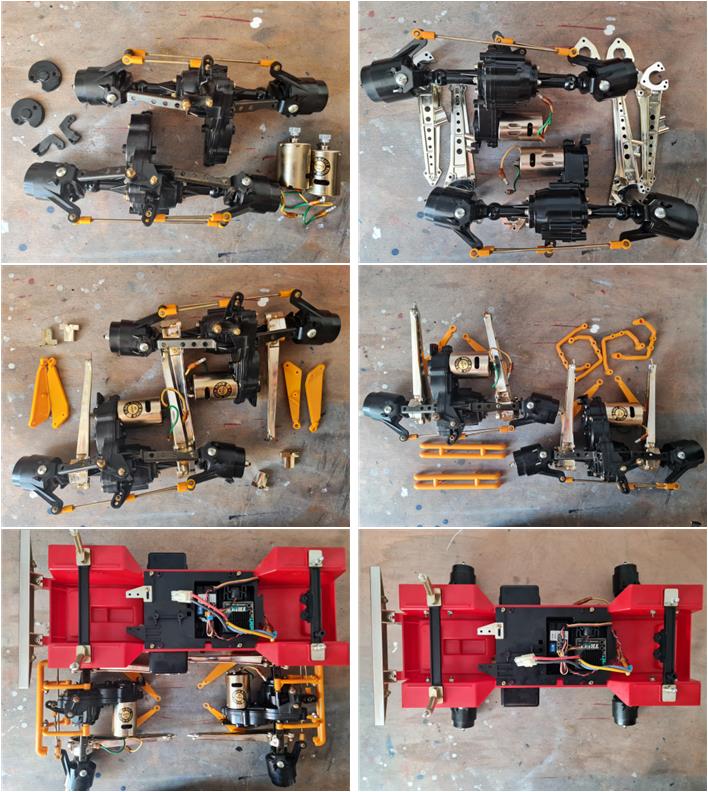
Assemble the two axles and then install them onto the chassis; the suspension arms are chrome‑plated and feature yellow plastic components. The chrome parts are made of rigid plastic, while the yellow parts are made of soft plastic. Once the two axles are mounted to the chassis, the model is complete and ready for the body shell to be fitted.
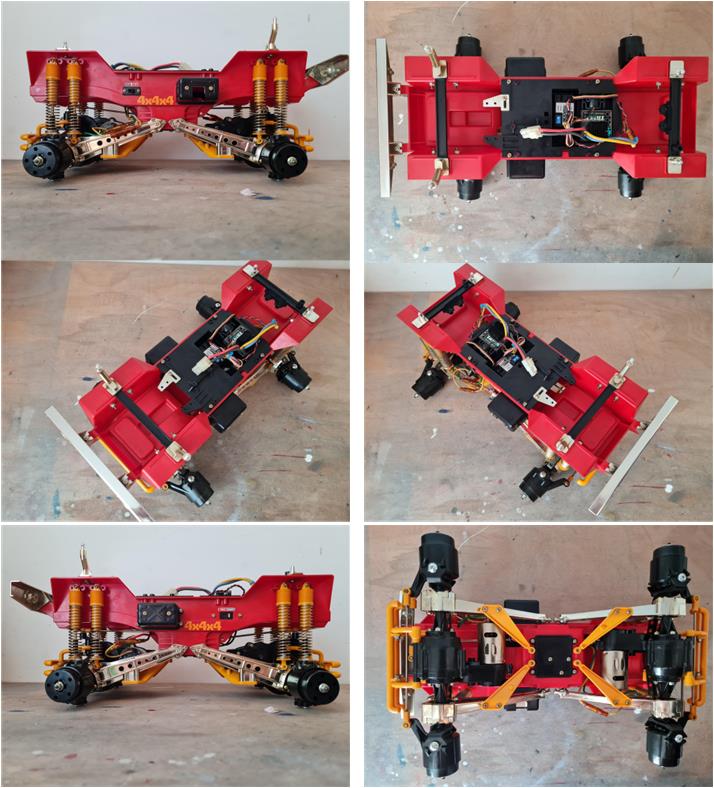
Images showing the completed chassis without the four wheels.
Body restoration Remove all accessory parts from the body shell: the chrome‑plated parts and the cabin windows. The chrome parts are in perfect condition; do not remove the decals, because doing so would certainly cause the adhesive to tear off the chrome plating, permanently damaging the part. The cabin window piece is also in perfect condition. Rinsing the chrome parts and the window with lukewarm water is sufficient to restore them to a like‑new condition.
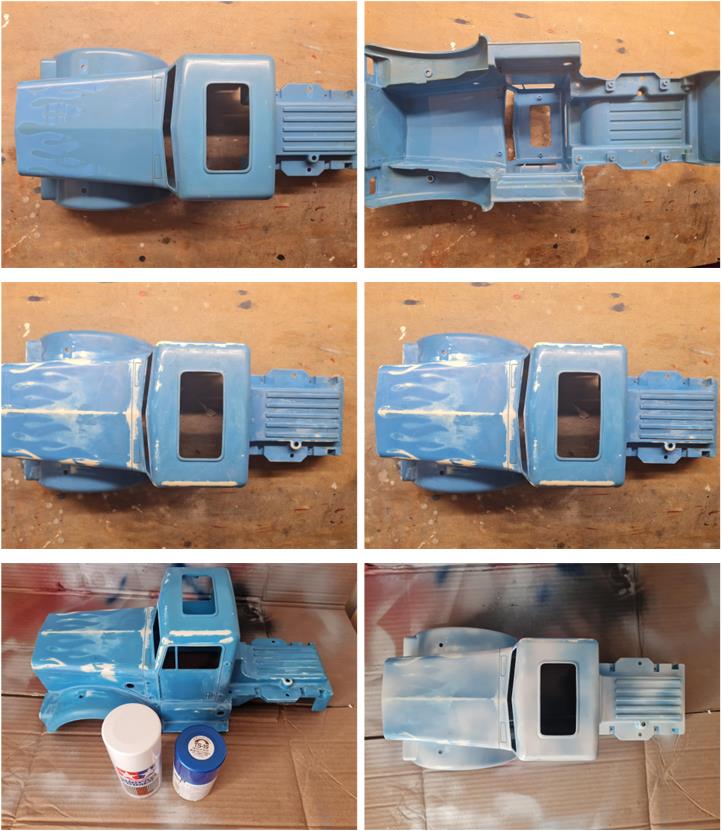
Remove the decals and then treat the surface with a kitchen paper towel soaked in pink alcohol (the scented household type). The alcohol chemically attacks and dissolves the adhesive residue from the decals and the paper towel removes it, leaving the surface perfectly smooth. Wipe the entire surface several times to remove the weakest layer of paint.
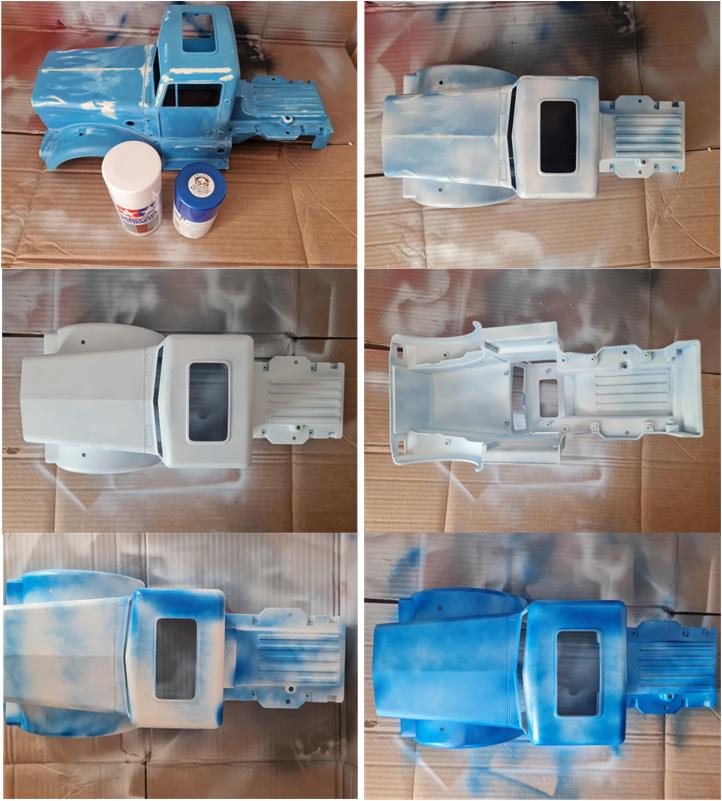
At this point it is possible to apply the fine white primer, code number 87044, to prepare the surface for the TS19 “Metallic Blue” color. Apply several coats of primer to both the inner and outer surfaces. It is not necessary to completely cover the previous paint layer, which can itself act as a primer (images in the second row). Apply many very light coats of TS19 on both the inner and outer surfaces. With this paint and metallic effect, it is always better to apply one coat too many than one too few, as the formation of drops or spots caused by excess paint must absolutely be avoided.
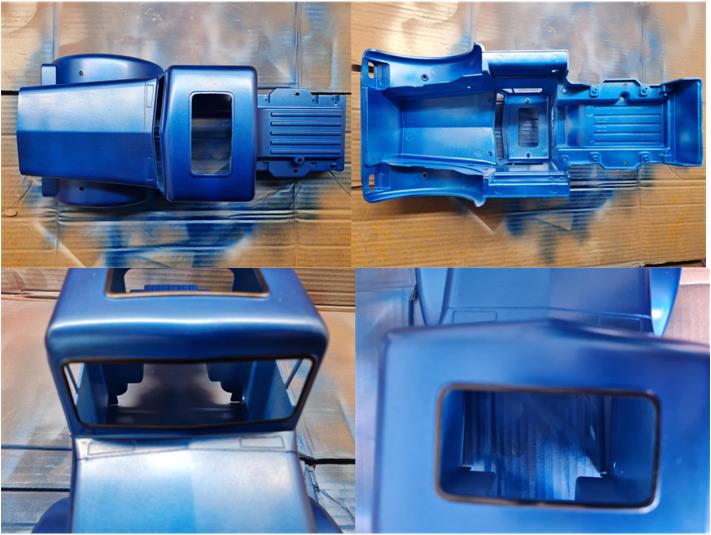
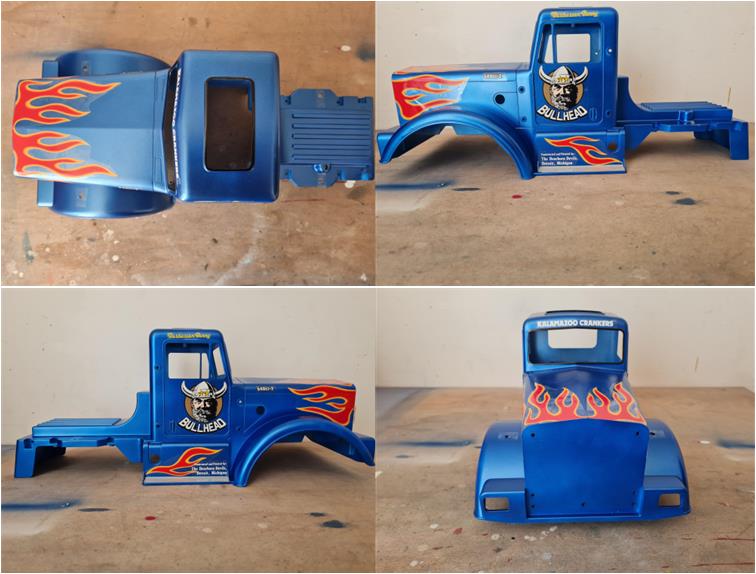
The body shell has now been completely painted; a single 100 ml spray can is enough to cover the entire surface. The color must appear uniform and fully cover both the inner and outer surfaces (images in the first row). To complete the body shell, it is necessary to paint the windshield seal in matte black X18 (image on the left of the second row) and the sunroof seal (image on the right of the second row).
Before completing the body shell with the chrome accessories, apply the decals.
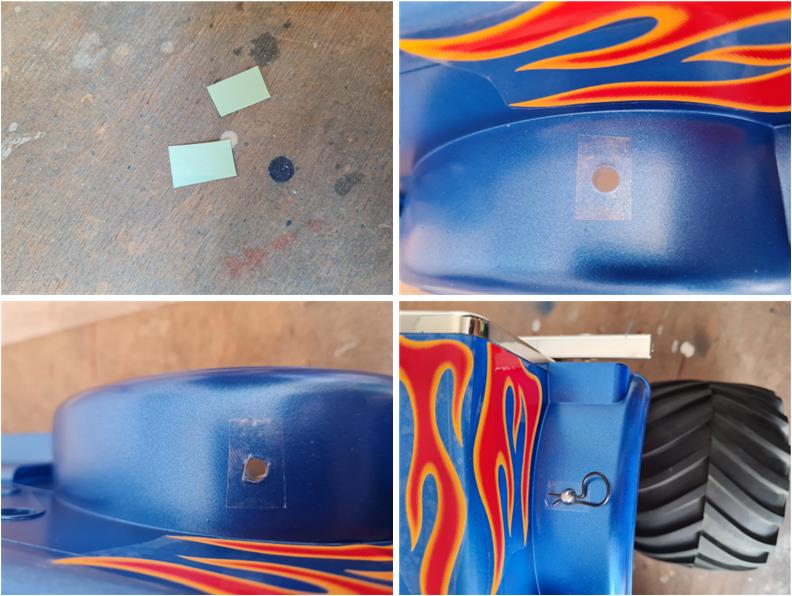
From the decal sheet, some areas without any printed image are always left unused. Procedure to prevent the clips from scratching the paint:
– cut four rectangles of the correct size (about 1 cm × 2 cm) from the unused parts of the decal sheet (image on the left of the first row), – apply each rectangle over the four holes for the body‑mount posts (image on the right of the first row), – pierce the decal to allow the tower head to pass through (image on the left of the second row), – the adhesive rectangle must have the correct size to prevent the clip from scratching the paint (image on the right of the second row).
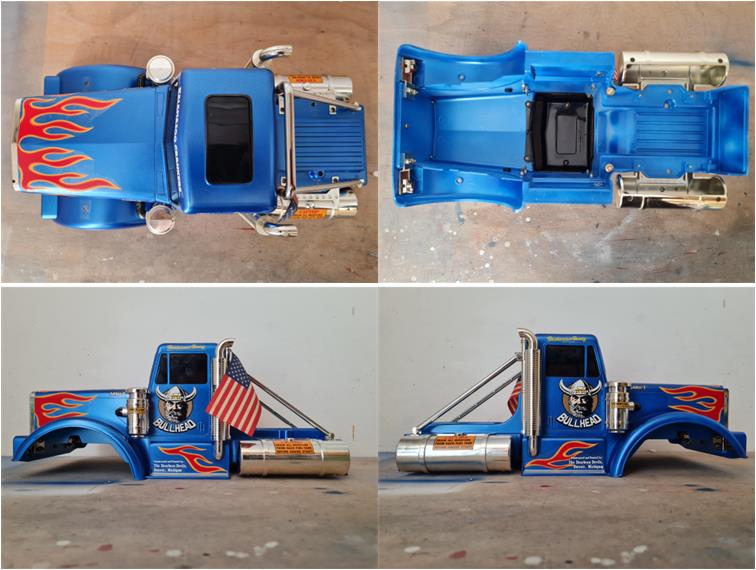
Images showing the painted body shell complete with decals.
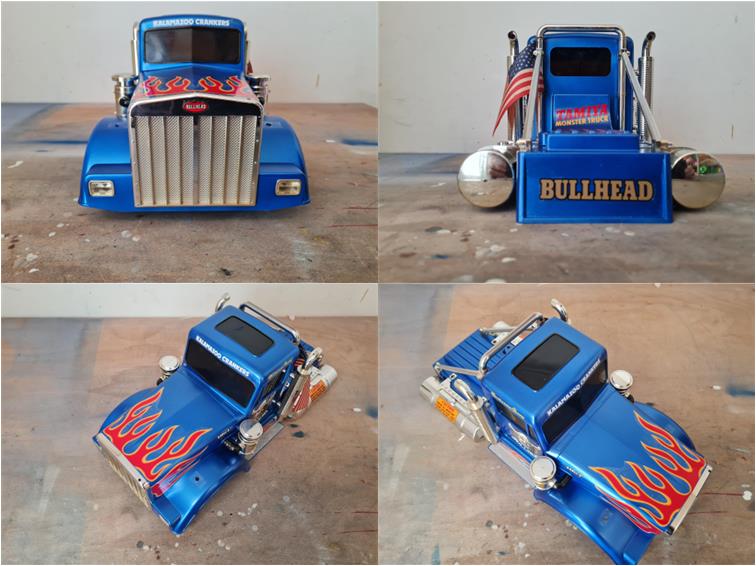
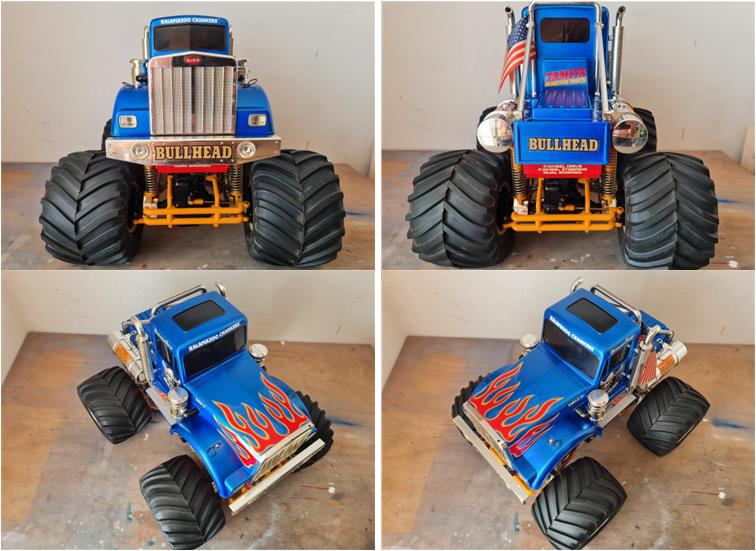
Restored model Images showing the completed model.
Tamiya, original figure, box art, guide book and catalogue are of TAMIYA INC, which does not endose or sponsor www.tamiyaclassic.com. Any brands, logos and trademarks represented on this website are the copyright of their respective owners.