Tamiya Volkswagen Beetle, item number 58173, released in 1996 and available on the market until 1999. Lexan body complemented by various styrene accessories, most parts are chrome-plated. M-02L chassis, long wheelbase of 239 mm. Tamiya reuses the Beetle body that has already been featured on several models; its rounded shape makes it fun and has consistently boosted sales. At least until now, as this is probably the rarest model on the M-02 chassis. Tamiya does not release sales figures, so this is only an estimate based on the second-hand market, where this model appears only occasionally. This time the body is made of Lexan and not styrene, as in previous chassis versions. The real car and the scaled-down version both share rear-wheel drive.
Analysis of the model to be restored
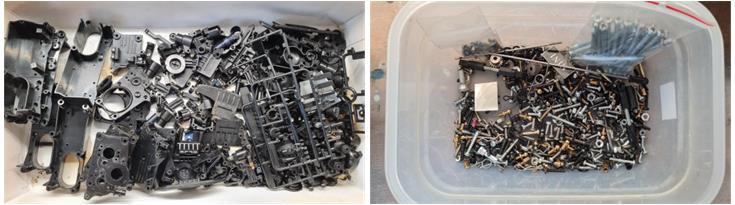
The purchased lot is not a chassis; it consists of many parts that are presumably meant to allow the assembly of a complete chassis. With these purchases, there is never a guarantee of being able to complete a chassis; always check that the main parts are included and that there are extras. This is a clue that the lot was assembled by dismantling more than one chassis and there is a chance of having the pieces to complete one.
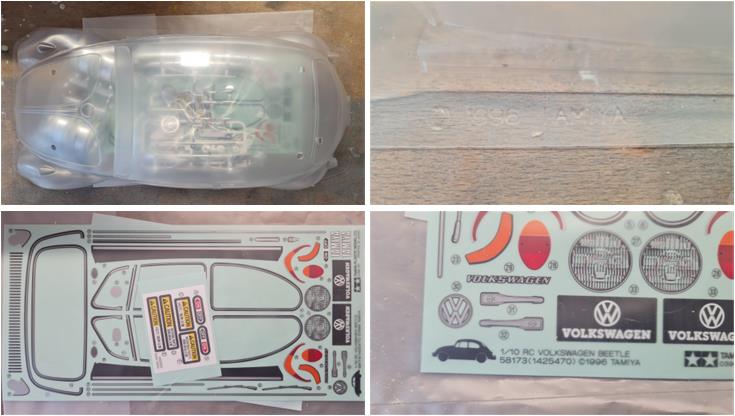
This lot also includes the Beetle body and the sticker sheet. The body comes complete with accessories (image on the left of the first row). The sticker sheet is complete and shows the correct code 58173. The lot also includes the wheels and chrome rims, all four plus four pieces are new and have never been installed. In fact, this body has also been released on the market with the M-06 chassis, item number 58572, up to the present day (2025). It’s impossible to determine whether this body was sold with an M-02 or an M-06 chassis because they are identical. The two chassis also share the sticker sheet, the rims and the chrome styrene accessories.
Chassis restoration
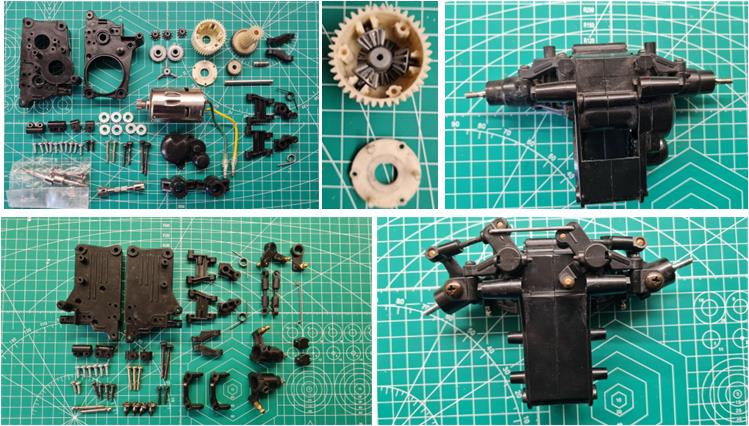
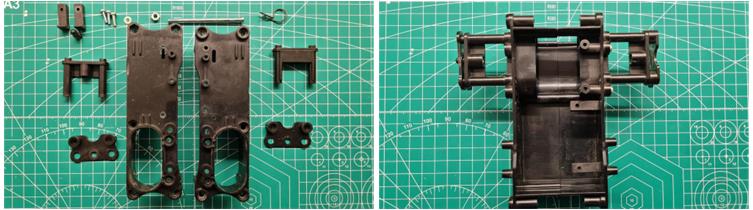
The plastic parts and small components in the lot show signs of heavy use, but they are clean. To assemble the chassis in question, it’s enough to piece together the puzzle by selecting the parts that have suffered the least wear on the track (the differential looks as if it just came out of the factory, image in the center of the first row). It’s also necessary to identify and discard parts that were modified by the previous owner. To assemble the front and rear gearbox housings, all the required pieces are present and have been laid out on the table (images on the left) for a final analysis before assembly (images on the right).
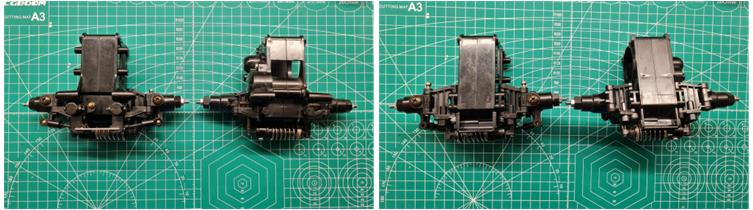
Although the parts are worn, the lot includes a large number of redundant components, making it possible to select the ones with less wear. In the images below, the two assembled housings are shown from the top and bottom views.
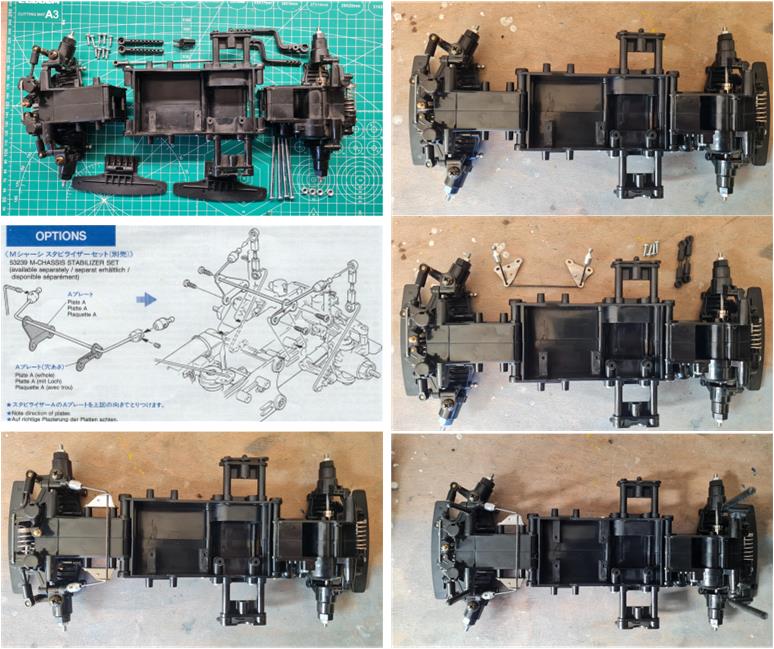
It is now possible to assemble the central section made up of two half-shells. The central part houses the electronics and the battery.
The three main sections are ready, so it’s time to assemble the two bumpers (which are identical), the four body posts, the antenna mount and the four 4 mm nuts and bolts that hold the three sections together. It was decided to follow the instructions recommending the front stabilizer bar as the only performance-enhancing accessory (image on the left of the second row). The front bar improves road grip at the front end, enhancing steering precision. This is the only modification compared to the factory-standard setup, but it still maintains the authenticity of the chassis.
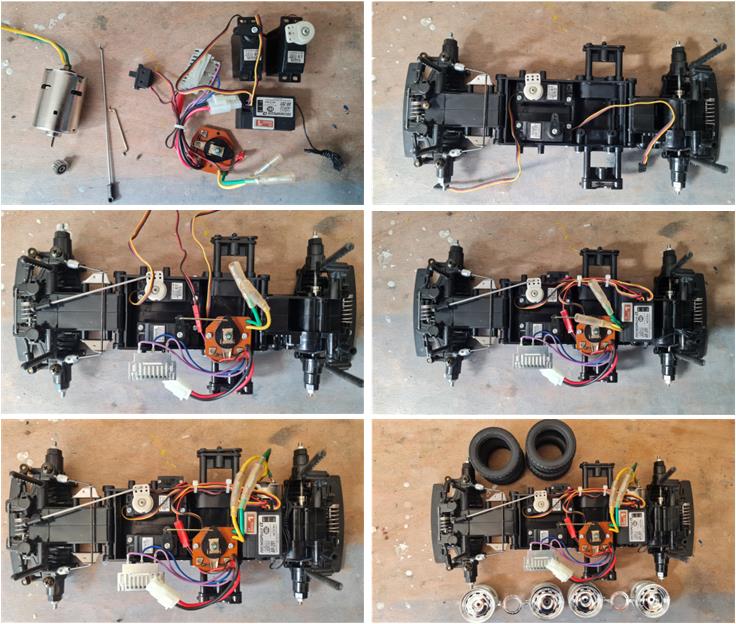
It’s time to install the electronics and the mechanical speed controller included in the lot was chosen for use. Installing the two servos is relatively simple because the two columns on the right and the two on the left are adjustable and can accommodate servos of different sizes. The mechanical speed controller is supported by Tamiya, so all the mounts needed to install the selector and resistor on the central cell are present. Once the electronics and linkages that transmit movement are installed, the four wheels complete with rims can now be mounted.
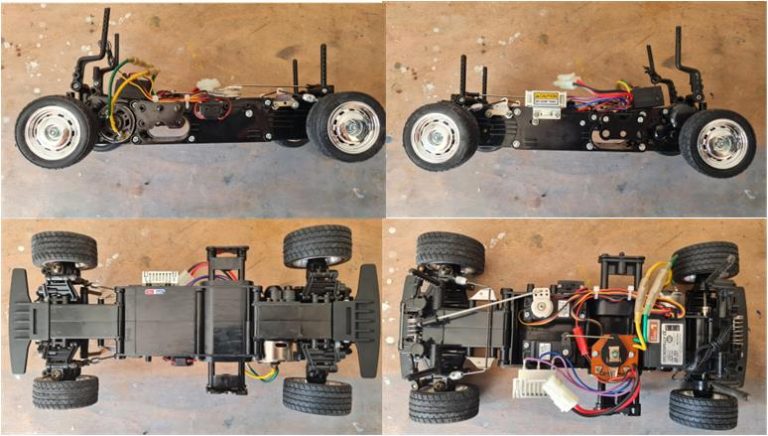
Photos of the chassis taken from the right side, left side, bottom and top. As shown in the images, the condition of the selected parts is good. They’re not factory-fresh, but they’re far from being in poor shape. They will pair well with the body, which is completely new and has never been painted.
Body restoration
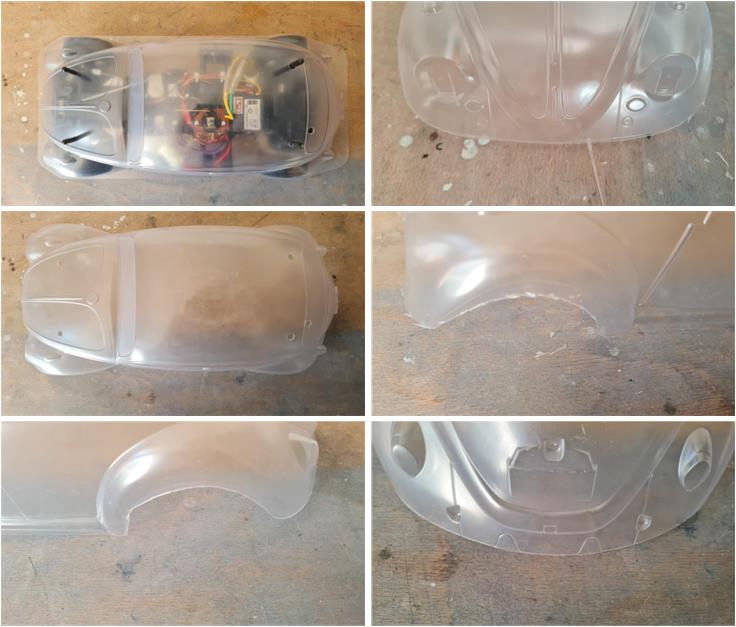
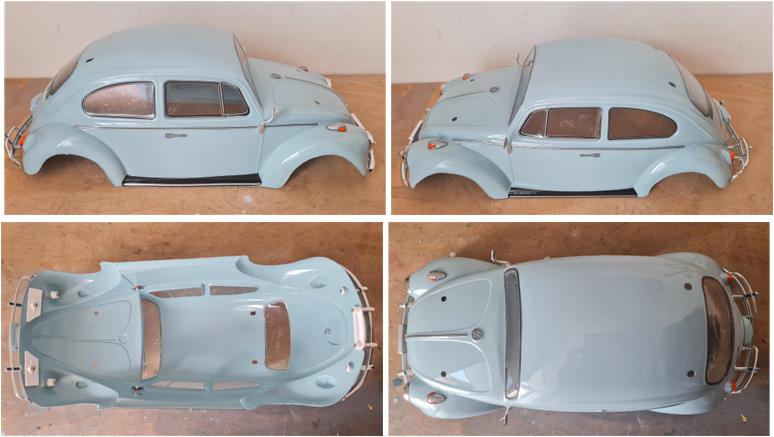
The body is completely new and includes decals and chrome styrene parts. To produce a body from a Lexan sheet, the manufacturing process involves lubricants, which react poorly with paint. The first step in preparing a Lexan body for painting is washing the inside with degreasing dish soap. The body must then be dried carefully to prevent water droplets from leaving limescale marks as they evaporate. Before trimming the excess parts, the body can be temporarily placed on the chassis (image on the left in the first row) since Tamiya has pre-drilled the holes for the body posts. Use short-blade scissors to cut the wheel arches, keeping away from the line that marks the shape of the arch. Use long-blade scissors to cut the straight lines, following the contour of the body as closely as possible.
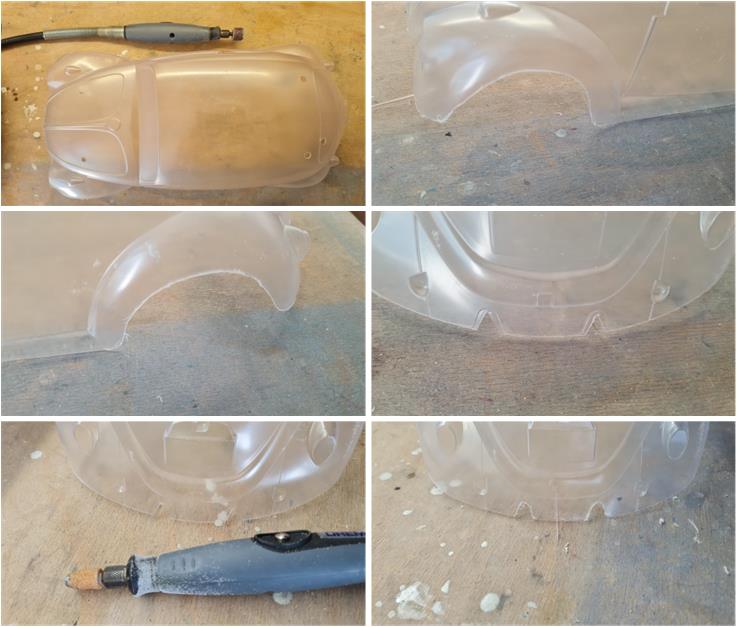
Curved parts, such as the wheel arches, need to be refined. The edges can be worked with a curved file or a hobby drill. There are cylindrical abrasive bits of various sizes that can be used to shape arches with a wide radius (first row) or arches with a small radius (last row).
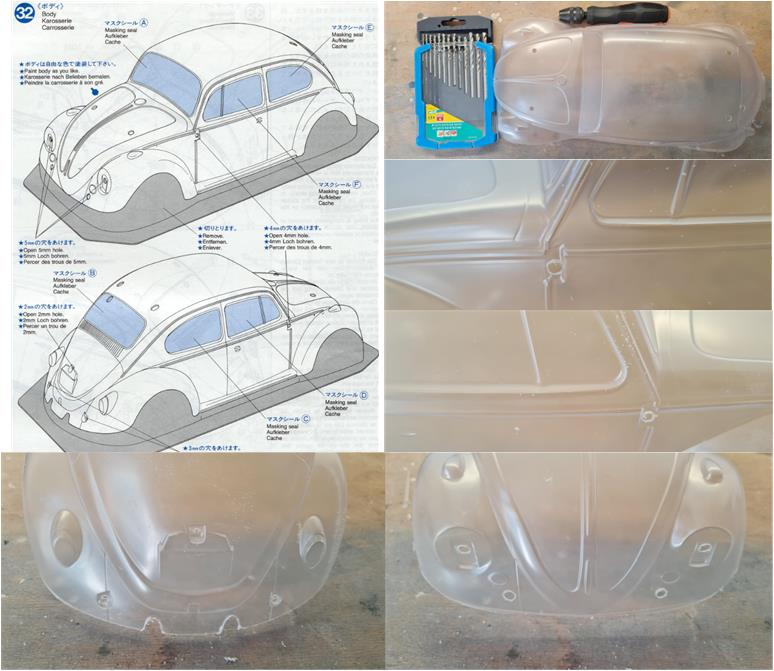
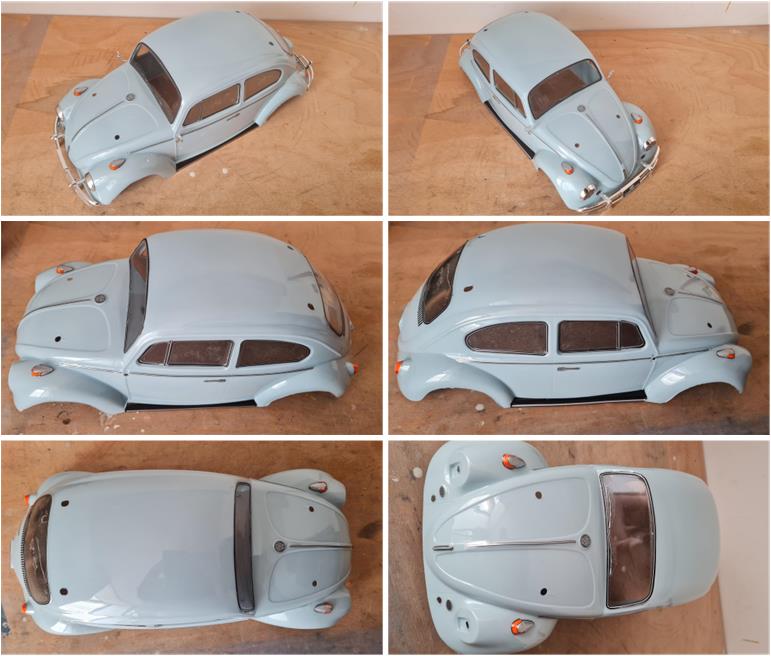
Tamiya provides several holes for installing the front bumper, rear bumper, driver’s mirror, passenger mirror, license plate light holder and front lights. Each part requires a specific diameter, so the body must be drilled before painting. Use a hand drill to avoid applying too much torque and preferably use self-centering wood bits. When drilling, always place a piece of wood behind the Lexan body to give the bit a surface to grip. This way, as pressure is applied to make the hole, the body deforms slightly against the wood. The wood acts as a base, allowing the bit to drill the Lexan more precisely.
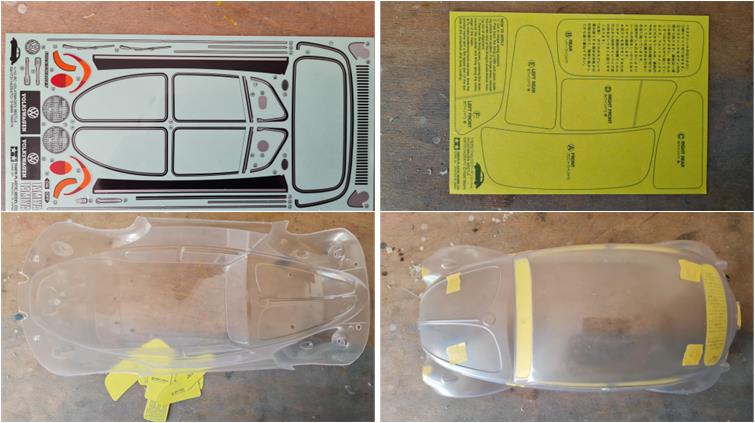
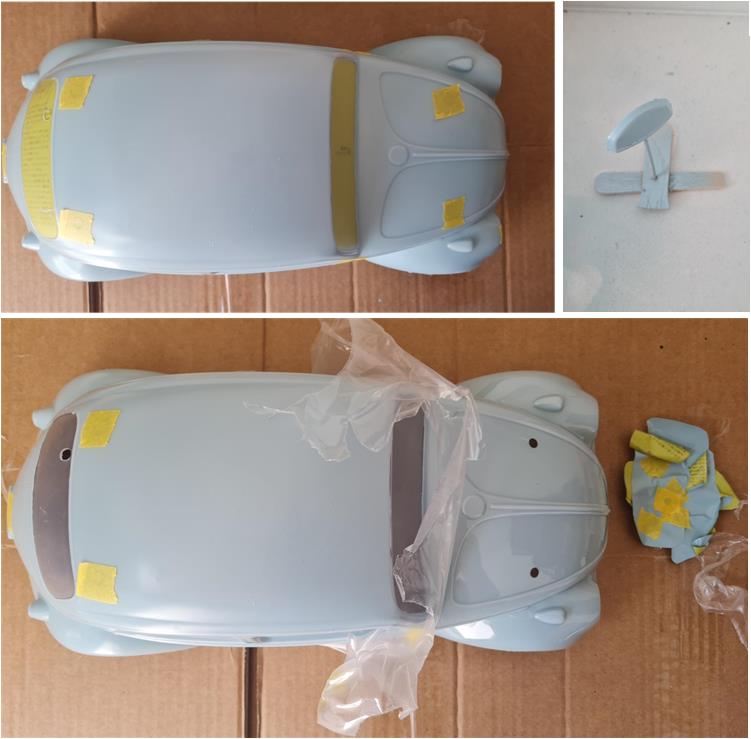
Seal the freshly drilled holes with masking tape to prevent paint from leaking during application. The decal set includes window masks. Cut out the masks for the side windows, windshield and rear wiper window.
The license plate light holder is made of white styrene; apply a primer coat to prepare the surface for painting.
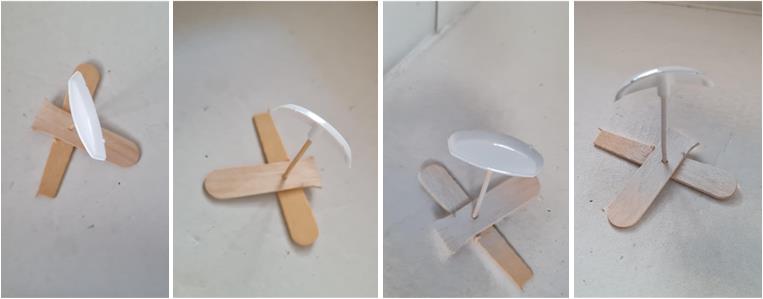
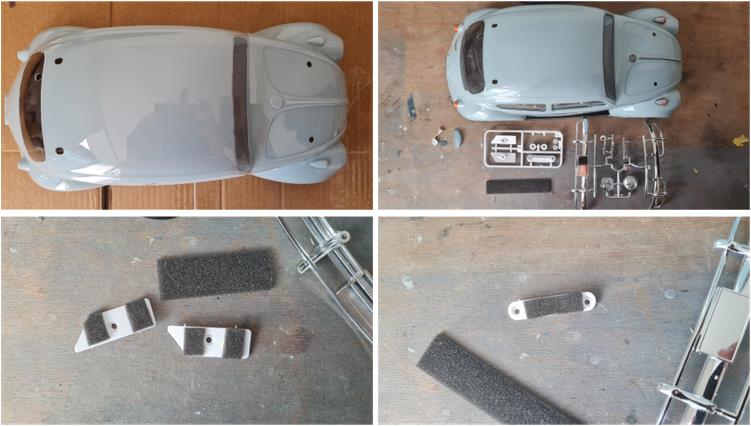
It’s time to apply the paint (follow this guide explaining how to paint Lexan parts). The color to be used is PS32 racing gray. There’s no need to plan multiple coats in advance: it is only one colour. After applying the paint, wait between two and four hours before removing the window masks and the tape covering the holes.
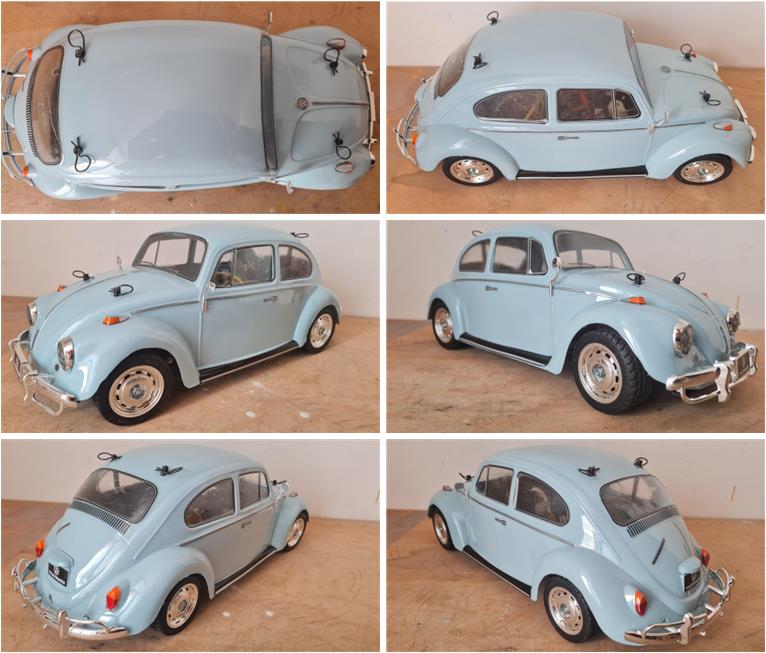
Apply the decals to the Lexan body, then add the accessory parts such as the rear bumper, front bumper, driver’s side mirror, passenger side mirror, license plate light holder and the two front headlights. For the internal support of the two bumpers, Tamiya recommends using double-sided tape. For the front section, replace the tape with an adhesive foam sheet, which achieves the same result of securing the support to the body without damaging the paint (image in the last row).
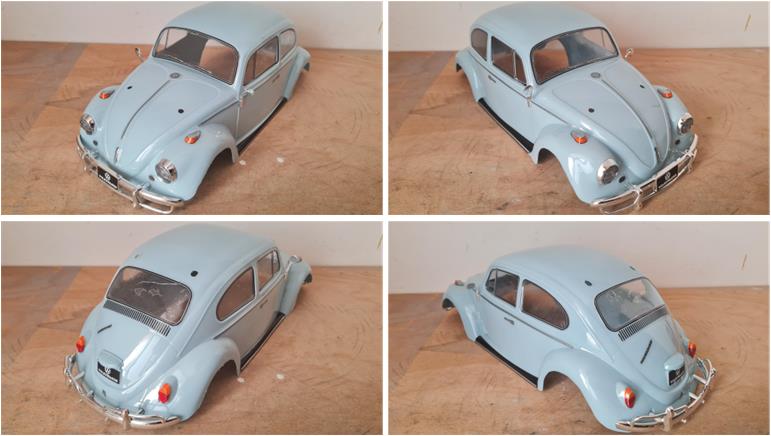
Images of the body ready to be mounted on the chassis.
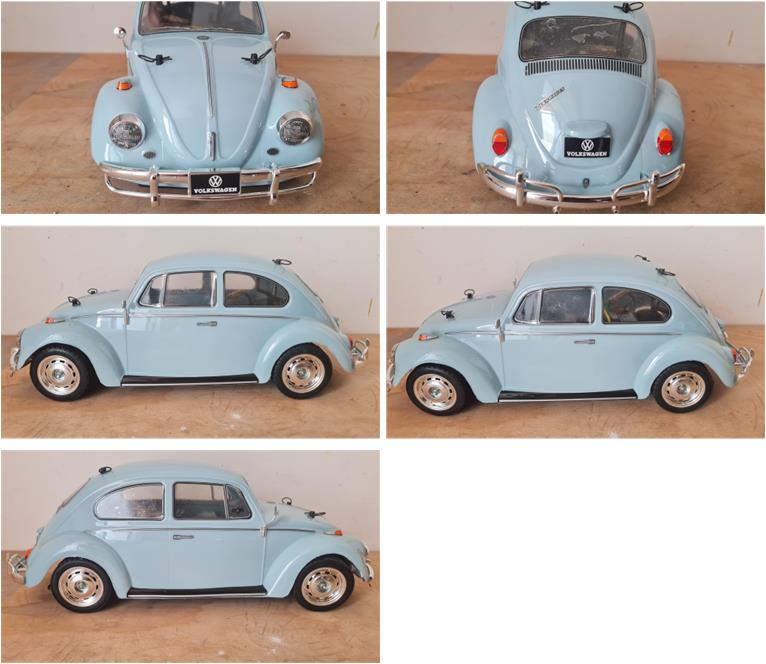
Restored model with body
Images showing the completed model with the body.
Tamiya, original figure, box art, guide book and catalogue are of TAMIYA INC, which does not endose or sponsor www.tamiyaclassic.com. Any brands, logos and trademarks represented on this website are the copyright of their respective owners.