
Paint Lexan bodies and parts


The technique for applying colors to body or transparent parts is completely different from that used for applying color to non-transparent body or parts. Transparent body is made of Lexan (polycarbonate). Transparent body is lighter than those made of Styrene or ABS, but they are less detailed. For this reason, they are normally used on and off the track; they must be light, elastic and strong to withstand intense use and the worst impacts. The paint on a Lexan body undergoes the same stresses, so it must be strong but at the same time flexible.
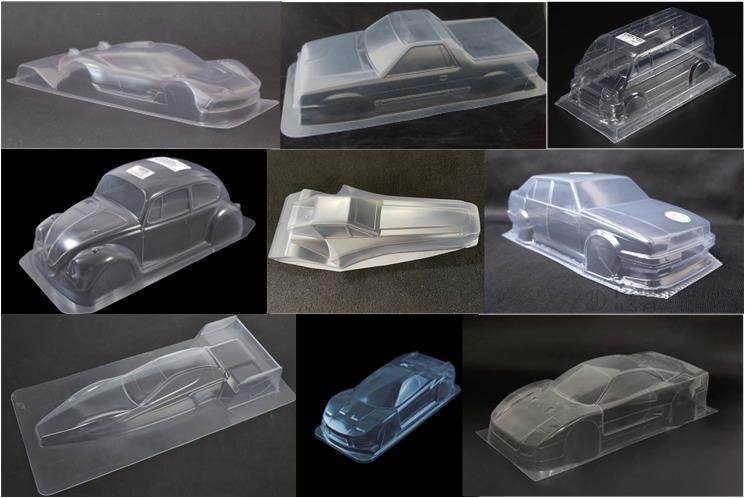
Lexan is industrially produced in transparent sheets, which are heated and then thermoformed with a press. This type of processing leaves chemical residues that must be removed and makes it difficult to obtain overly complex shapes. For this reason, some Lexan body are made up of multiple parts that must then be joined together. Bumpers, lights, wings… can be obtained from a specific sheet or from the same sheet where the body has been formed. The method of constructing Lexan bodies means that the body must be cut to remove all excess material and externally protected by a transparent plastic film. This transparent plastic film should only be removed at the end of the painting process.
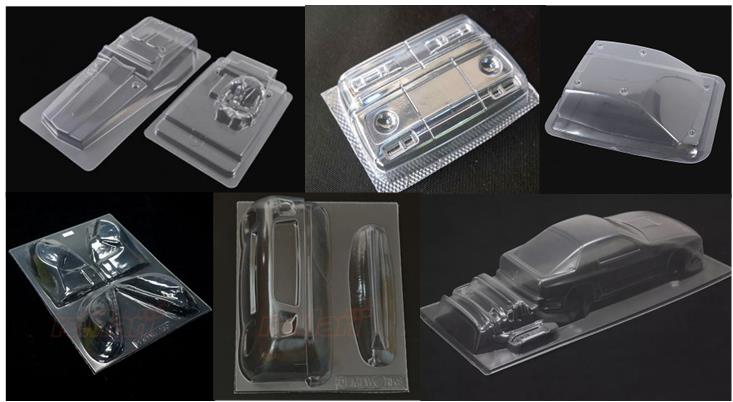
The best way to achieve a poor final result is to go to a large shopping center or visit a website, buy the first spray can of the chosen color and apply it to the body. Painting is just the most visible step to carry out: various products need to be applied and several operations must be performed before painting. Using next-generation spray cans to apply color allows for results comparable to application via a spray gun and compressor.
Work environment and spray can preparation
Before delving into the technique for applying colors to non-transparent body, let’s introduce some notes on the environment where these operations should be carried out, as well as how to store and use spray cans. This introduction is generally relevant to any painting work.
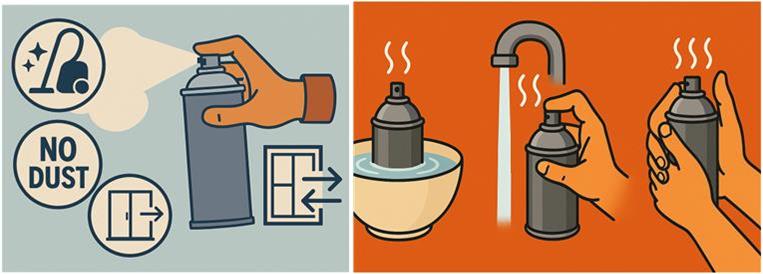
The workspace must be ventilated, well-lit, clean and dust-free to prevent any debris from compromising the job by sticking to the freshly painted surface. Before painting, it is advisable to wash the floor with water so that dust particles bind together and do not float in the air.
Spray cans always indicate the optimal ambient temperature for applying paint, which is usually best between 18…22°C. The cans should be kept cool, but shortly before starting the paint application, they should be placed in a location where they can increase in temperature by at least 2…3°C.
There are several methods to warm up spray cans, but it is essential to avoid overheating them, as excessive pressure could cause them to explode. The cans can be warmed by immersing them in a basin of lukewarm water, placing them under a stream of warm water from the faucet, or simply warming them with hands. By doing so, the paint inside also increases in temperature and, consequently, in pressure. Higher pressure improves paint dispersion, which exits the nozzle as a fine mist.
Spray cans generally indicate that they should be shaken before use; warming them serves the same function but is even more effective.
Type of paint to apply
There are several manufacturers of spray paints on the market and it is generally better to choose those specializing in modeling because their paints contain specific chemical additives and have a larger nozzle.
The chemical additives are designed to help the paint withstand the impacts that a Lexan radio-controlled car body may experience. They make the paint elastic and prevent it from detaching from the body after a collision. One of Lexan’s characteristics is its ability to deform significantly while retaining memory of its original shape: after an impact, a Lexan body regains its original shape even if it has undergone severe deformation. Under these conditions, there is a possibility that the paint may detach from the body or develop cracks.
A larger nozzle makes it easier to apply paint on complex surfaces such as those of a radio-controlled model body. Its function is to widen the cone of paint generated, thus increasing the breadth of the paint cloud itself.
The first step in applying color to body is the most evident but also the most decisive for the final result: choosing the right product. The choice of paint depends on the function of the body:
– If it is a display body, acrylic-based paints offer greater brightness.
– If it is a non-display body, polyurethane-based paints are more impact-resistant.
For Lexan body, the best choice is polyurethane-based paints (for example, Tamiya’s PS-xx series, specifically designed for polycarbonate surfaces, but not well suited for rigid plastic surfaces like Styrene or ABS). When applied to ABS or Styrene, polyurethane paints dry forming a thicker layer that feels rubbery and rough to the touch.
Removing paint residues and preparing surfaces for painting
If dealing with new parts and body, it is not necessary to remove previously applied paint layers. However, if it is a restoration, the previous paint layer must be removed. This technique is also useful in the unfortunate event of a mistake during the first painting process. In such cases, it is necessary to remove all the newly applied paint and start over.
The fastest and most environmentally friendly method to remove paint layers is to immerse the body in 90…99% denatured ethyl alcohol, free from added dyes and fragrances. Alcohol can be reused for multiple cycles.
The paint is chemically attacked by the alcohol and after several hours of immersion, it can be removed with simple mechanical action using a wooden spatula or kitchen paper towels. Friction detaches the paint from the body. Repeat the operation, alternating the immersion phase with the mechanical action phase, until the paint is completely removed.
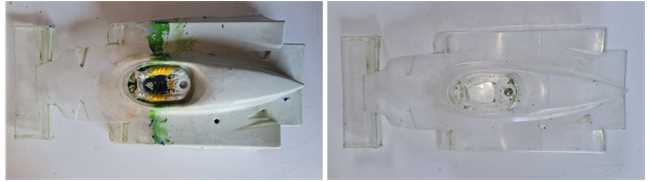
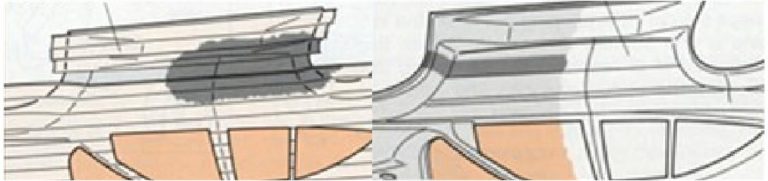
When the part to be treated is too large and cannot be completely immersed in alcohol, this operation can be carried out in successive phases by partially immersing the object to be stripped. For example, a body can first be treated for the front section and later for the rear section. In the image on the left, the front part was treated first, showing two layers of paint—one green and one white. In a subsequent step, the rear part was immersed in alcohol and the body became completely transparent, as seen in the image on the right.
To remove paint from corners, use a wooden toothpick. The process of removing paint is quite lengthy since multiple passes are required and the operation must be repeated until the final result is satisfactory. The body must be completely transparent; otherwise, residual traces will show through the new paint. The part to be painted does not need to be fixed to a support for handling during the painting phases, as it is sufficient to hold it from the outside.
Surface preparation before painting
In a transparent body, color is applied from the inside and then seen from the outside. This creates a highly glossy and bright external finish, so the outer protective film should never be removed until all other steps are complete.
Before washing off any chemical residues, the body must be cut to remove all unnecessary parts, such as the interior of the wheel arches or body edges. To cut Lexan, use scissors with straight or curved blades depending on the line to follow. Curved-blade scissors are commercially available for cutting bandages or electrical cables. Lexan can also be cut with a scalpel by scoring the cut line and then separating the excess material.
Different cutting techniques can be used, but the most important factor is achieving a clean cut without jagged edges. Avoid making sharp corners and always sand cut lines with fine sandpaper to remove any serration. When running a finger along the cut line, it should feel smooth and not resemble the teeth of a metal saw. Any sharp corners or jagged edges can lead to cracks or fractures upon impact. Smooth surfaces put less stress on the body, making it less prone to breaking.
Drill holes for body mounts, antennas, etc., using a metal drill bit.
Before proceeding further, fit the transparent body onto the chassis to check how well they align. Since the treated surface is internal, abrasive sponges should be used to scuff the inside of the body to improve paint adhesion. To avoid excessive scratches, thoroughly wet both the body and the sponge.
Lexan body is thermoformed and lubricants are used to ensure the mold releases from the plastic sheet. These lubricants must be removed from the inner surface by washing it with hot water and degreasing dish soap. Check that all grease, oil stains, fingerprints and other residues are fully removed—since the material is transparent, washing effectiveness can be easily verified against light. Wait until the body is completely dry and free of water droplets, then wipe it down with a dry, lint-free soft cloth.
Masking and painting design
Applying paint correctly requires good technique, dependent on hand movement—it is not enough to simply press the nozzle and spray paint onto the surface.
Before applying the first color, plan the sequence of colors and determine how to mask different areas.
When applying multiple colors, the correct sequence is from the darkest to the lightest. This prevents the darker color from affecting and dulling the lighter shades mistakenly applied afterward. Some parts cannot be painted with a spray can because they are too small or thin. Depending on the size of the part, polyurethane-based paints can be applied with a brush (Tamiya’s PCxx series, which is no longer in production as of 2025 but can still be found on the market). A pointed brush is useful for painting along lines, while a flat brush is better for surfaces.
For designing a multi-colored body and its decorations, use the outer protective film of the body. A black marker can be used to draw the intended paint lines, allowing for a preview of the design. Once the painting is finished, the film can be removed, erasing all guideline markings.
After completing this stage, apply masking tape to parts that should not be painted (such as windows and windshields that remain transparent) or that need a different color. Ensure that there are no bubbles or imperfections along the edges of the masking, preventing paint from seeping underneath. If bubbles are present, press along the edges with fingers to eliminate gaps. Masking can be done using automotive masking tape or liquid masking solutions.
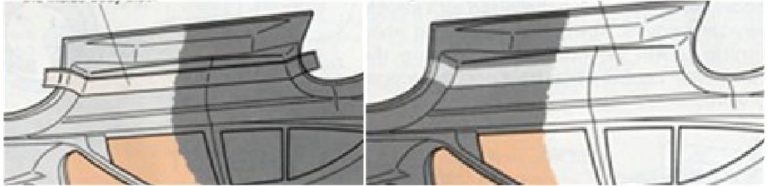
The steps below illustrate how to achieve a darker lateral stripe (e.g., red) on a lighter body color (e.g., white):
– Cover the entire body with masking tape, leaving only the stripe area exposed for painting in red.
– Apply the first light coat of the red colour,
– Wait for the colour to dry, sealing the masking and acting as a base for the following coats of red,
– Remove the masking. Polyurethane-based paints form a relatively thick and compact layer, which is elastic but tougher than acrylic paints. Do not wait for the paint to dry completely before removing the masking—if it dries too much, cracks may form. It is better to remove the masking while the paint is still slightly tacky.
– Once the first color is completely dry (refer to the spray can instructions for drying times before applying a second layer), apply the second, lighter color over the entire body, including the stripe area that was previously painted red. When layering the second color over the first, never overapply the first coat. The general rule is that the solvent in the paint will soften the previous layer. If the second color is applied too heavily in one pass, the solvent can dissolve the first layer, ruining the finish. It is better to apply multiple light coats, gradually building up the coverage in the final layers.
The sequence below shows how to achieve a light-colored lateral stripe (e.g., yellow) on a dark-colored body (e.g., blue):
– Place the masking tape over the stripe that should remain yellow.
– Apply the first light coat of the blue colour,
– Wait for the colour to dry, sealing the masking and acting as a base for the following coats of blue,
– Remove the masking; polyurethane-based paints form a relatively thick and compact layer that is elastic but tougher. Do not wait for the paint to dry completely before removing the masking, as cracks might form. It is best to remove the masking while the paint is still slightly tacky.
– Once the first color is perfectly dry (refer to the spray can instructions to check the recommended drying time before applying the next coat), apply the second, lighter color over the entire body to ensure that the yellow stripe highlights the blue evenly across the surface. When applying the second color over the first, do not overdo the initial coat.
The general rule is that the solvent in the paint will soften the previous layers. If the first coat of the second color is applied too heavily, its solvent may dissolve the base coat, ruining the final appearance. It is better to apply multiple light coats, gradually increasing coverage with subsequent layers.
If paint smudges occur during application, small corrections can be made.
A cotton swab (preferably pointed rather than rounded) soaked in alcohol can be used to remove unwanted streaks caused by poorly placed masking. Rub the soaked tip several times over the smudge; the mechanical action combined with the alcohol will help remove the excess paint.
Once the smudge is removed, immediately wash the interior with water to remove any remaining dissolved paint and wait for the water to evaporate. If the dissolved paint is not completely removed, it will become visible once another coat of paint is applied, forming a faint halo in the original color of the smudge.
After applying all layers of color, it is highly recommended to add a coat of white paint. White stabilizes the applied colors, creating a uniform finish while acting as a base layer. Additionally, it strengthens the paint, making it more resistant to impacts.
Painting process
To achieve an even distribution of paint and prevent it from dripping or forming unwanted spots:
– Hold the spray nozzle 20–30 centimeters away from the surface to prevent excessive paint accumulation in certain areas.
– Press the nozzle intermittently to release a continuous flow of fine color mist; holding it down continuously results in overly concentrated paint distribution. Never attempt to cover the entire surface in a single layer.
– Move your hand smoothly from right to left and back again across the surface to ensure that the spray can disperses paint evenly over the piece. Avoid focusing too long on any single section.
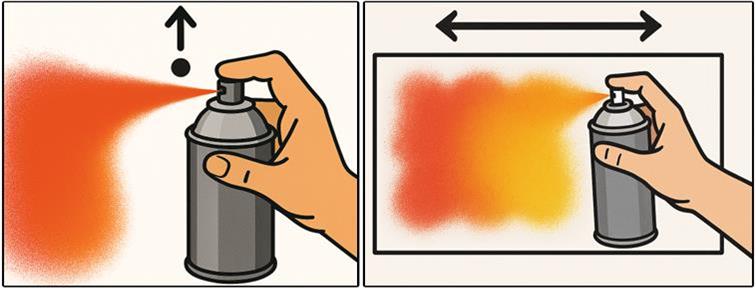
– Patience is the greatest virtue of a good painter; paint layers should be light and multiple. The time between coats depends on the selected product, but packaging always indicates the drying time to the touch, which corresponds to the interval between applications. If light coats are applied, the next layer can be applied after just a few dozen minutes.
– The first coat must be the lightest. The color should appear only faintly because this first layer acts as a base for subsequent coats, making the surface more receptive to greater amounts of paint.
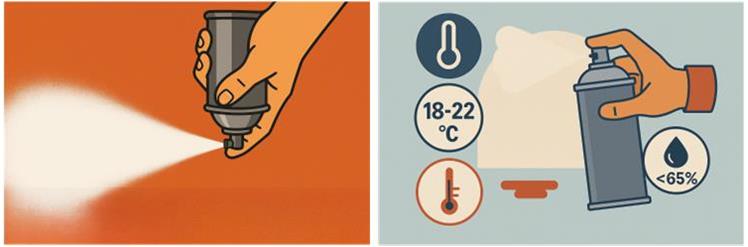
– Avoid painting on days with high humidity (never above 65%) or when the temperature is too low (the best range is 18–22°C and never below 10–11°C). Cold and rainy days should be avoided. Moisture in the air tends to mix with the paint, deteriorating the surface quality; under these conditions, the paint may appear uneven or blotchy.
– Every time an operation is completed, the spray nozzle must be cleaned to ensure smooth application in subsequent coats. Turn the can upside down, press the nozzle and spray until the paint stops coming out.
Once these steps are completed, the outer protective film can be removed, allowing for the application of decals.