
Paint hard plastic body and parts


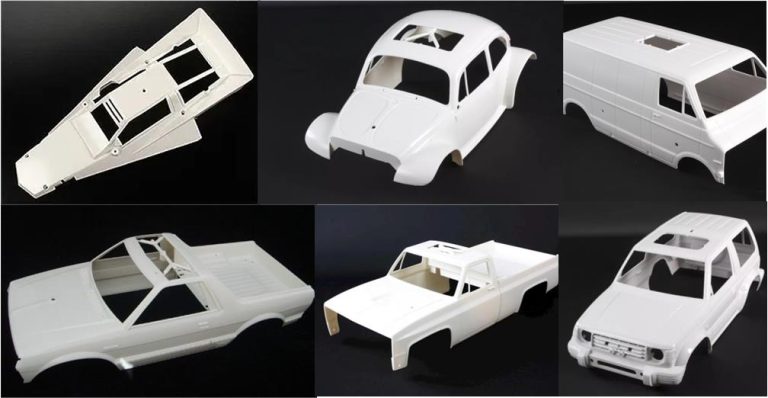
The technique for applying colors to bodies or non-transparent parts is completely different from that used for applying color to bodies or transparent parts. Non-transparent bodies can be made of various plastic materials such as Styrene and ABS; when discussed later, it can also be applied to fiber parts such as carbon or F.R.P. (an acronym for Fiber Reinforced Polymer). Non-transparent bodies are thicker than those made of Lexan but are more detailed; for this reason, they are usually the bodies that stand out on display shelves.
The best way to achieve a poor final result is to go to a large shopping center or visit a website, buy the first spray can of the chosen color and apply it to the body.
Painting is only the most visible step to perform: there are various products to apply and several operations to complete before and after painting. A properly treated surface has four levels: the surface to be treated, the primer, the paint and, if necessary, the gloss coat.
Applying color with the latest generation of spray cans allows results comparable to those obtained using a spray gun and compressor.
Work Environment and Spray Can Preparation
Before delving into the technique for applying colors to non-transparent body, let’s introduce some notes on the environment where these operations should be carried out, as well as how to store and use the spray cans. This introduction is generally applicable to any painting work.
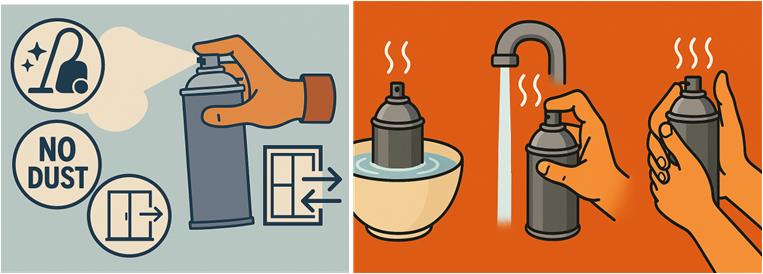
The painting workspace should be ventilated, well-lit, clean and free of dust to prevent any dirt from compromising the job by sticking to the freshly painted surface. Before painting, it is recommended to wash the floor with water so that dust particles clump together and do not float in the air.
Spray paint cans always indicate the optimal ambient temperature for applying the paint, which is generally between 18–22°C. The cans should be kept cool, but just before beginning the application, they should be placed in a location where they can increase their temperature by at least 2–3°C.
There are various methods to warm the cans, but they should not be overheated, as excessive pressure could cause them to explode. The cans can be warmed by immersing them in a basin of lukewarm water, holding them under a stream of warm tap water, or simply warming them with hands. This process also increases the temperature and pressure of the paint inside, leading to better spray dispersion when it exits the nozzle.
Spray cans generally recommend shaking before use, but warming them has a similar function and is more effective.
Type of Paint to Apply
Various manufacturers offer spray paints, but it is generally best to choose those specialized in model-making, as their paints contain specific additives and have larger nozzles.
The chemical additives are designed to make the paint resistant to impacts that the body of a radio-controlled car may experience. These additives give the paint elasticity and prevent it from chipping off in pieces after an impact. The larger nozzle facilitates application on complex surfaces, such as the body of a radio-controlled model, by creating a wider paint cone and, consequently, a broader spray cloud.
The first and most critical step in painting body is selecting the appropriate product, which significantly affects the final result. The choice of paint depends on the function of the body:
– For display body, acrylic-based paints offer greater brilliance.
– For non-display body, polyurethane-based paints are more resistant to impacts.
For body made of Styrene or ABS, acrylic-based paints (such as Tamiya’s TS-xx series) are the best option. These types of body are heavy and detailed, making them less suitable for use while running the model. Instead, they are typically replaced by equivalent Lexan body, which is lighter and better withstands impact deformation.
Removing Paint Residues and Preparing Surfaces for Painting
After selecting the appropriate paint, the first real task is preparing the surface. If the parts and body are new, there is no need to remove previously applied paint layers. However, for restorations, it is necessary to remove the previous paint layer or layers.
The fastest and most environmentally friendly method to remove paint is soaking the body in denatured ethyl alcohol (90–99%) in its pure form, without added dyes or fragrances. The alcohol can be reused for multiple cycles.
Chemically, the alcohol attacks the paint and after several hours of soaking, the paint can be removed with a simple mechanical action using a wooden spatula or kitchen paper towels. The friction from scrubbing separates the paint from the body. The process should be repeated until the paint is completely removed, alternating between soaking and rubbing with the cloth.
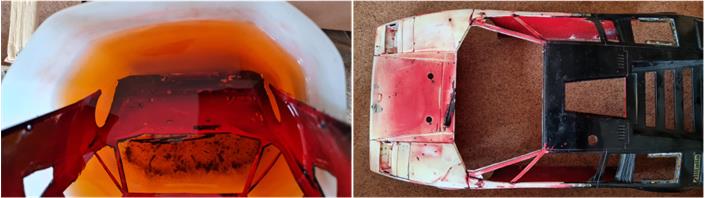
For larger parts that cannot be fully submerged in alcohol, the removal process can be done in phases, partially submerging sections of the body. For example, the front of a body can be treated first and then the rear part afterward. In the image below: on the left, the alcohol basin contains the front part of a body initially painted black and then red. On the right, the treated body displays the white of the styrene.
To remove paint from corners, use a wooden toothpick. Paint removal is a lengthy process requiring multiple steps, repeated until the final result meets expectations. The effectiveness of paint stripping is subjective—some prefer to repeat the process multiple times, while others stop earlier. Paint layers that remain after initial treatments can serve as a primer for future applications.
If opting to leave some paint, it is necessary to smooth these areas using wet sandpaper—first 1,200-grit, then 1,500-grit—to align treated surfaces with those where the paint has not detached. The best approach is working with sandpaper and water: fully immerse the sandpaper in water, wet the surface, then sand the wet surface with damp sandpaper. This prevents dust from accumulating and keeps the surface clean.
Once sanding is complete, wipe away all residue using **kitchen paper towels or a soft clean cloth**. The cloth removes loosened paint mixed with water, forming a fluid paste. This process also ensures a more uniform finish—alcohol treatment often leaves the paint rough to the touch. If surfaces are left untreated, the next layers of paint will not adhere properly.
Even new parts or body must be treated with 1,200-grit, followed by 1,500-grit sandpaper, to prepare the surface for painting and remove any residues from previous processing. On new body, check for and remove any mold flash left from manufacturing.
The process for new parts follows the same steps as stripped parts: wet sanding with water, followed by cleaning with a soft cloth or paper towel to remove the mixture of paint dust and water.
Degreasing and Securing the Parts
The next step is to degrease the surfaces by washing them with warm water and dish soap.
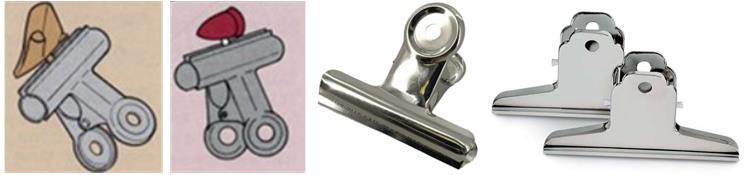
Before painting, secure the bodywork or parts on a support, allowing handling without touching the painted surface. Small parts can be held using metal clips or putty adhesive.
Primer
At this stage, the surface is still not ready for painting—it must first be prepared by applying a primer, also known as an adhesion promoter or bonding agent, which helps the paint adhere properly. The primer allows the paint to bond well to the surface and ensures a solid and uniform layer. For best results, it is advisable to use both primer and paint from the same manufacturer.
There are different types of primer:
– Based on the surface: Suitable for materials like metal, plastic, nylon, etc.
– Based on color: Primers are available in various colors like white, pink and gray. The choice of primer color depends on the final paint color. The basic rule concerns white and gray primers, which represent opposite ends of the spectrum—white primer enhances bright colors, while gray primer creates a darker paint effect. Other recommendations:
– Bright final colors (yellow, red, green) stand out more with a white primer.
– Soft final colors (light pink, muted red, orange) work best over a pink primer.
– Dark final colors (blue, black, gray) are more pronounced when applied over a gray primer.
– Based on surface finish:
– Fine primer creates a smoother surface.
– Textured primer produces a rougher effect.
Applying primer is less complex than painting. The key rule is avoid excess application, never focus too long on one area and apply multiple thin coats until the surface is evenly covered. Wait at least two hours between each primer coat.
Masking and Painting Design
Once the primer is applied, it is finally time to paint. Proper painting technique depends on hand movement—it is not enough to simply press the nozzle and spray.
When using multiple colors, always apply lighter colors first, followed by darker colors. This prevents dark paint from affecting lighter shades when mistakenly applied later.
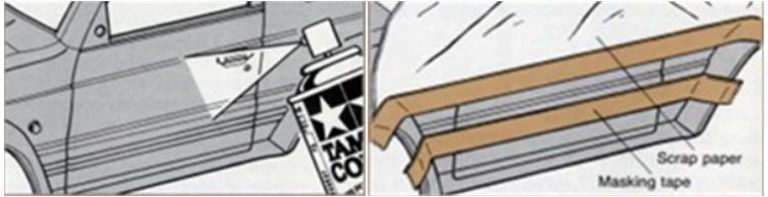
Before applying the first color, mask areas that should remain unpainted or require a different color. Ensure there are no bubbles or imperfections along the masking edges to prevent paint from seeping underneath. If bubbles appear, press along the edges with your fingers to eliminate gaps. Masking can be done using painter’s tape or liquid masking solutions.Example: Creating a Light-Colored Side Stripe. To achieve a white side stripe on a red-painted body, follow these steps:
1. Apply the lightest color (e.g., white) over the entire body, applying multiple coats; this prevents color inconsistencies when applying the second coat over areas with a different underlying color.
2. Place the masking tape to form the stripe. Press firmly to ensure adhesion and prevent color bleed.
3. Apply the second color over the entire bodywork; the first coat of the second color should be light. Wait for the color to dry, sealing the masking and serving as a base for the following coats; the second color (e.g., red) is darker than the first. Apply the second, third …coat of the second color,
4. Wait for the paint to fully dry.
5. Remove the masking tape, revealing the light-colored stripe.

Example: Creating a dark-Colored Side Stripe. The following sequence shows how to achieve a dark-colored side stripe (e.g., blue) on a light-colored body (e.g., yellow):
1. Apply the lighter color (e.g., yellow) over the entire body, applying multiple coats; this prevents inconsistencies caused by different underlying colors.
2. Place the masking tape, which in this case covers the entire body except for the stripe. Press firmly to ensure adhesion and prevent paint from seeping underneath.
3. Apply the second color over the entire bodywork; the first coat of the second color should be light. Wait for the color to dry, sealing the masking and serving as a base for the following coats; the second color (e.g., blue) is darker than the first. Apply the second, third …coat of the second color,
4. Wait for the paint to dry completely.
5. Remove the masking tape, revealing the dark-colored stripe.
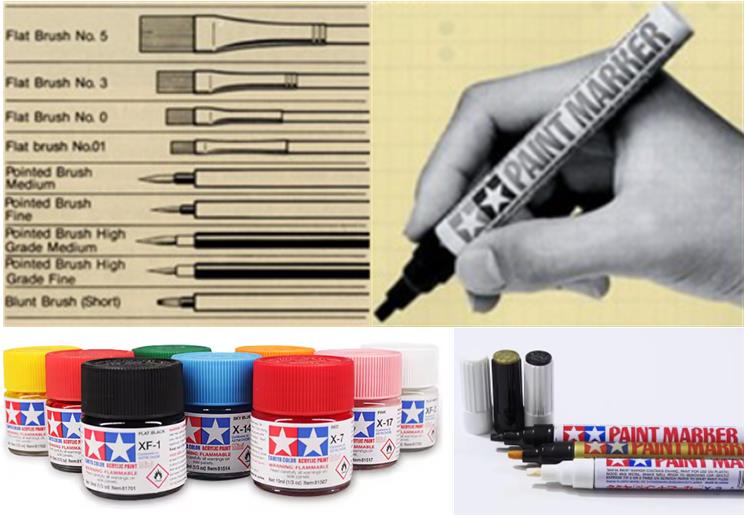
Some parts cannot be painted with a spray can because they are too small or thin. Depending on the size of the part to be treated, you can choose to apply the color using a brush with acrylic paints (such as Tamiya’s glossy X and matte XF paint lines) or use acrylic markers (such as Tamiya’s Paint Markers).
The pointed or flat shape of the brush or marker allows the paint to be applied either along lines or across surfaces.
Painting
To achieve a uniform distribution of paint and prevent drips or blotches, developing a good spraying technique is essential. Here are some tips for improving the use of spray cans:
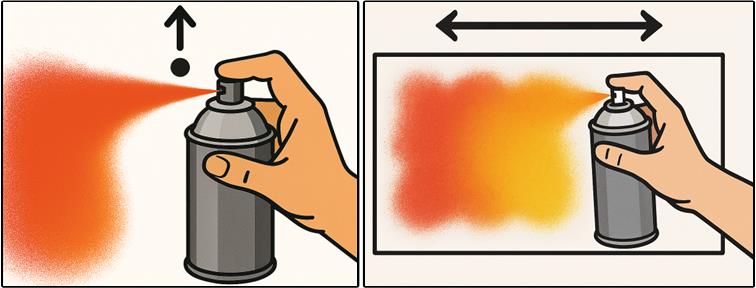
– Maintain a distance of 20–30 cm between the nozzle and the surface to prevent excessive paint buildup in certain areas. Applying paint too closely can cause air and paint bubbles, resulting in a rough, orange peel-like texture.
– Press the nozzle intermittently to create continuous small clouds of paint. Holding the nozzle down constantly leads to uneven paint distribution. During each coat, never attempt to fully cover the surface in a single pass.
– Move the hand in a steady motion from right to left and back, ensuring the spray covers the entire piece. Avoid focusing too long on any specific portion to prevent uneven coverage.
– Patience is the most valuable quality of a good painter. Paint layers should be light and applied in multiple coats. The waiting time between coats depends on the product used—this information is always indicated on the packaging, specifying the drying time to the touch, which corresponds to the minimum interval required between coats. If applying thin layers, the next coat can often be applied after just a few dozen minutes.
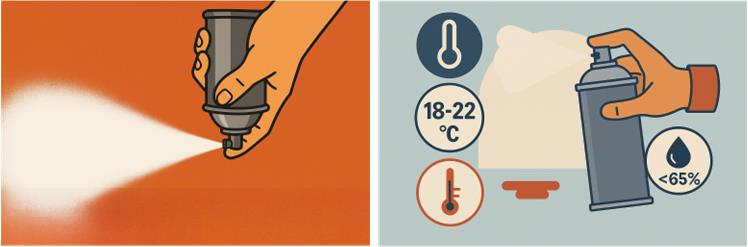
– Avoid painting on days with high humidity (never above 65%) or when the temperature is too low. The best conditions are between 18–22°C and it is advisable never to paint below 10–11°C. For example, cold and rainy days should be avoided. Moisture in the air tends to mix with the paint, negatively affecting the surface finish—this can result in tiny imperfections resembling small stains. Due to the well-known physical phenomenon of fluid expansion, a gaseous substance cools when it transitions from high pressure in its liquid state (inside the spray can) to low pressure in its gaseous state (outside the can) as it expands. This same principle applies when paint passes through the nozzle. Cold paint causes dissolved moisture in the air to condense, diluting the paint and reducing its effectiveness. Water particles combine with the paint droplets, making them larger and less capable of properly coloring the surface.
– After completing each painting session, it is essential to clean the spray can nozzle to ensure proper operation for future applications. To do this, invert the can, press the nozzle and spray until no more paint comes out.
In case of color stains or drips due to excess paint application, follow this procedure to correct the issue:
– Wait two days for the incorrectly applied paint to fully harden.
– Sand the affected area with 1,200-grit sandpaper, followed by 1,500-grit sandpaper, restoring the surface to its optimal state by eliminating any waves or imperfections noticeable by touch.
– Clean the surface with a dry cloth to remove all residues.
– Reapply the paint, covering not only the corrected area but also the surrounding surfaces in good condition to ensure uniformity in the paint layer.
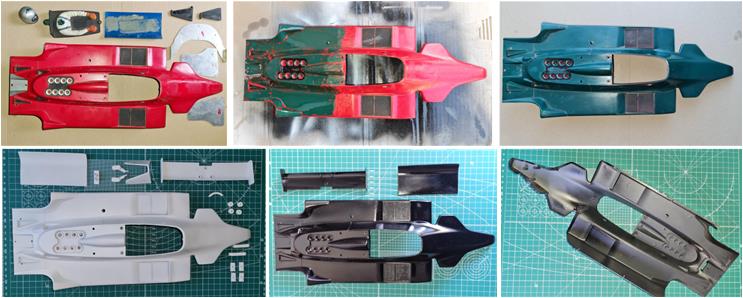
The image below, progressing from the top left to the right and downward, illustrates the process:
– A red-painted body undergoing restoration.
– A partially stripped rear section of the bodywork.
– The body completely stripped, except for the engine grills and velocity stacks, which are unaffected by alcohol treatment.
– The body and parts with primer applied.
– The body and parts with black paint applied.
– The interior of the body, where a matte black paint has been applied.
Protective Clear Coat
The final step—though not strictly necessary—is highly recommended: applying a clear coat over the painted surface to complete and strengthen the paint layer.
Before applying the gloss, allow the paint to fully dry, then use polish to remove any imperfections and enhance the shine.
For the best results, apply at least two coats of clear paint:
– The first coat should lightly cover the surface, serving as a base for subsequent layers. A thin initial coat prevents the solvent in the gloss from chemically affecting the underlying paint.
– The second coat provides the glossy effect.
Clear coatings are available in glossy or matte finishes. One final step to achieve a flawless painted surface is waxing—this enhances smoothness and shine while adding extra protection.