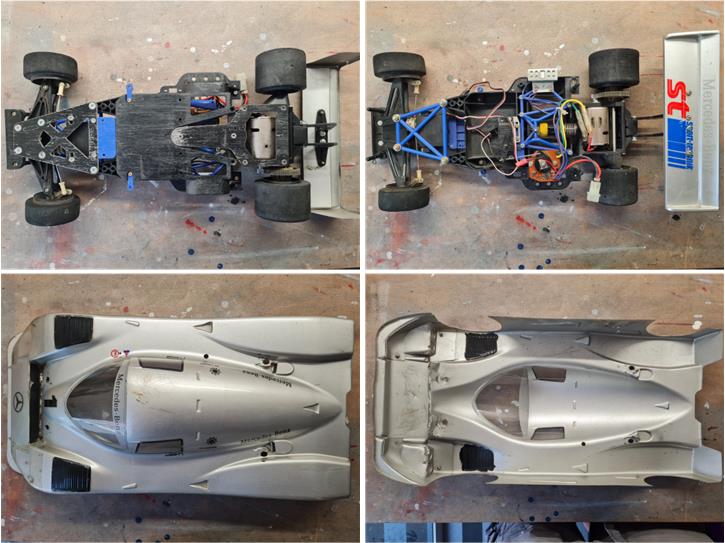
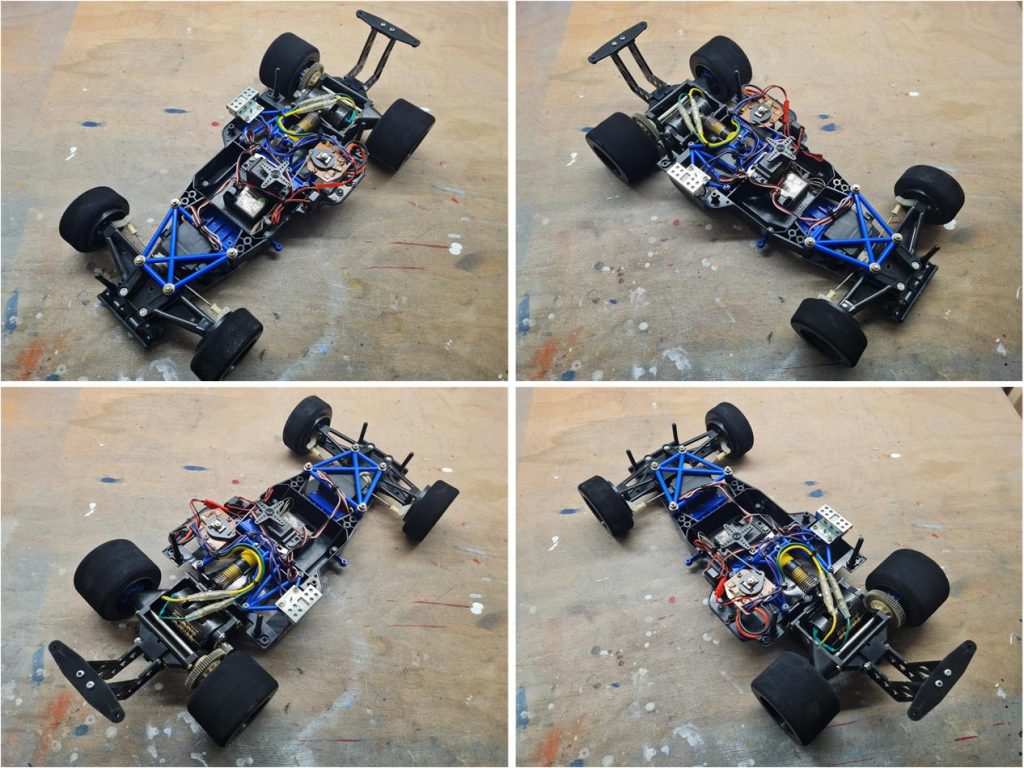
Model Tamiya Mercedes Benz C11, model number 58088, released in 1990 and available on the market until 1994 Lexan body shell with additional Lexan details: right front headlight cluster, left front headlight cluster and rear spoiler assembly Group C long‑wheelbase chassis
The Mercedes‑Benz C11 competes in the 1990 World Sport‑Prototype Championship in Group C. The C11 derives from the C9 and both are developed by Sauber (a racing team based in Switzerland, active in Formula 1 until 2025, when it becomes the foundation for Audi’s F1 team). The C10 version was never produced because its designation is difficult to distinguish in spoken German: the letter C and the number 10 sound too similar. For the first time, the Mercedes‑Benz name appears on the C11. Six units of the C11 are built around the 5.0‑liter Mercedes‑Benz twin‑turbo V8 engine producing 730 horsepower (950 hp in qualifying). The engine is mounted in the rear‑central section on a carbon‑fiber monocoque; the bodywork is carbon fiber and Kevlar; the gearbox is a 5‑speed manual with rear‑wheel drive; and total weight is about 900 kg. Michael Schumacher also races this car at the 24 Hours of Le Mans, setting the fastest lap.
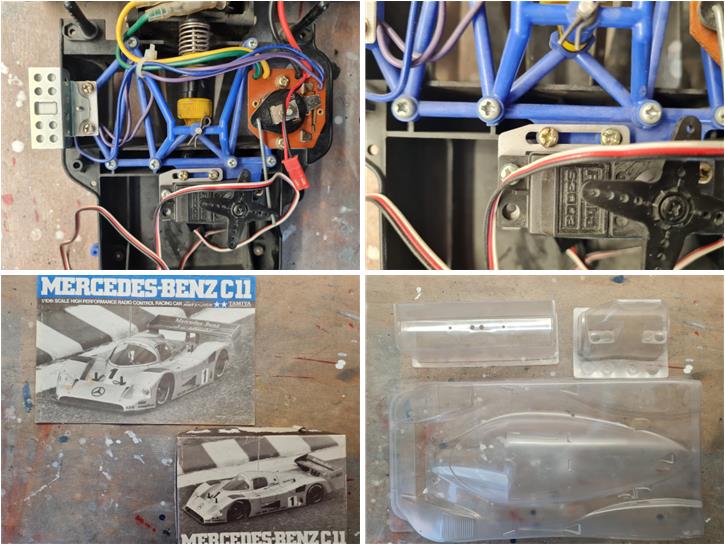
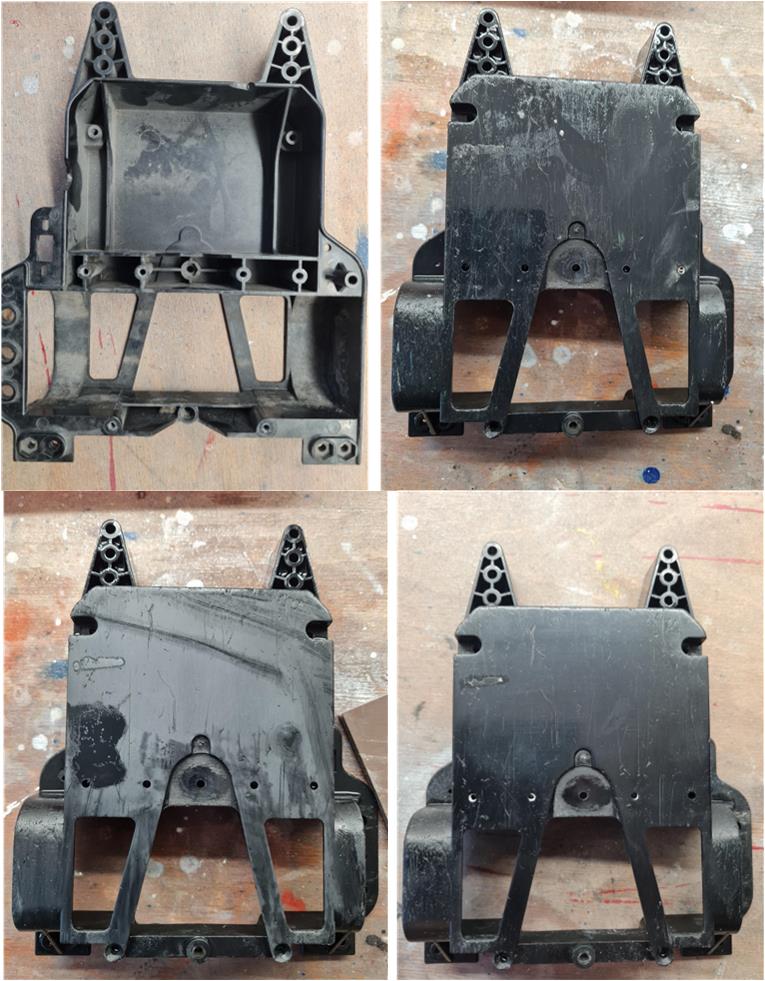
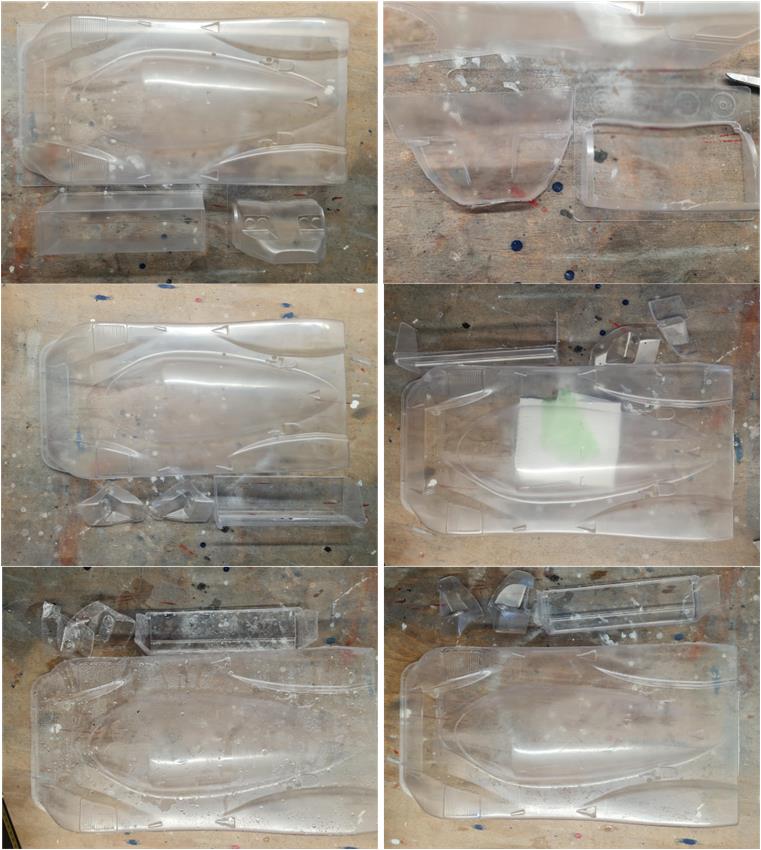
The chassis comes with two servomotors, a resistor, a mechanical speed controller, the chassis instruction manual, the body instruction manual and a small‑parts storage box. The L‑shaped aluminum bracket (right image in the first row) used to mount the servo that operates the mechanical speed controller is very rare. It also includes a new body shell (right image in the second row) consisting of the main body, rear wing and front headlight cluster. The markings on the body shell correspond to the 1990s data referencing code 58088; however, it is not possible to determine whether it is an original spare part from that era (part number 50396, described as “Mercedes Benz C11 Body Parts Set”) or a body shell produced for one of the re‑releases of this model (for example part number 9805379, described as “Tamiya Body + Rear Wing Mercedes‑Benz C11 58088”). The wheel‑arch openings are not pre‑cut. There are three re‑releases available today (2026): in 2005 and 2009 under part number 58351 with a factory‑finished and pre‑painted body shell; in 2008 under part number 84079 as a limited edition; and in 2022 under part number 47484, also a limited edition. All re‑releases feature black plastic parts; the original version has blue plastic for the damper stay and spacer. The lot received includes the body shell, but the decal sheet is not present.
The purpose of this restoration is to recover all the parts of this chassis, since they are original from the period and to rebuild the body shell starting from the new one. The goal is a model compliant with the factory specifications of the 1990s, ready for track use.
Chassis
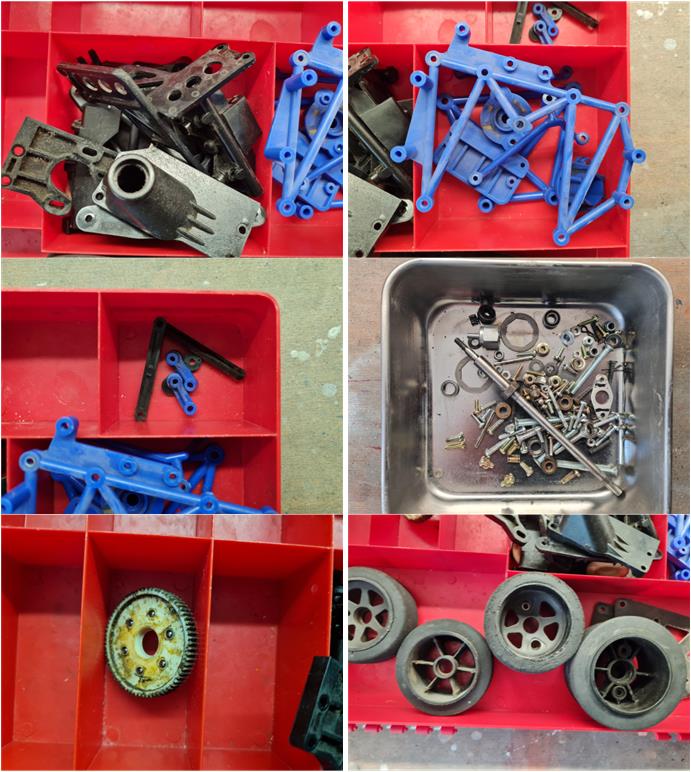
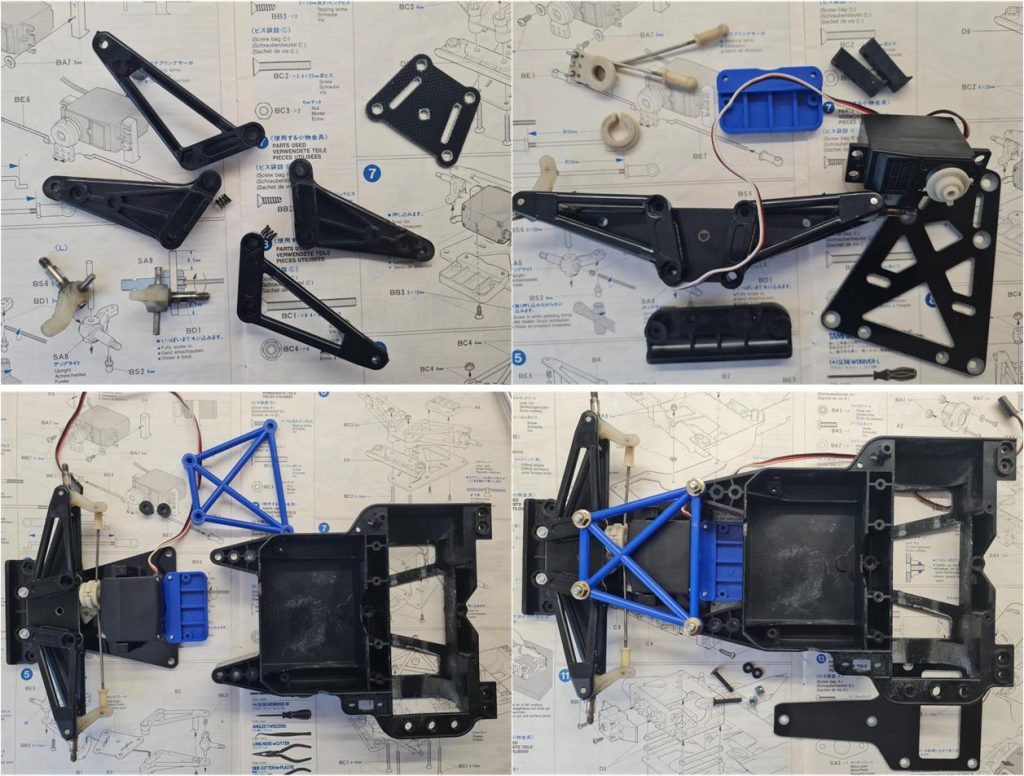
Disassemble the chassis completely, separating the parts by material: plastic, metal, Teflon and F.R.P. (Fiber Reinforced Polymer). Wash the plastic parts with hot water, dish soap and a toothbrush. The soap’s surfactants break down dirt and grease, while the toothbrush mechanically removes the most stubborn residue. After washing, leave the plastic parts to dry in the sun for a few hours. Immerse the metal parts for one week in a container filled with diesel fuel; after a week, the diesel will have dissolved grease, oxidation and rust. Once this step is complete, leave the parts in the sun for a few hours; at the end of the treatment, the parts will be shiny and coated with a very thin oil film that protects them from oxidation. The front A‑shaped F.R.P. section is too damaged and is replaced with equivalent new parts that remained on the shelves after restoring the 58098 Ferrari F40 model.
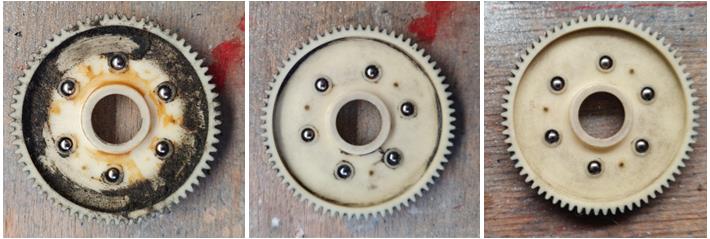
Mechanically remove the grease from the gears using a kitchen paper towel. Repeat the operation until the result meets expectations. The first image shows the ball differential gear before treatment, the central photo shows the gear after the first cleaning steps and the last image shows the gear at the end of the treatment. The teeth have also been cleaned.
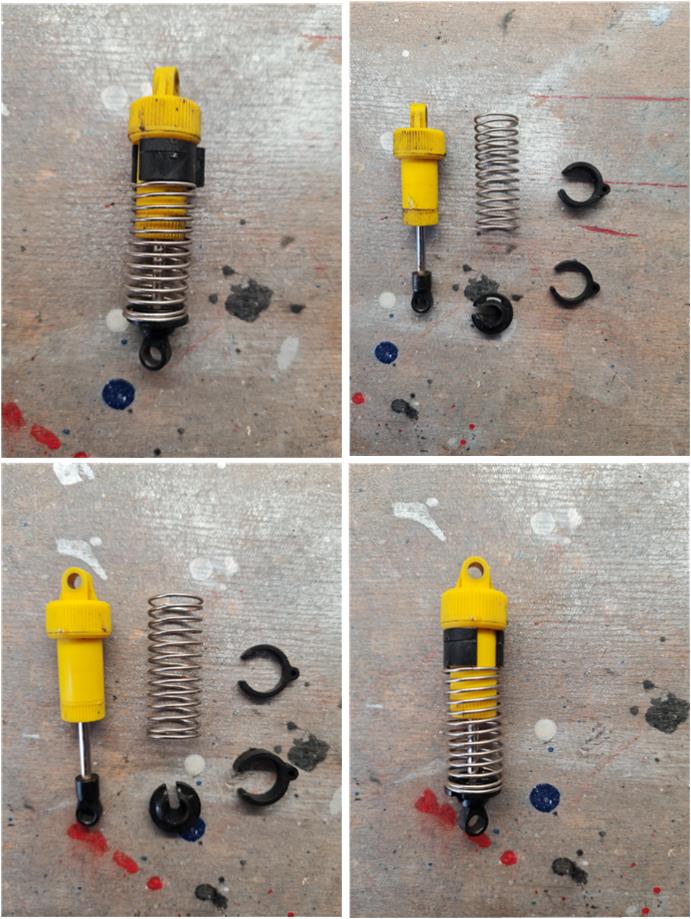
Disassemble the rear central shock absorber completely. Clean every single component with a kitchen paper towel and check that the piston moves correctly. When pressing and releasing the piston, the movement must be smooth: this confirms the absence of air bubbles inside the CVA shock chamber. Reassemble the shock absorber, ensuring that every part operates at its best (right image in the second row).
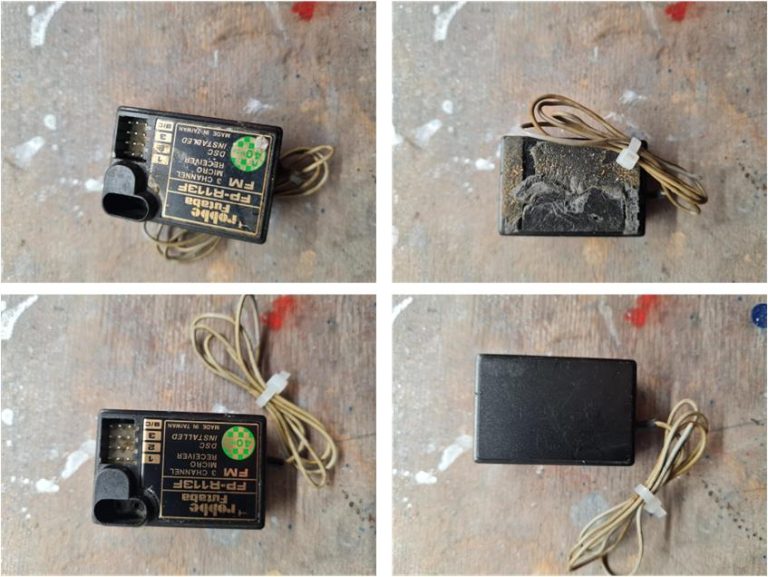
Clean the exterior of the receiver using household alcohol (the pink, scented type commonly used at home) and a kitchen paper towel. The alcohol dissolves the adhesive, making it easy to remove the strip of double‑sided tape (receiver before treatment in the first row and after treatment in the second row).
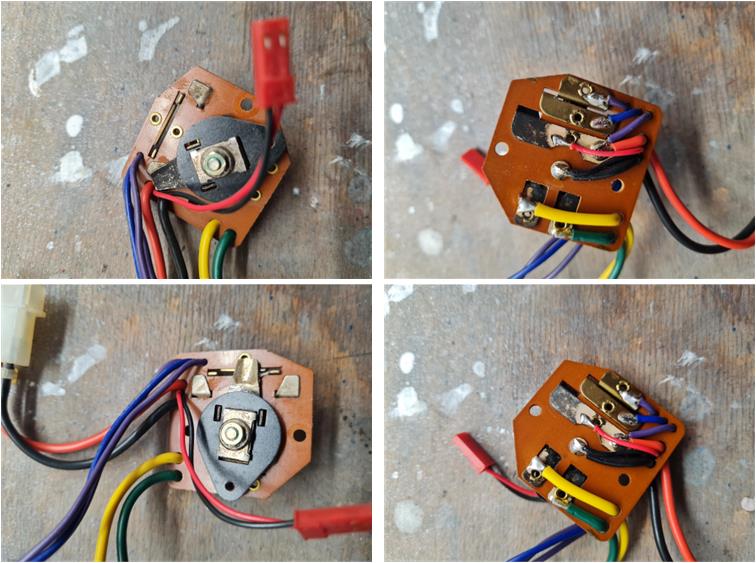
Clean the rotor area of the mechanical speed controller and all electrical contacts using alcohol and a kitchen paper towel. Clean both the upper and lower surfaces (mechanical speed controller before treatment in the first row and after treatment in the second row).
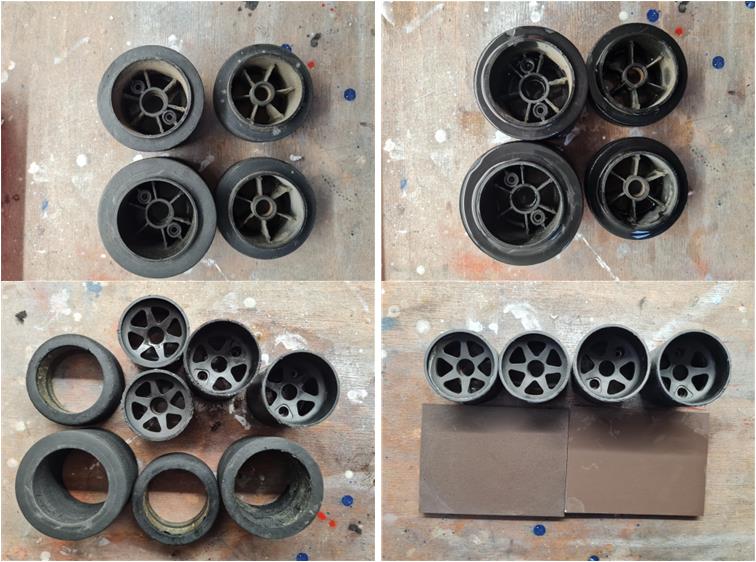
The wheels are in poor condition and dirty and the foam tires are unevenly worn. The right rear tire appears new, while the left front one is heavily worn (left image in the first row). The foam tires were attached to the plastic rims using double‑sided tape. To remove the foam from the plastic rims, it is necessary to soak the tires with pink alcohol (right image in the first row). The pink alcohol must penetrate between the foam and the plastic; only then can it dissolve the adhesive of the double‑sided tape, causing it to lose its grip. Continue soaking the foam and manually try to detach it from the rim. Each time, re‑soak and repeat the process until the two parts separate (left image in the second row). The rims are damaged on the sides from impacts with other objects. Treat the damaged edges with 2000‑grit sandpaper and then 3000‑grit sandpaper using the wet‑sanding technique. Work the rim edge until it becomes smooth again (right image in the last row). The foam tires are replaced with those currently (2026) available for model 47484: for the rear tires, part number 19401901 described as “Rear Tire Bag (Rear Tire x2)” and for the front tires, part number 19401900 described as “Front Tire Bag (Front Tire x2)”. Both sets were released for the NISSAN R91CP (’92 Daytona winning car), part number 84264.
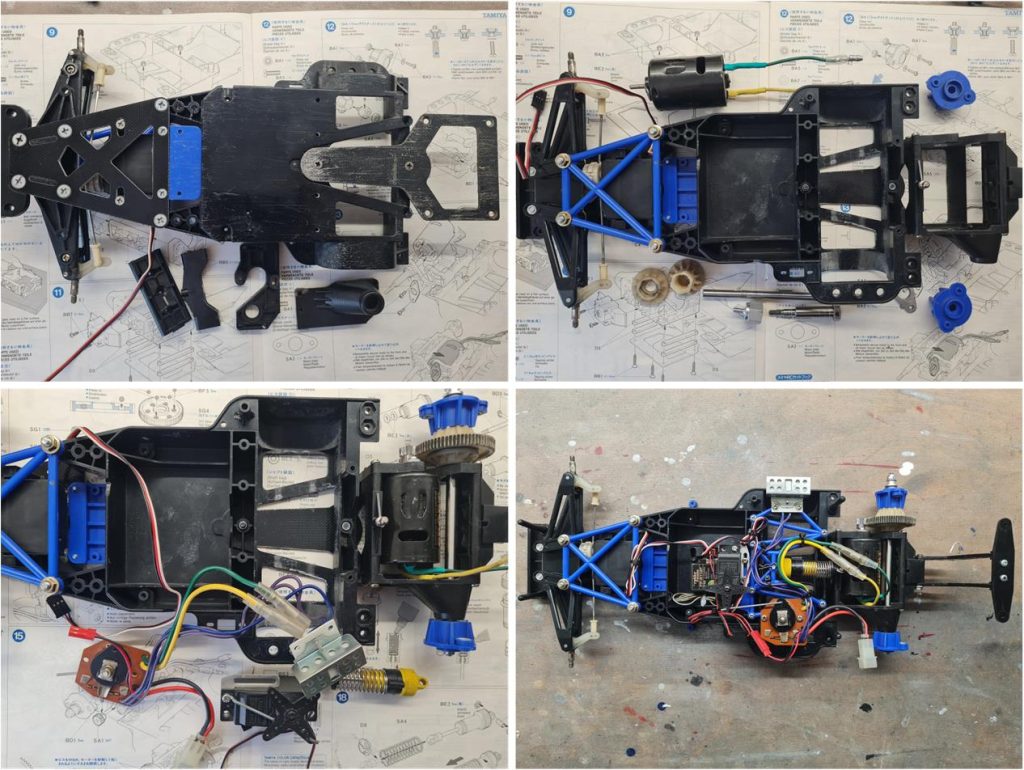
Now it is possible to assemble the chassis using the regenerated parts; the goal has been to reuse the original components from the lot, replacing only those in very poor condition. As for the electronics, the mechanical speed controller and its servo motor have been retained.
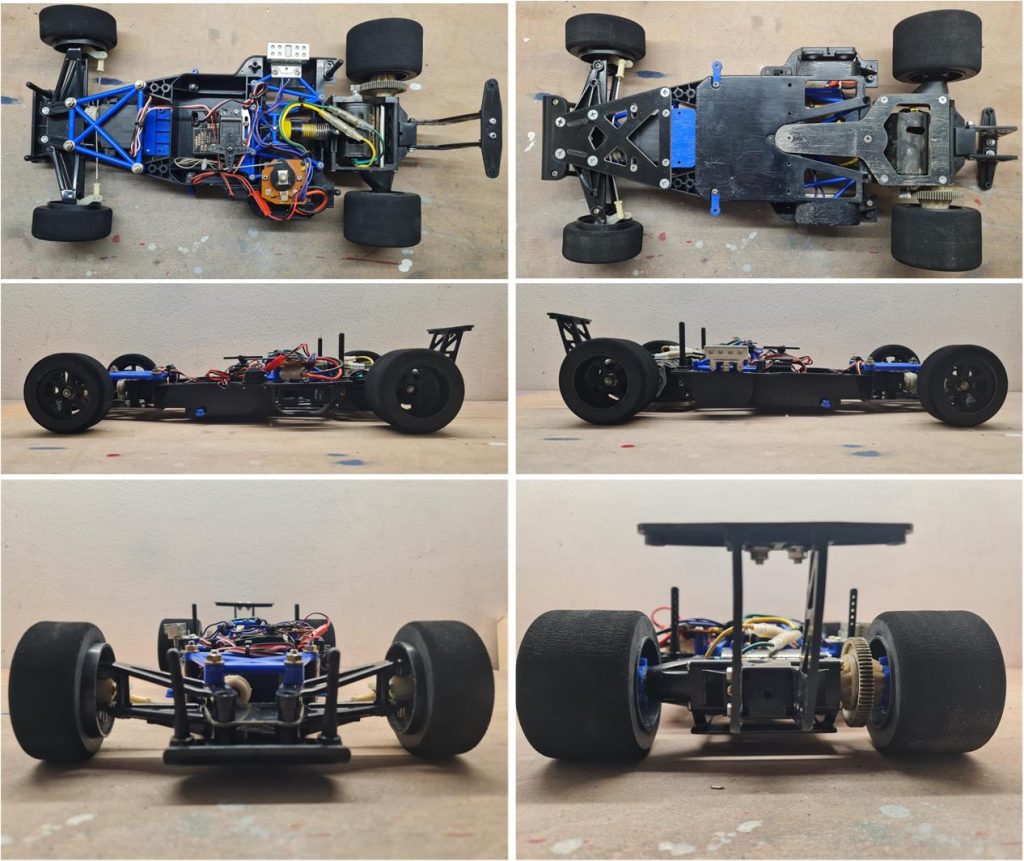
Images of the complete chassis.
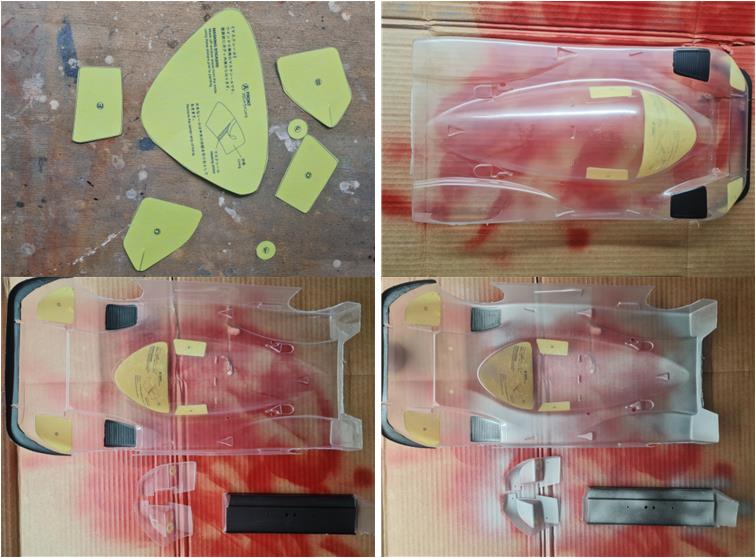
Body shell The body shell is new and consists of the main body, the rear spoiler and the front light cluster (left image in the first row). Trim the parts by removing all excess material; you will obtain four components: right front light, left front light, rear spoiler and main body (right image in the first row). Clean the inside of the parts with degreasing dish soap, lukewarm water and a kitchen paper towel to remove Lexan manufacturing residues (right image in the second row). Rinse thoroughly with lukewarm water (left image in the third row) and then dry the droplets with a kitchen paper towel to prevent limescale marks from forming as they evaporate (right image in the third row).
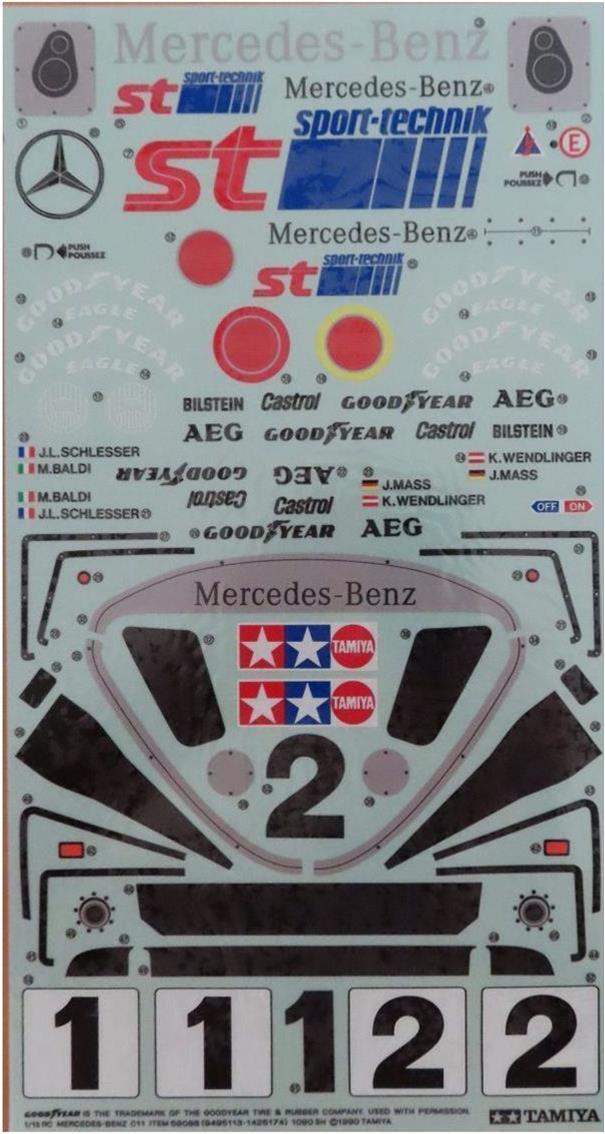
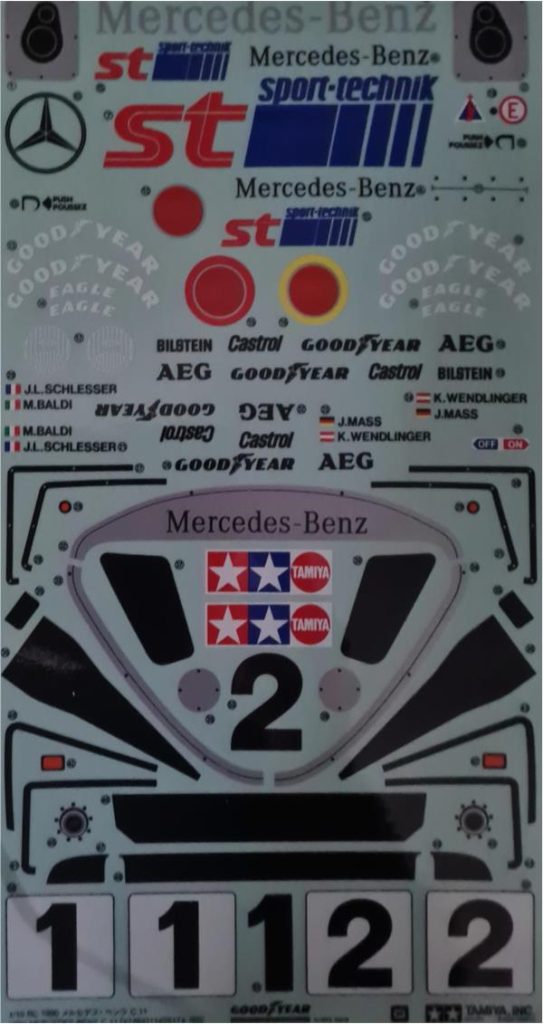
The lot does not include any decals, but the replacement decal set for model number 47484 is available on the market today (2026), part number 19494248, described as “Decal Mercedes‑Benz C11 Group C 47484”. This solution is preferable to reproducing the decals, since the sheet for model 47484 (on the right in the image) is identical to that of model 58088 (on the left in the image). The only difference is the text at the bottom, where Tamiya acknowledges that the Good Year trademark is independent.
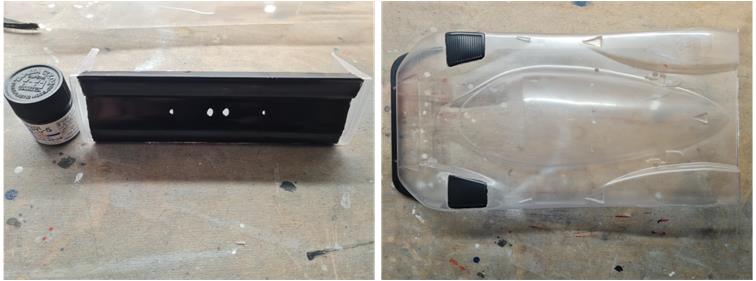
Apply two or more coats of PC5 black to the air intakes, the central section of the rear wing and the front wing on the nose. If necessary, mask the areas to be painted using masking tape.
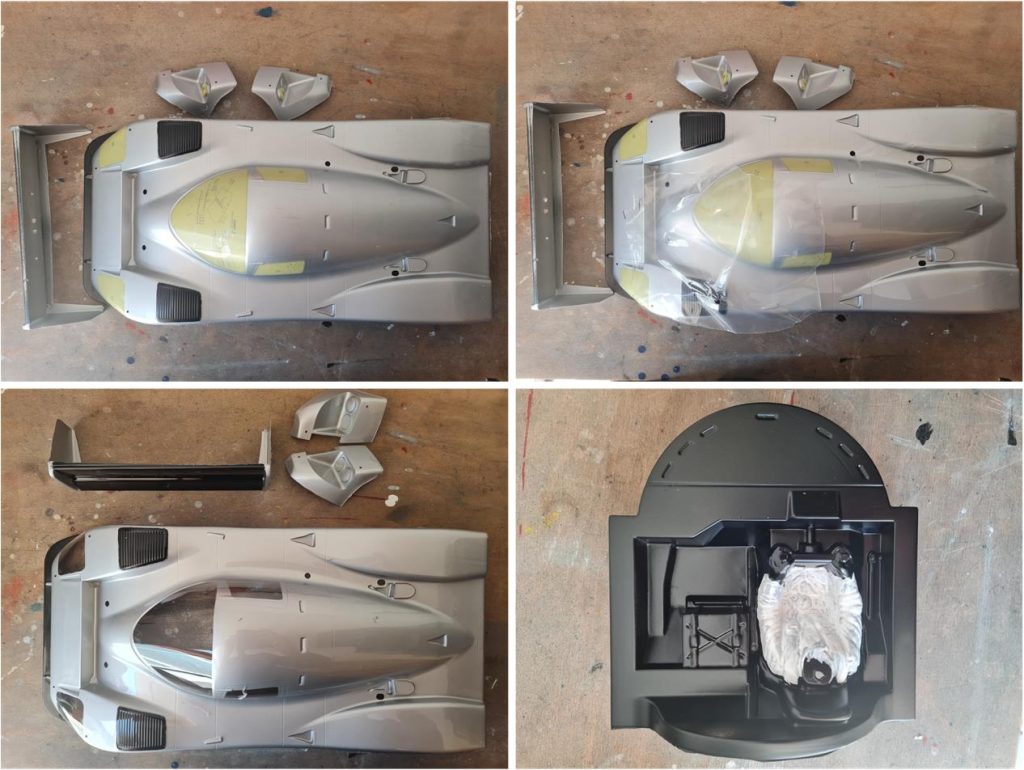
After applying the black paint, you can mask the cockpit area and the outer lenses of the right and left front light clusters. Apply PS12 silver from the inside, starting with light coats; afterwards, you may apply wetter coats, but without overdoing it to avoid unsightly drips. The paint must be applied to four parts: right light cluster, left light cluster, rear wing and body shell.
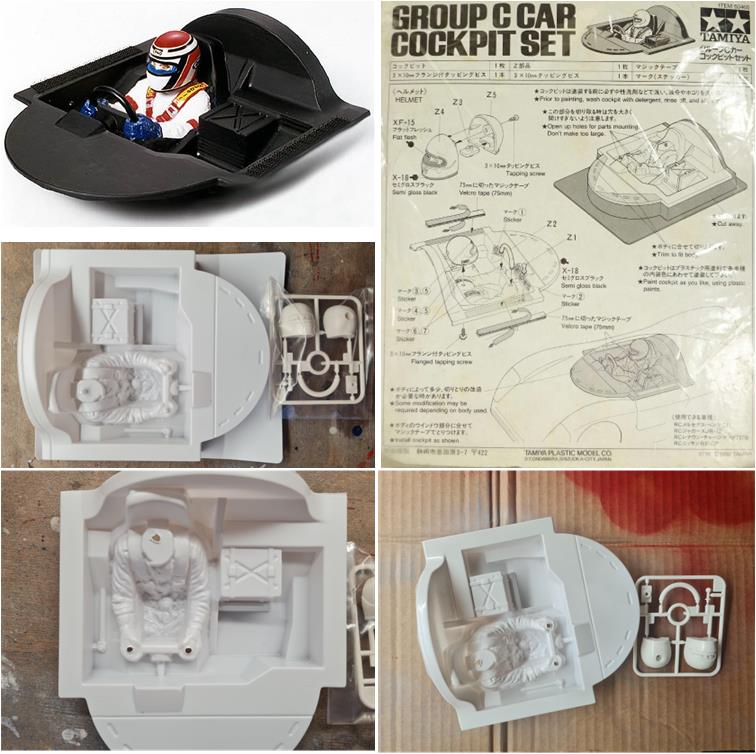
A cockpit set is available for Group C sports‑prototype cars, part number 50460, described as “1/10 Group C car cockpit set for 787B R91CP C11 XJR12”. The first step is trimming away the excess material from the cockpit (left image in the last row) and preparing the plastic for paint by applying fine grey primer 87064 (right image in the last row). To complete the cockpit painting, perform the following operations, each spaced 24 hours apart:
– apply two or more coats of TS82 flat rubber black – apply two or more coats of XF2 flat white to the driver’s suit – apply two or more coats of XF7 flat red to the driver’s safety belts
The chosen livery for the car is the one with number 1, driven by Mauro Baldi and Jean‑Louis Schlesser
The body shell is ready to receive the decals. After 24 hours from the last coat, remove the thin outer plastic film. Apply the decals and install the rear spoiler on its support and the two headlights on the body shell. To complete the cockpit, install the helmet and the steering wheel, securing the steering wheel from the inside using the acetone‑and‑ABS solution.
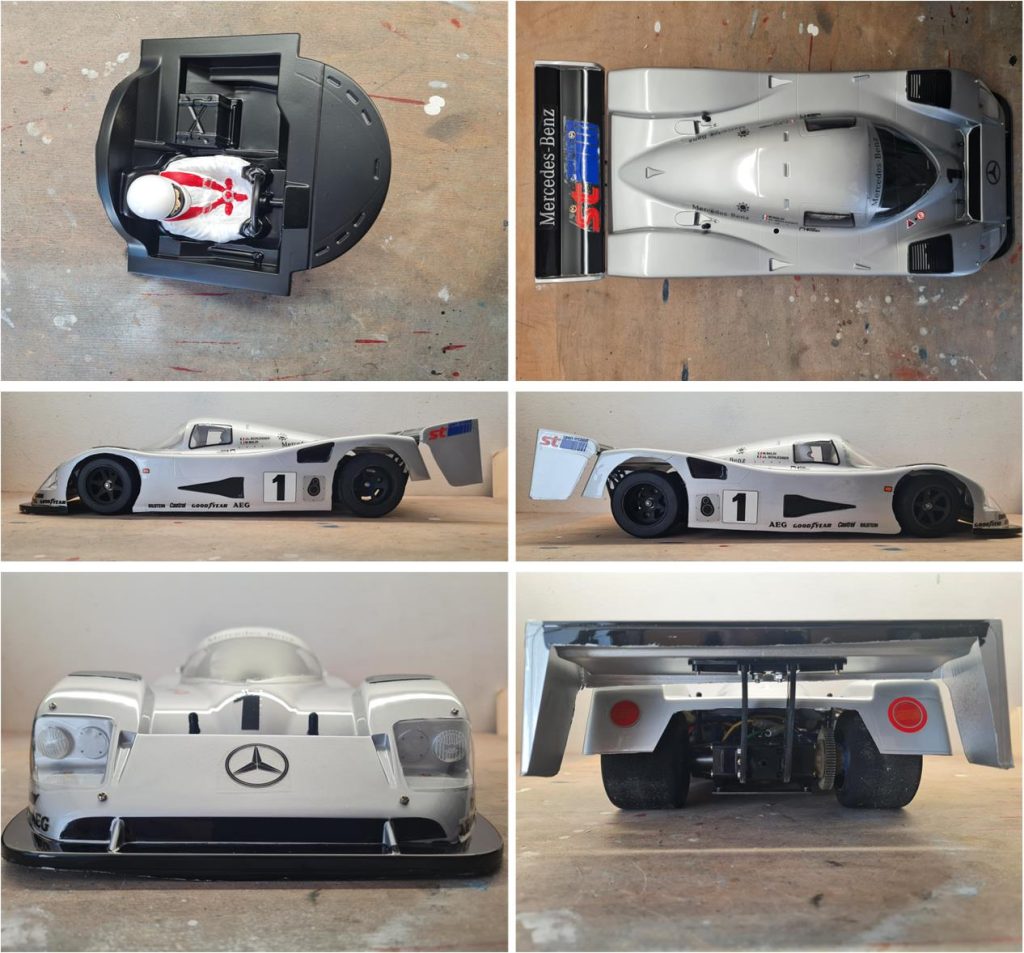
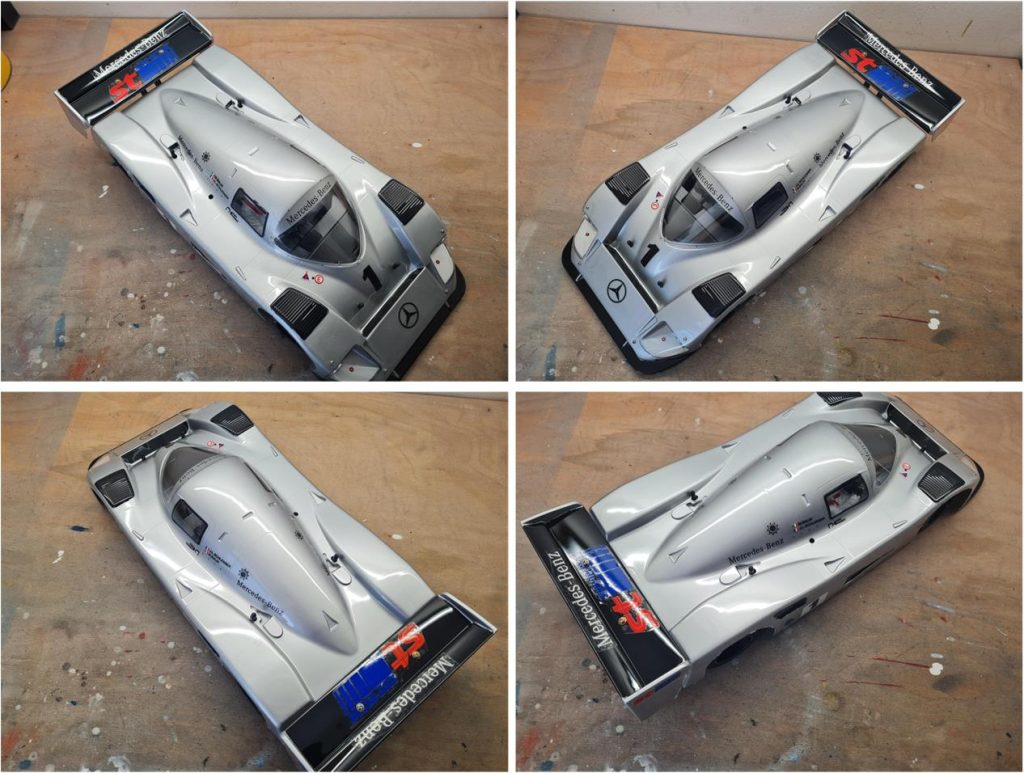
Restored model Images of the restored model.
Tamiya, original figure, box art, guide book and catalogue are of TAMIYA INC, which does not endose or sponsor www.tamiyaclassic.com. Any brands, logos and trademarks represented on this website are the copyright of their respective owners.