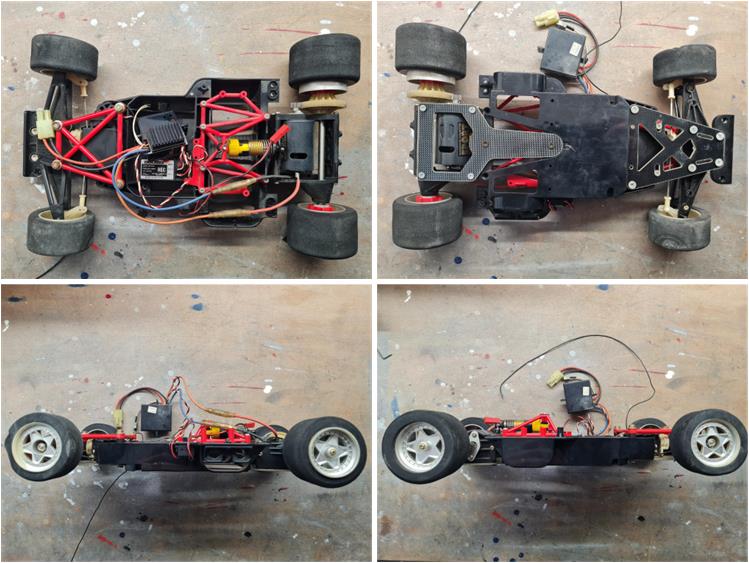
Model Tamiya Ferrari F40, model number 58098, released in 1991 and available on the market until 1995 Lexan body enriched with several red‑styrene details: driver’s side mirror, passenger’s side mirror and rear spoiler Group C chassis in the short‑wheelbase version
Project The lot includes a chassis in good condition, complete with all its parts (including the red plastic components), the foam tires and the chrome rims of the Ferrari F40. Tamiya installs these rims only on the Ferrari F40 model 58098 and its reissues. The foam tires are in excellent condition and show no wear; likewise, the rims have no marks and are intact. This is evidence that the model has been run very little. This hypothesis is confirmed by the few scratches present on the underside of the plastic central tub. The bathtub chassis bears the markings that identify it as an original 1990s chassis. The model is complete with electronics: receiver, electronic speed controller and steering servo. Therefore, the parts are original and in good condition.
Analyzing the body shell, it can be stated that it is almost intact, but the paintwork is very poor. It has a partial cut on the left rear corner (second‑row image), but this damage is repairable. The rest of the body shell is intact. The body includes all red‑styrene accessories: rear wing, driver‑side mirror and passenger‑side mirror. The paint is losing — or literally shedding — entire sections (first‑row images; at this point only about 60% of the body still retains the red color). It was likely painted using acrylic‑based paints (suitable for styrene, Tamiya TS‑series) instead of polyurethane‑based paints (suitable for Lexan, Tamiya PS‑series).
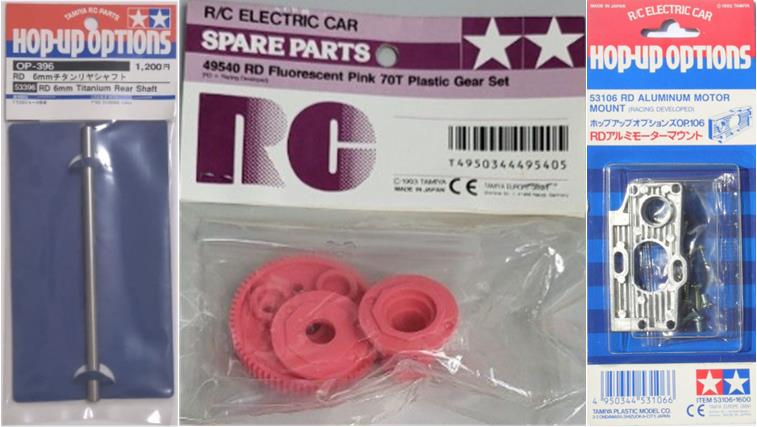
This second project was developed in parallel with the one involving model 58098, which was restored complete with box and user manual. The least‑worn parts found in this second lot were all redirected to the first project; the goal for the boxed 58098 project is to assemble a model equivalent to one just out of the factory in the 1990s. The goal of this second project is to assemble a high‑performance chassis equipped with several accessories intended to improve performance, as recommended by Tamiya in the instruction manual:
– titanium rear axle, part number 53396, described as “Racing Developed 6mm Titanium Rear Shaft” (left in the image) – pink gear set, part number 49540, described as “Racing Developed Fluorescent Pink 70T Gear Set Vintage Gr.C Group C Chassis” (center in the image) – metal motor plate, part number 53106, described as “Racing Developed Aluminium Heat Sink Motor Mount (F101‑F103 & C‑Chassis)” (right in the image)
Chassis restoration
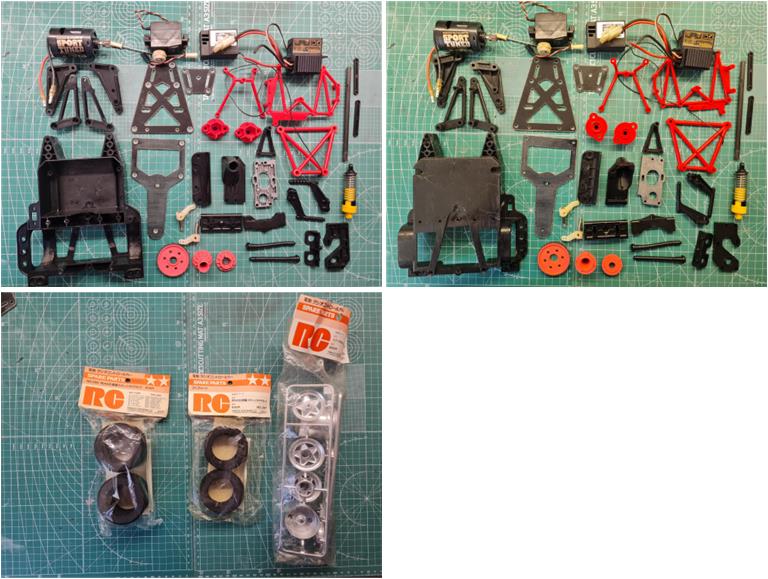
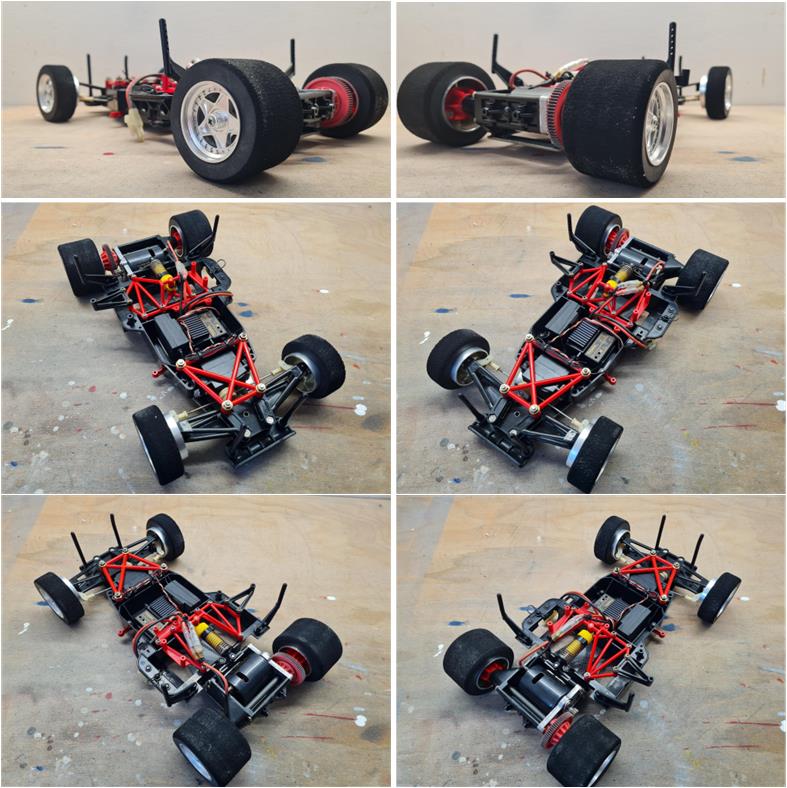
Disassemble the chassis into all its components, separating the parts by material: plastic, fiber, metal and gears. Treat all metal parts (hardware, rear axle, springs, shock shaft and front suspension, …) with diesel fuel: submerge them completely in the liquid for at least one week inside an airtight glass container (such as a canning jar with a metal lid). Diesel attacks oxidation and rust, dissolving dirt and grease. At the end of the treatment, leave the parts in the sun for a day: the metal pieces will be clean and coated with a thin oily film that protects them from oxygen. Leave the plastic and fiber parts soaking in a solution of water and kitchen degreasing soap for several days. The soap dissolves the dirt; after this first phase, mechanically clean any remaining dirty areas to remove encrustations. Remove grease from the differential gears using a kitchen paper towel. Although the selected parts are those left over after restoring the 58098 chassis complete with box and manual, the parts chosen for this project are in excellent condition (see first‑row images). For example, the rims and wheels included in this purchase lot were installed on the 58098 chassis complete with box and manual.For this project, the four rims with part number 50426 were installed, along with the front foam tires part number 50397 and the rear foam tires part number 50398. The front foam tires recommended in the manual are part number 50387, which differ from the available 50397 because the 50387 are 2 mm wider. Both solutions are functionally equivalent; they differ based on the type of track you intend to run on: part number 50387 offers greater cornering grip with higher speed in tight turns, while part number 50397 offers less rolling resistance on straights, allowing higher top speed. These three sets are from the 1990s: the label color is typical of that period (left image in the third row).
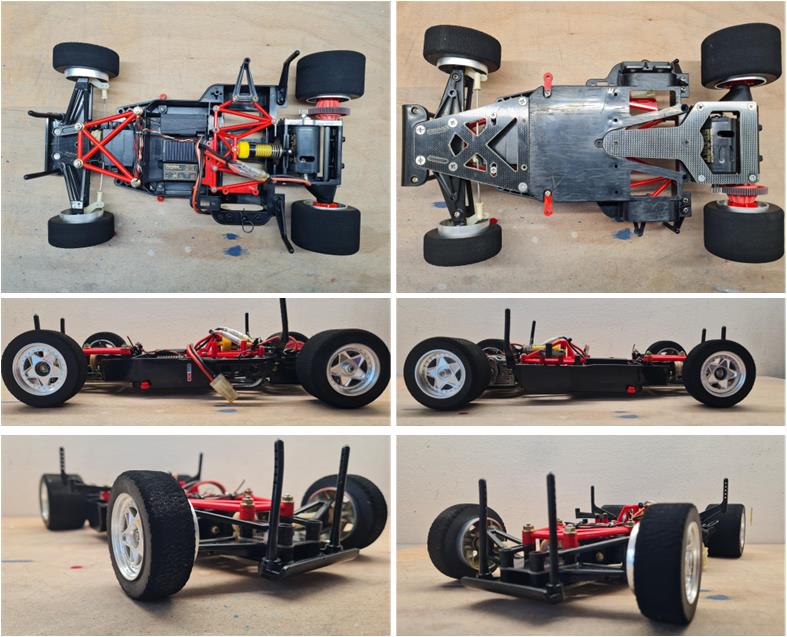
The chassis assembly is quick; ball bearings were also installed for the ball differential.
Images of the restored chassis.
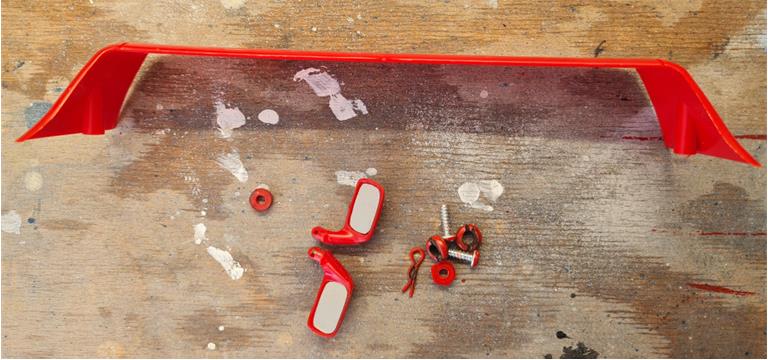
Body shell The Lexan body shell is in good condition and the red styrene parts (the two rear‑view mirrors and the rear spoiler) are intact. Examining the inside of the body, it is clear that the paint was applied over the Lexan, over the accessories, over the screws securing the spoiler and over the clips holding the two mirrors. This means the paint was applied with the body fully assembled. Remove the accessories so the screws and clips can be treated with diesel fuel, placing them in the same container used to restore the metal parts (diesel chemically attacks the paint, which then detaches easily).
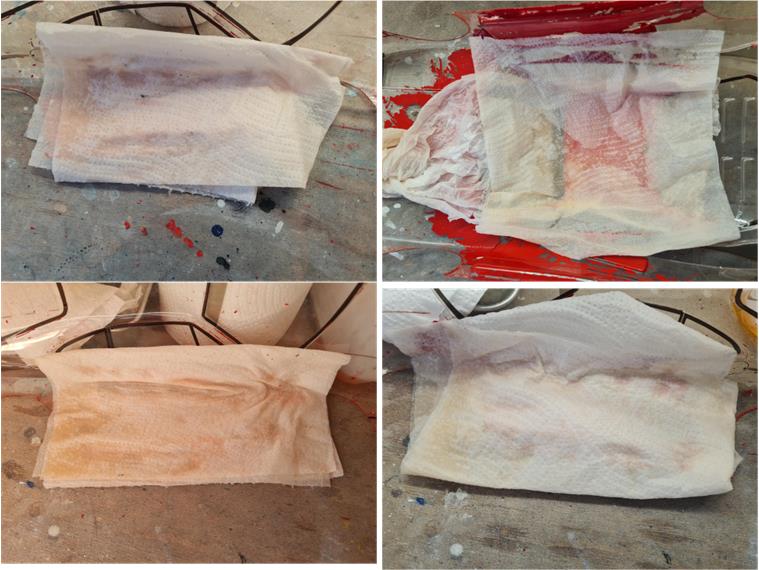
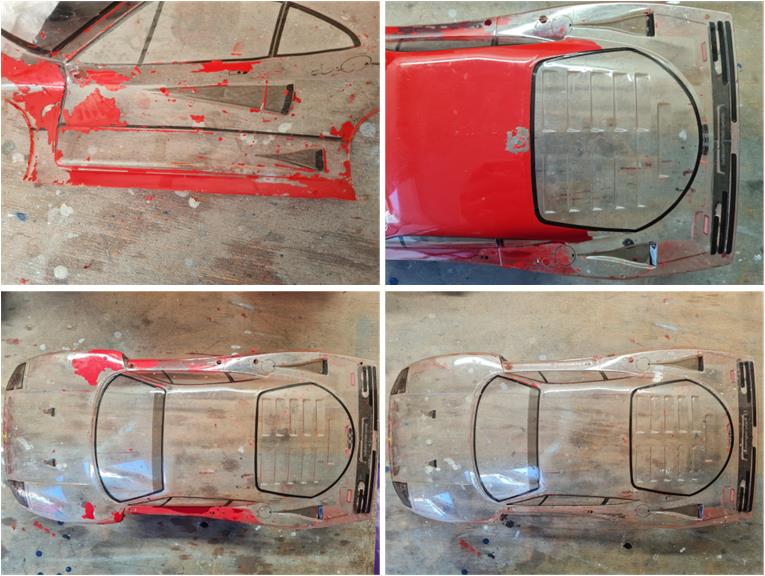
The goal is to preserve the decals while removing the paint residue. Mechanically, the remaining paint is firmly bonded to the Lexan, so it must be softened using denatured ethyl alcohol at 90–99%, in the version without added dyes or fragrance. Wear latex gloves when handling and working with 90–99% alcohol. Alcohol also attacks the adhesive of the decals, dissolving it. Therefore, do not fully immerse the body shell in alcohol, because both the paint and the decals would detach. Soak kitchen paper towels with alcohol and place them on the areas to be stripped inside the body shell. The alcohol‑soaked paper adheres well to the surface to be stripped; press with your fingers to ensure the surfaces are in contact (the right side can be seen in the left image of the first row, the roof of the cockpit in the right image of the first row and the left side in the left image of the second row). Make sure the alcohol‑soaked paper does not come into contact with the decals applied on the outside of the body shell: the alcohol must only wet the inside. Wait 30–45 minutes for the alcohol to be absorbed by the paint, remove the paper and then mechanically remove the treated paint. When the treatment works well, the paint comes off almost like peeling. Avoid letting the treated paint dry again, because it becomes even harder and more difficult to remove. In some areas, patches of paint remain adhered to the Lexan: use a kitchen paper towel soaked in alcohol and rub mechanically to remove these color spots.
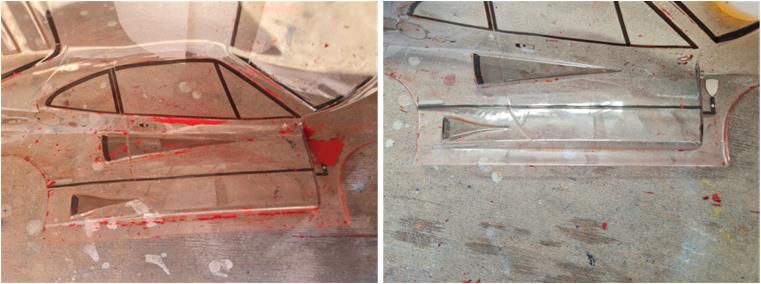
Repeat these operations until the paint is almost completely removed: in the left image you can see an intermediate stage of the process and in the right image you can see the almost‑final result. The decals outlining the cockpit windows and the air intake have remained in place.
Nelle immagini sotto si vedono alcuni passaggi della lavorazione; il risultato finale è mostrato nell’immagine in basso a destra. Concludere questa fase utilizzando cotton fioc imbevuti di alcool per eliminare le ultime tracce di colore. Passare il cotton fioc sui punti dove sono ancora presenti macchie: l’alcool agisce chimicamente sciogliendo il colore, mentre l’azione meccanica del cotton fioc rimuove le ultime tracce residue.
The same treatment was applied to the plastic parts that required paint removal. See the sequence in the images below: in this case, the piece is alternately left immersed in alcohol and then rubbed with a kitchen paper towel. Repeat this two‑step cycle until the paint disappears completely.
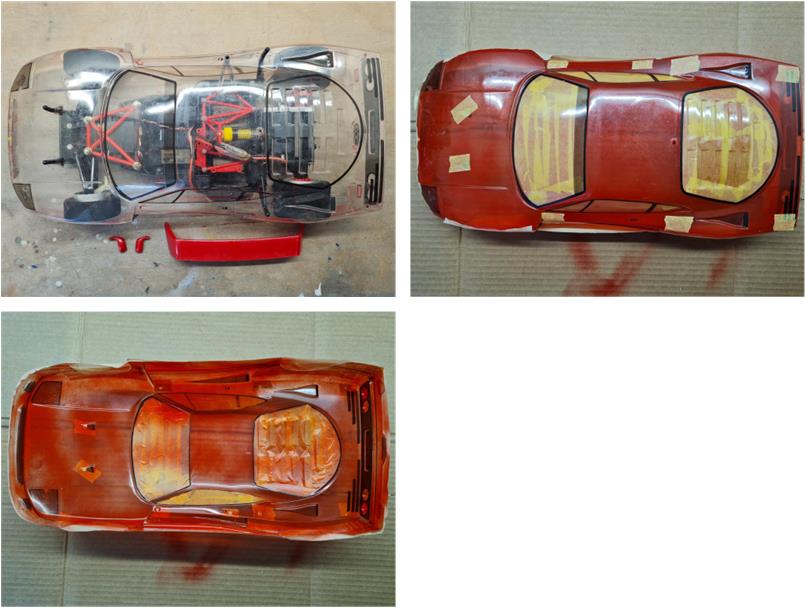
The body shell is now ready for painting and has been mounted on the chassis to verify that everything fits properly (left image, first row). Apply masking to the cockpit windows and close the external holes (for the four body posts, spoiler, mirrors and antenna; right image, first row). Apply a protective strip of painter’s tape along the outside perimeter of the body shell, fully covering the wheel‑arch openings (left image, first row). The restoration plan is to preserve the decals installed by the previous owner and this body shell does not have a protective outer film. The strip of painter’s tape along the perimeter prevents paint from reaching the outside surface and covering the decals. The first coats of PS2 red must be light; it is better to apply several light coats rather than trying to cover the surface immediately.
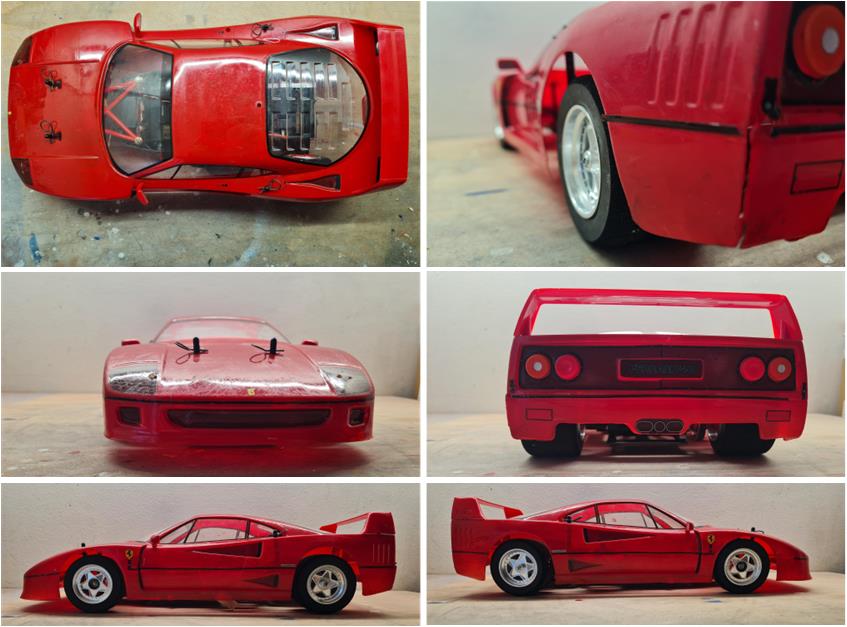
Images of the restored body shell. The crack on the right rear corner (top‑row image on the right) is not very large, and it was left unrepaired as it does not affect the substance of the work. The body shell shows signs of track use on the nose and side panels; repairing the cut would not improve the final result. Images of the body shell without the red styrene accessories. As shown in the images, the alcohol treatment applied from the inside preserved the original decals.
Restored model Images of the restored model.
Tamiya, original figure, box art, guide book and catalogue are of TAMIYA INC, which does not endose or sponsor www.tamiyaclassic.com. Any brands, logos and trademarks represented on this website are the copyright of their respective owners.