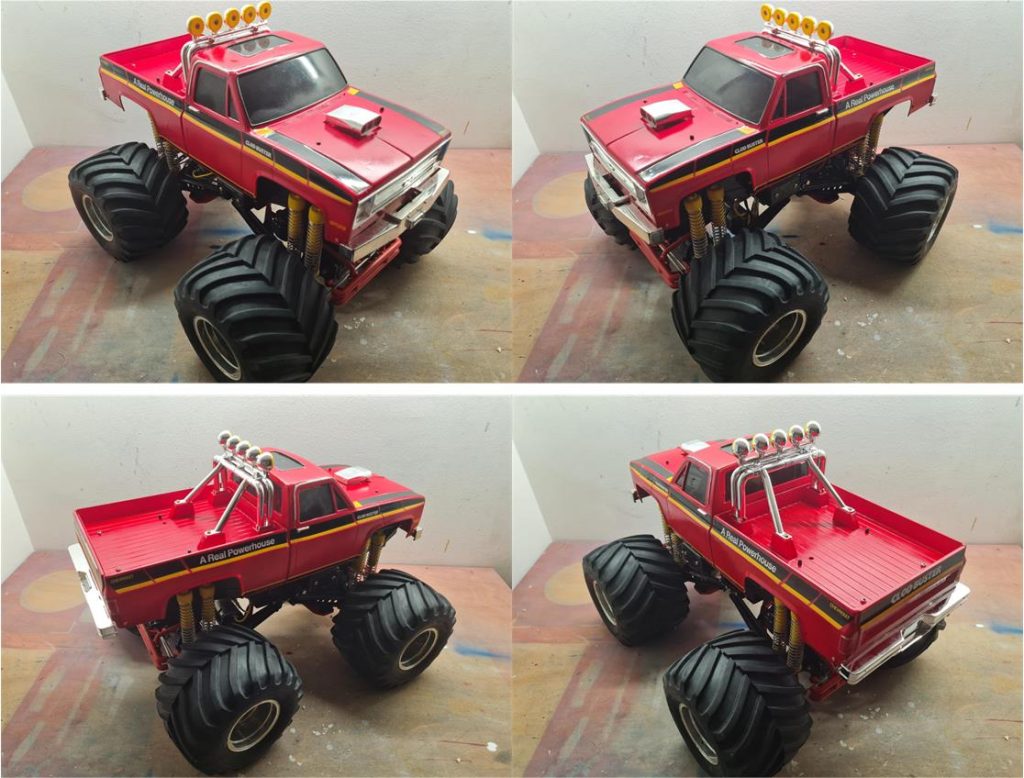
Clod Buster

Model

Tamiya Clod Buster, model number 58065, released in 1987 and available on the market until 2003 Body in styrene Clod chassis

Analysis of the model to be restored

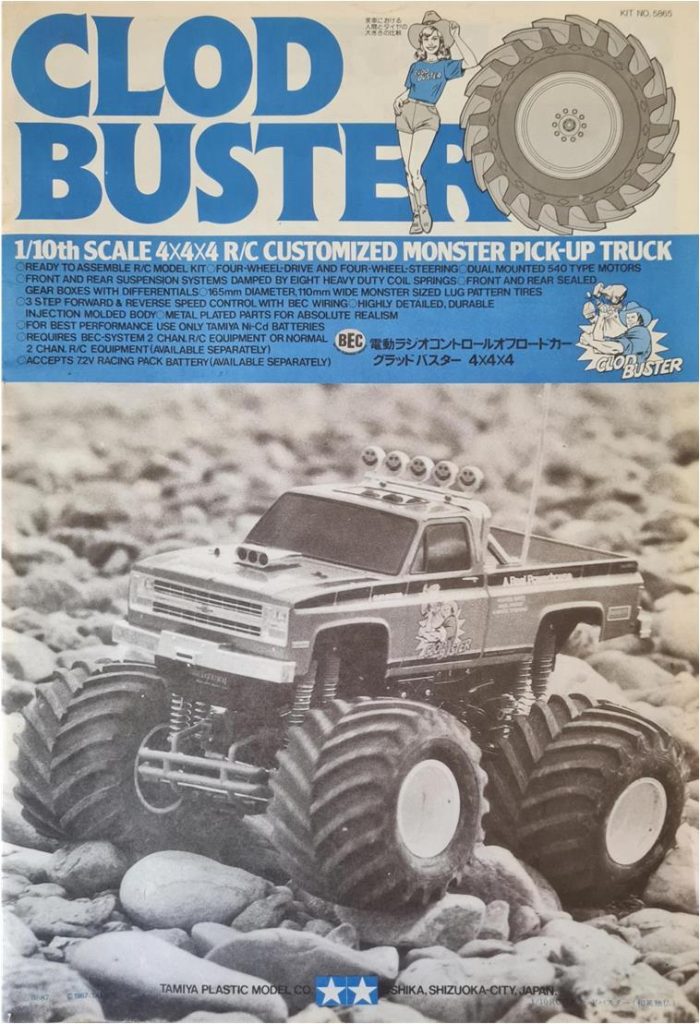
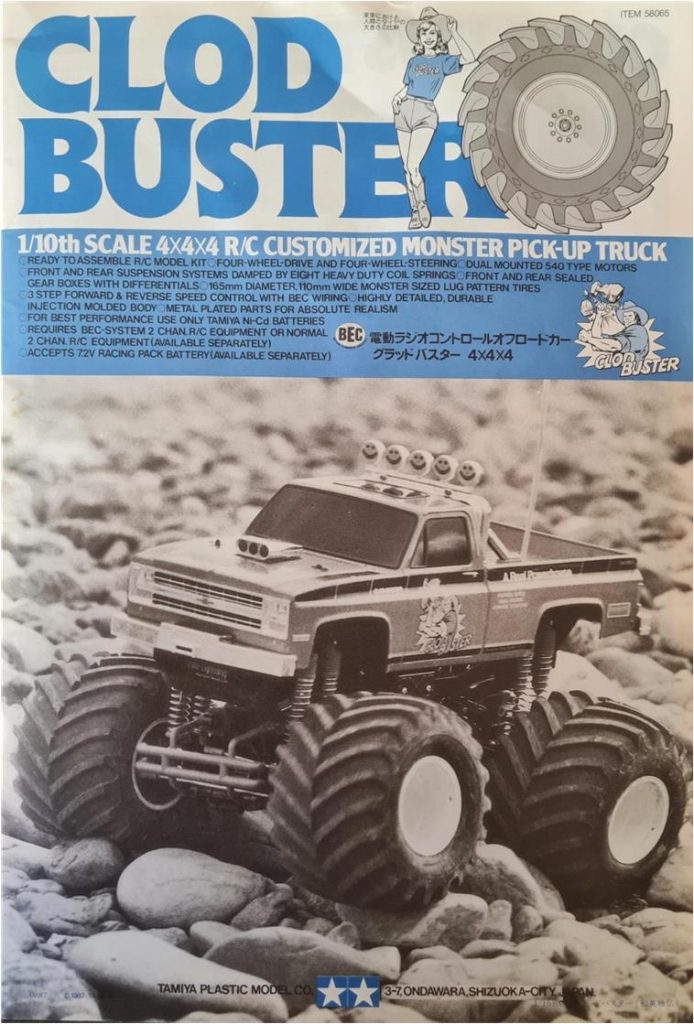
The model purchased during an online auction arrives with two instruction manuals: one for the first version 5865 and one for the second version 58065. The two manuals are identical, but for the models of the first version the body featured, on the grille and on the tailgate of the rear bed, the Chevrolet logo and lettering respectively. It is not possible to know why both versions of the manual are present.

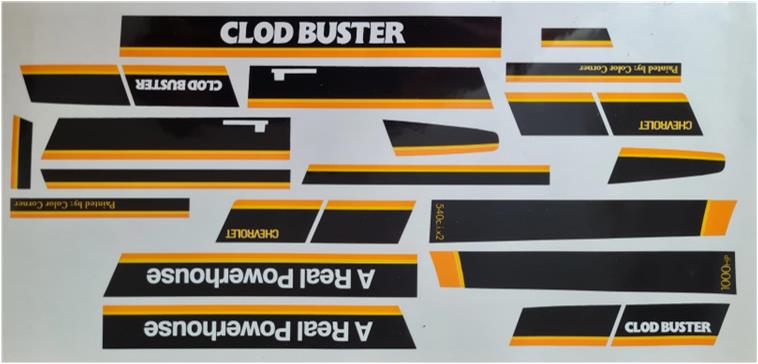
In the lot there is also a sheet of stickers that are a faithful reproduction of the original ones. The quality of the vinyl is very high and the reproductions appear consistent with the original version. The stickers for this model are not very numerous; in fact, the sheet is small. Today (2026) it is impossible to find an original sticker sheet for sale.

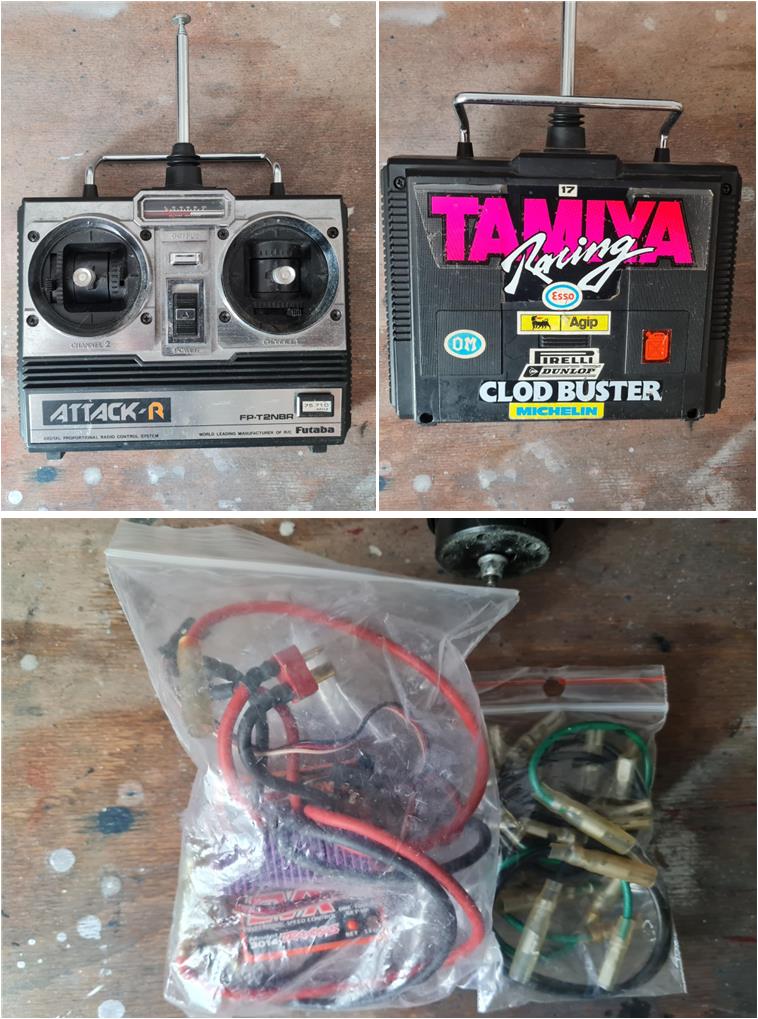
The package also includes the electronic components consisting of the Futaba Attack remote control and an electronic speed controller for managing two electric motors. There is also a bag of new, never‑opened wiring. The remote control has been well kept aesthetically, but it is unusable because battery acid has caused damage in the battery compartment.

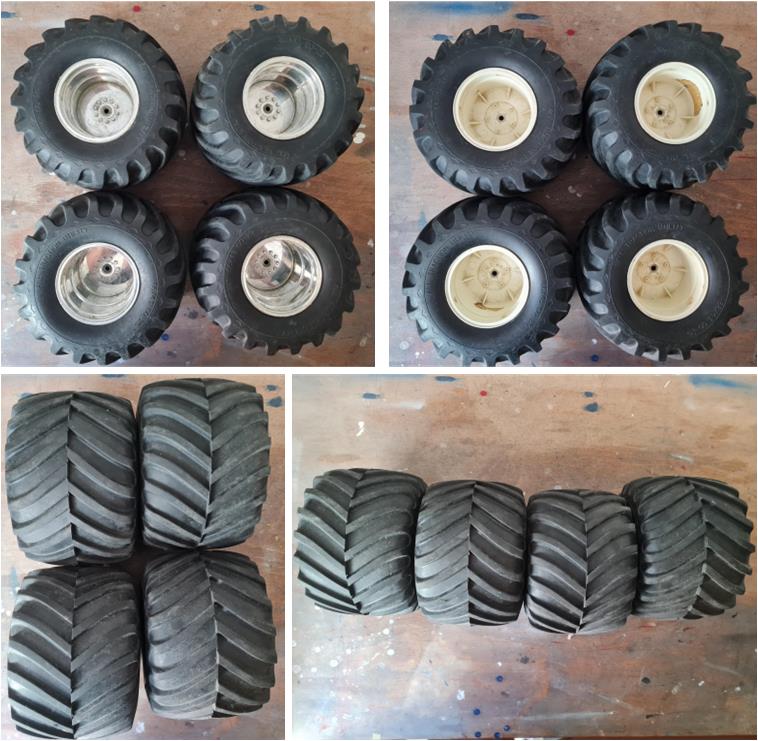
The rims (first row) are in excellent condition both on the outside and inside. The edge shows no impact damage and the chrome finish is perfect. However, they have a chromed outer face, which is typical of the Bullhead version, model number 58089; the original ones are white. The tires are new, with no cuts or tears.

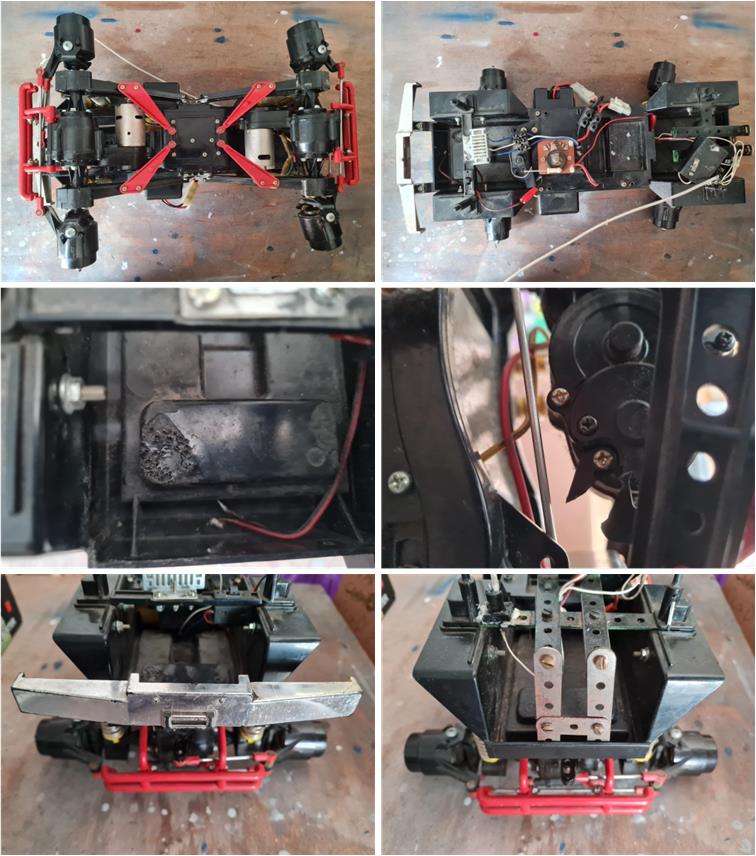
Inspecting the lower section (left of the first row) and the upper section (right of the first row), it is clear that the chassis appears complete in all its parts. The onboard electronics seem in good condition and complete. The wiring has been modified by adding screw connectors, but the mechanical speed controller with resistor is present. In the plastic tub, at the height of the resistor installation, there is damage that appears to have been caused by overheating (image on the left of the second row). An L‑shaped plate that connects the motor section to the suspension arms is broken (image on the right of the second row). The front section (image on the left of the last row) seems in order, while the rear section (image on the right of the last row) is missing the plastic crossmember that connects the two wheel arches. This part has been replaced with perforated metal plates from Meccano (or similar).

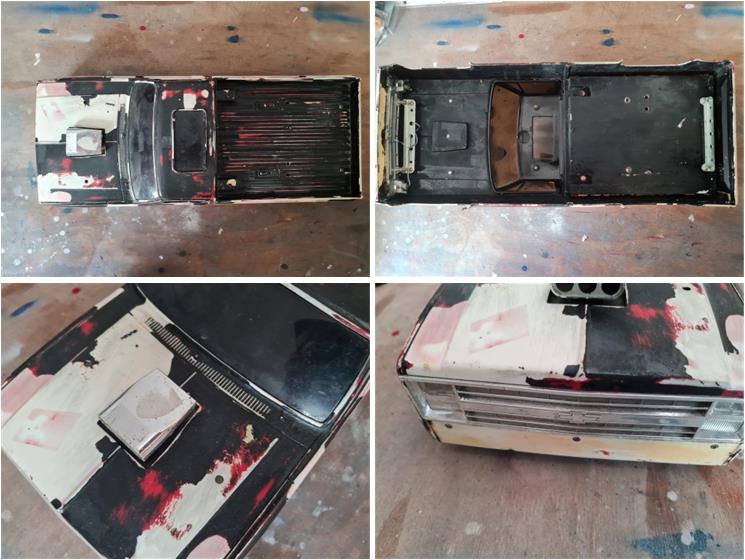
The body is missing the roll bar and the rear bumper, but it is the first version, characterized by the Chevrolet logo on the engine grille and the Chevrolet lettering on the tailgate of the rear bed. The body has certainly seen better days, but it is an excellent starting point for a good restoration. The worn condition of the body explains why the rims are chromed and in excellent shape: the original ones were likely replaced by the previous owner because they were in poor condition. It is equipped with a front lighting system (image on the right of the first row), although the lighting system is not original Tamiya. The chrome parts appear to be in good condition (images of the last row), but the roll bar and the rear bumper are completely missing.

The purpose of this project is to recover all the parts of this model in order to build a chassis as close as possible to the factory specifications of the 1990s. Even if slightly damaged, presumably by the heat from the resistor, the plastic chassis will not be replaced because it is the original one produced in Japan. The body will be restored by trying to recover all the original parts and adding the missing ones (such as the roll bar). The rims will not be touched, only washed; it would be possible to remove the chrome by washing the rims with 90% pure alcohol, but already in the 1990s many people bought the more appealing Bullhead rims to install on the Clod Buster.
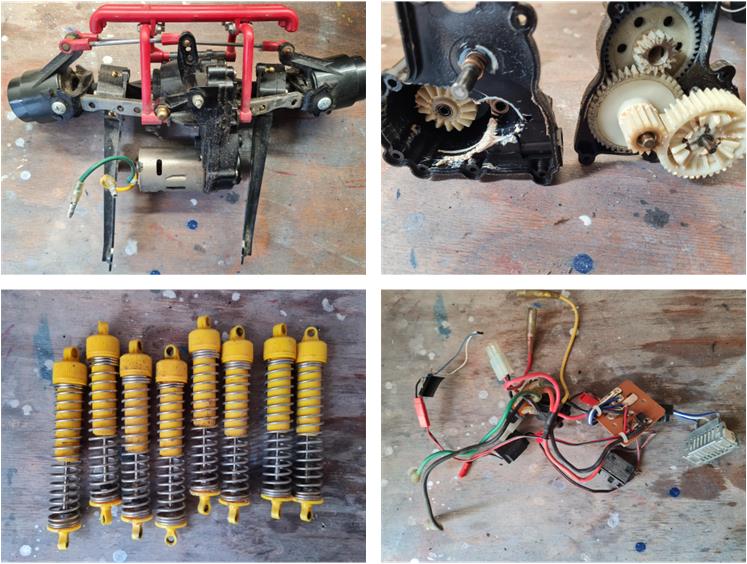
The stock red dampers have been replaced with eight CVA dampers, accessory code 50304, featuring yellow plastic components. This configuration will be retained, as it is an accessory officially listed in the instruction manual.

Chassis restoration

Analysis of the model during disassembly shows that it was used without sparing the mechanics. Many parts are covered in dust and sand (image on the left of the first row), but maintenance was carried out correctly by the previous owner; in fact, there are no broken parts or areas lacking lubrication (image on the right of the first row). The shock absorbers are also in order, though covered by a thin layer of dust similar to sand (image on the left of the second row). The electronics (image on the right of the second row) were revised to manage two batteries and the front lighting system, which was an accessory that became popular in the early 1990s. The lighting system is present as a factory accessory on chassis 959 and was later introduced as an accessory for many other models to be installed at a later time.

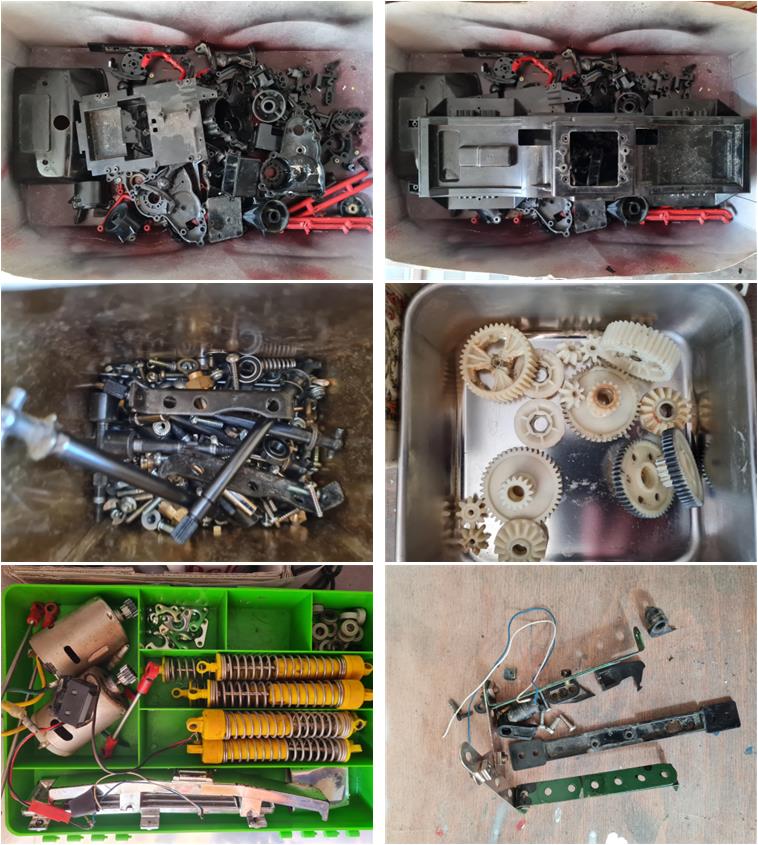
Once the chassis has been disassembled, separate the plastic parts (first row), the metal parts (image on the left of the second row), the gears (image on the right of the second row), the various materials (such as chromed plastic, shock absorbers, motors, electrical components… image on the left of the third row) and the material no longer usable (image on the right of the third row). Wash the plastic parts with hot water and kitchen degreasing soap, removing the most stubborn dirt lodged in the corners with a small brush. Keep the metal parts immersed for one week in diesel fuel. Diesel attacks oxidized areas, grease and dirt, dissolving them. After one week, dry the metal parts in the sun for 4…6 hours; the parts will remain clean and covered by a thin film of oil that protects them from oxidation. Clean the gears with a kitchen paper towel to remove the grease. During these operations, check that each part is intact and original.

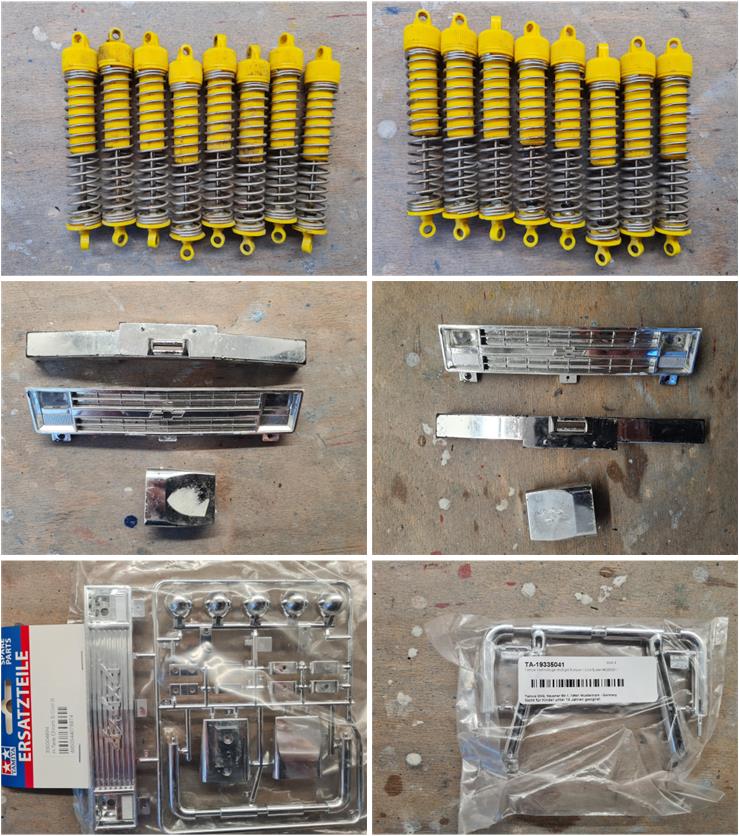
The shock absorbers are in good condition but very dirty (they are yellow, not red; these too are the shock absorbers installed on the Bullhead). A layer of dust completely covers them (image on the left of the first row). Disassemble each shock absorber and clean the surfaces with a kitchen paper towel to mechanically remove the layer of dust (image on the right of the first row). The chromed plastic parts of the body are more delicate than the non‑chromed plastic parts. Treating these parts with a very aggressive kitchen soap could cause the chrome to peel. The parts have aged and show traces of glue from stickers applied by the previous owner (image on the left of the second row). Wash these parts with hot water and a bit of hand soap so as to dissolve the sticker glue and remove the layer of dust (image on the right of the second row). Some chromed parts are missing; today (2026) replacement parts are available on the market because the Clod Buster remains the longest‑running model in Tamiya’s history and is still in production. The roll bar section that includes the lights (image on the left of the first row) is still available under code number 300004894 (part H) and the rear roll bar structure is available under code number 19335041 or 9335041 (a part shared with the Midnight Pumpkin). The difference between the parts available today and those used at the beginning of production in the 1990s lies in the Chevrolet logo, which in the reissue is replaced by the “4x4x4” emblem. In our restoration, all parts with the Chevrolet logo are present, so the replaced or missing parts do not differ from the original ones. Wipe the rims and tires with a kitchen paper towel to remove the layer of dust that has accumulated over time.

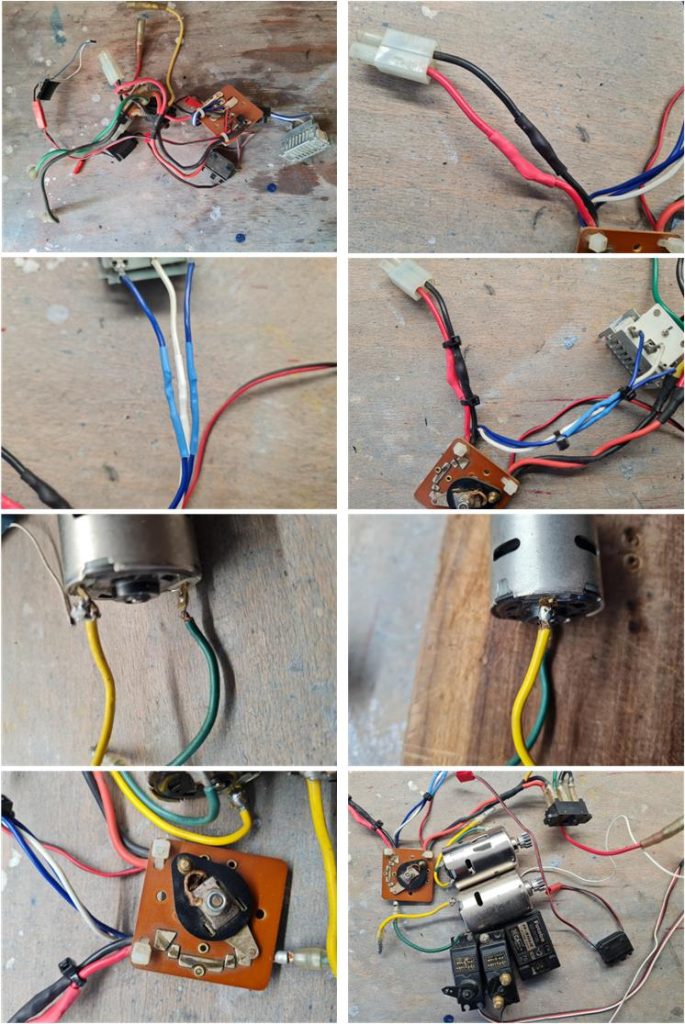
While waiting for the metal parts to finish the diesel treatment, it is possible to overhaul the electrical section, which was extensively modified by the previous owner to add the lighting system and dual battery setup. Remove the screw connectors that were installed on the three wires for the resistor and on the two wires for the dual battery (image on the left of the first row). Solder and install heat‑shrink tubing on the wires, removing the dual battery connector (image on the right of the first row) and respecting the color coding of the resistor wires (image on the left of the second row). To make the work more solid, fasten the wires with a plastic zip tie at each end of the solder joint (image on the right of the second row). The motor soldering is poorly done (image on the left of the third row) and must be redone (image on the right of the third row). Clean the speed controller with a kitchen paper towel soaked in alcohol (image on the left of the last row), as well as the servos, electric motors and the receiver (image on the right of the last row).

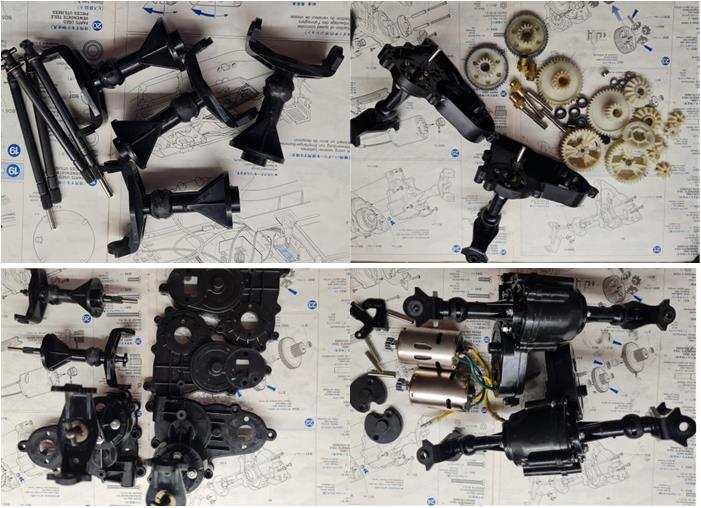
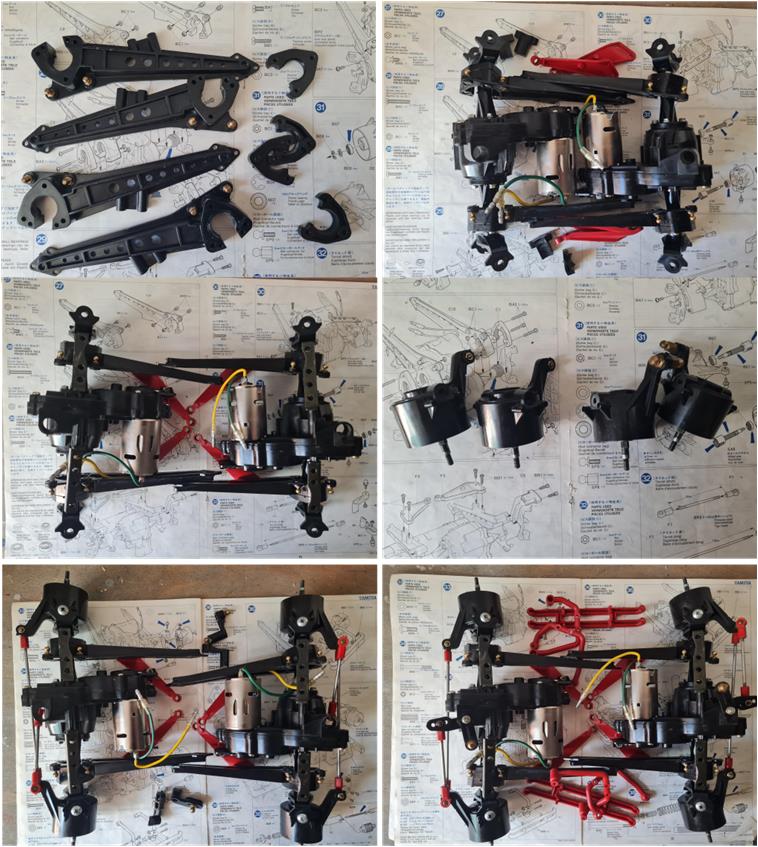
The Clod chassis is one of the largest ever produced by Tamiya, yet it is essentially composed of the two gearbox housings (identical to each other) and the central tub‑shaped chassis. Plastic dominates this design; the construction of the two gearbox housings is relatively complex even though they include the differential, transmission, suspension and electric motor.

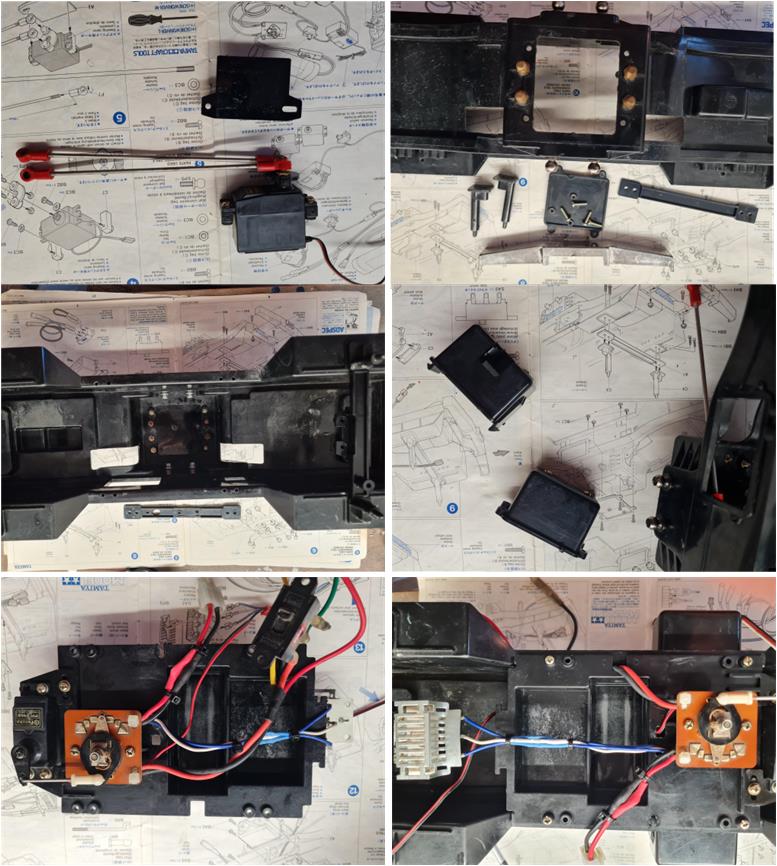
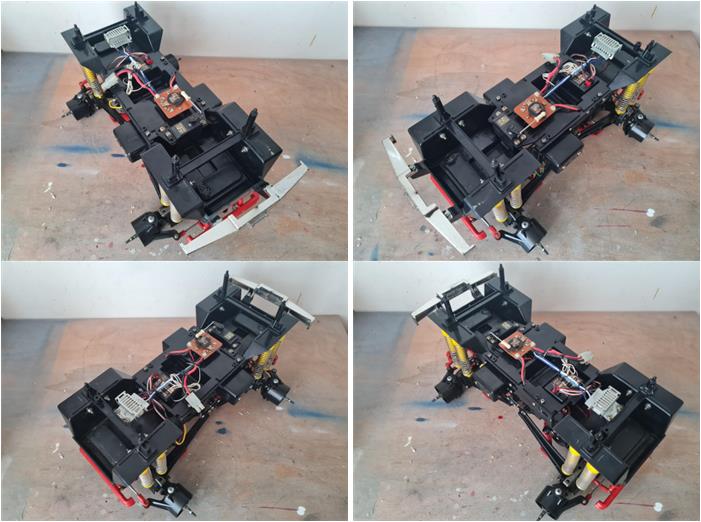
The plastic tub chassis includes the electronics, the battery compartment (image on the right of the second row), the electronics (images in the last row) and the four towers that allow the chassis itself to mate with the body. The electronics differ from the classic setup because they must manage the dual‑motor system, so the mechanical speed controller has two plus two wires for the front and rear motors; additionally, there is a system that allows the use of either a single motor or both together. The speed control electronics and the receiver are installed on the central plate, which in turn is fixed to the tub chassis (image on the left of the last row). Centrally, the servo that manages the steering is installed, featuring a dual linkage system that controls all four wheels in unison (image on the left of the first row).

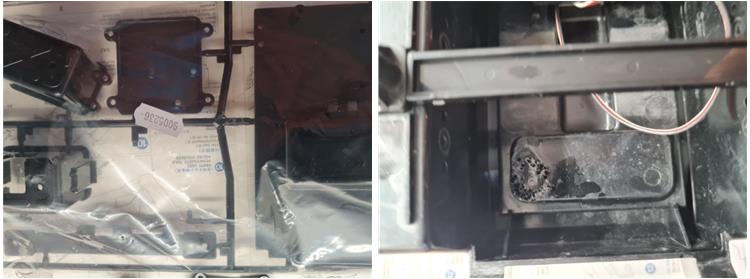
The rear crossmember was missing; this part is included in the mold with code number 19005236, which corresponds to part A.

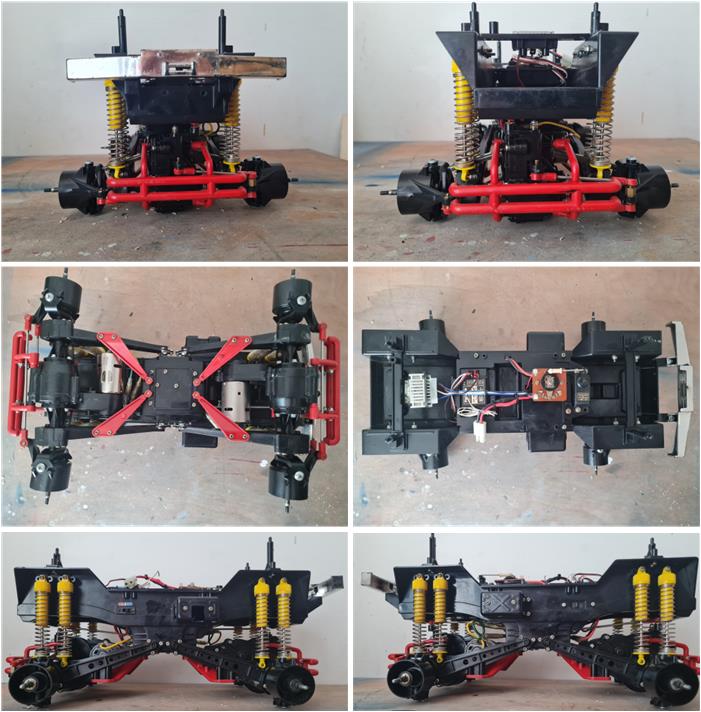
The chassis must be completed by installing the two motor assemblies, the suspension arms (red), the shock absorbers (eight, yellow) and the front and rear bumpers (red).

Images showing the completed chassis.

Body restoration

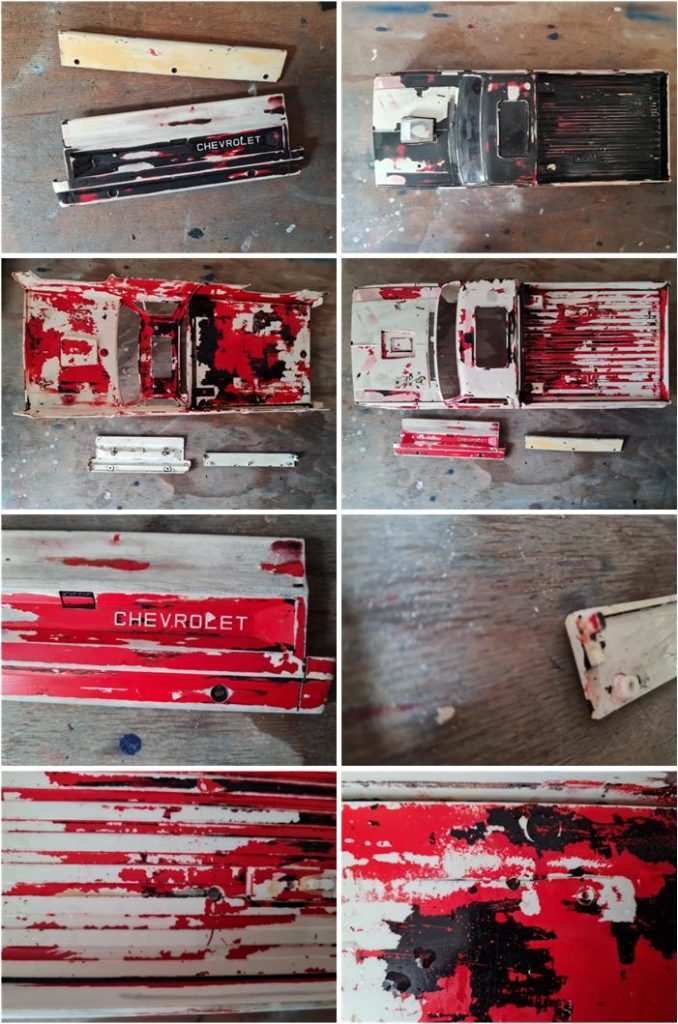
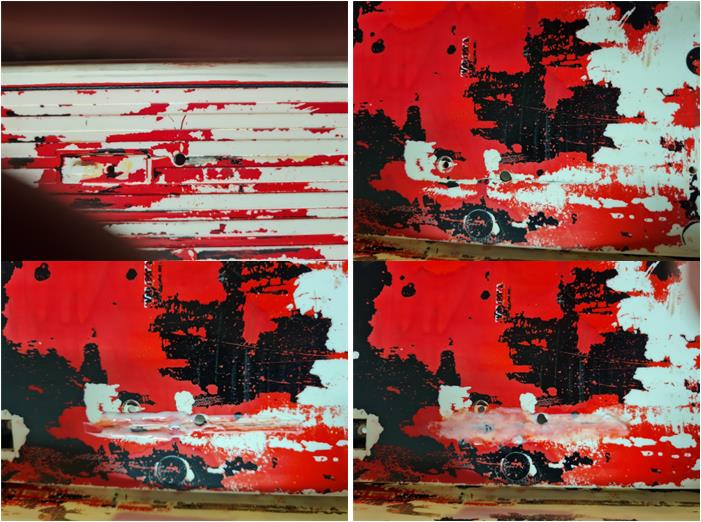
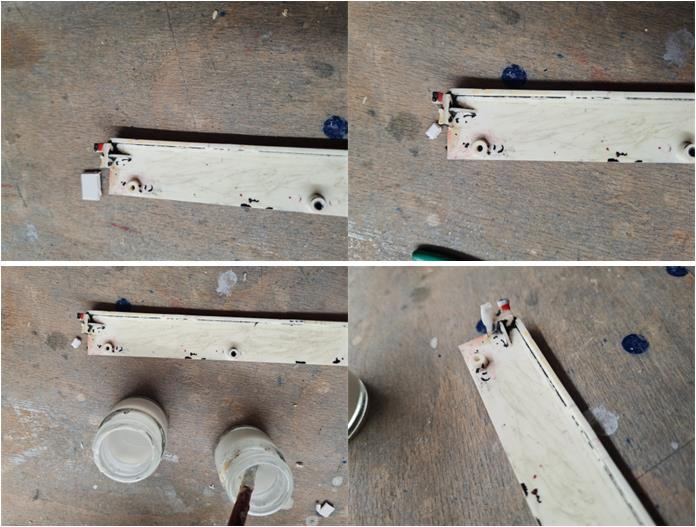
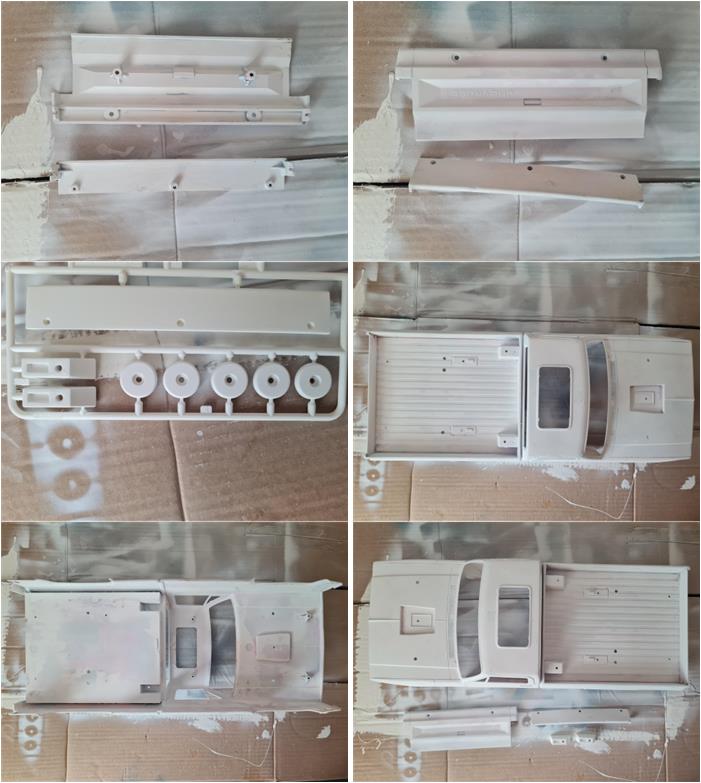
The body was painted first in red and then in black by the previous owner or owners (images in the first row). In both cases no primer was ever applied and today, after many years, the ABS and styrene parts are in a dreadful condition, as shown in the first‑row images. It is necessary to bring the body back to its original state; immerse the body and the styrene parts in pure alcohol at 95% (or higher). Alcohol attacks the paint (it takes at least 3…4 hours before it begins to work), which must then be removed mechanically using latex gloves to protect your hands and kitchen paper to wipe the paint off the surface. Repeat this operation until almost all the paint has been removed, as shown in the second‑row images. If some paint remains stubbornly attached, it is sufficient to leave it, because it will act as a base for the primer itself (second‑row images). The parts are certainly original because they bear the Chevrolet marking (image on the left of the third row). The U‑shaped section of the front part of the body must be repaired (image on the right of the third row), as well as a crack in the bed (image in the fourth row). Repairing these parts is not complicated using the ABS and acetone solution.

There are two points on the body that need to be repaired: the bed, which has a crack at the roll‑bar mounting point and one tab of the front plate. The chassis most likely flipped over after a jump or a turn taken too aggressively. When it overturned, the roll bar (which is not present in the purchased lot) must have been damaged and the body bed cracked exactly where the roll bar attaches to the body. The break in the bed is only a fracture and is difficult to spot. Use the more liquid ABS–acetone solution so it can penetrate the break and weld the two edges together. After applying the solution with a brush, flex the bed slightly so that the mixture can penetrate the crack more effectively. After one day, work the surface with 1000‑grit sandpaper and then 1500‑grit. Use the wet‑sanding technique.

The break of one tab on the front plate is presumably due to a frontal impact. Use the denser ABS–acetone solution to bond a rectangular piece of ABS cut from a 2 mm sheet. This rectangle replaces the missing tab. The rectangle is cut from the sheet using the intact tab as a template. Apply a drop of the dense solution at the point where the tab must be fixed. The dense solution stays exactly where it is applied. Place the new tab onto the drop and wait for the solution to solidify (at least 24 hours). Work the area with a metal file to remove excess material. Follow the guidelines of this section.

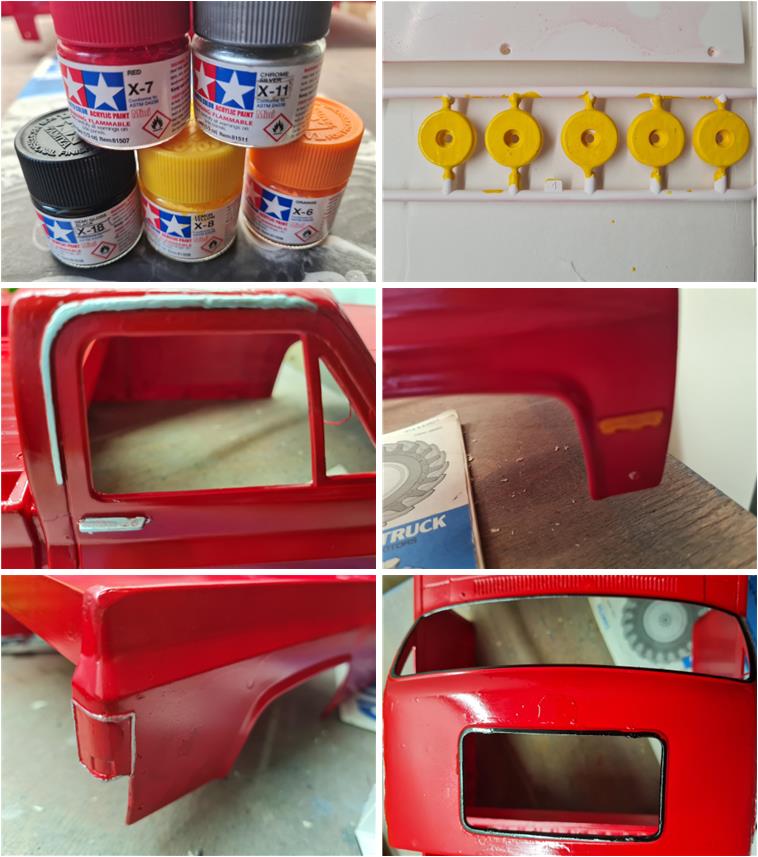
Apply several coats of fine white primer, code number 87044, to the body—both on the inside and the outside—on the tailgate of the bed, on the two roll‑bar pedestals, on the front plate and on the cups of the five roll‑bar lights. On the tailgate the Chevrolet logo is clearly visible; this logo is unique to the first version of the body. After the first months of production (due to logo‑ownership issues) it was replaced by the “4x4x4” marking. The two roll‑bar pedestals and the five light cups are missing from the purchased lot; these parts are included in set number 10005970, identified as G‑Parts (image on the left of the second row).

Apply several light coats of fine white primer, code number 87044, to the body and to the accessory parts so that they are completely covered by the white primer; any remaining old paint must shift toward white. Apply several light coats of red TS8 to the inside and outside of the body. It is now possible to apply the colors used to finish the Clod Buster:

– yellow X8 on the roll‑bar light cups (image on the right of the first row),
– orange X6 on the front side indicators (image on the right of the second row),
– metallic grey X11 on the handle, on the roof drip rail and on the outline of the two rear lights (image on the left of the second and third row),
– rubber black X18 on the sunroof seal and the windshield seal (image on the right of the third row) and
– red X7 for the finishing touches, as it is identical to TS8.

It is now possible to install the radiator, the roll bar, and the tailgate to complete the body. The final operation is to apply the decals, and the body is ready to be mounted onto the chassis.
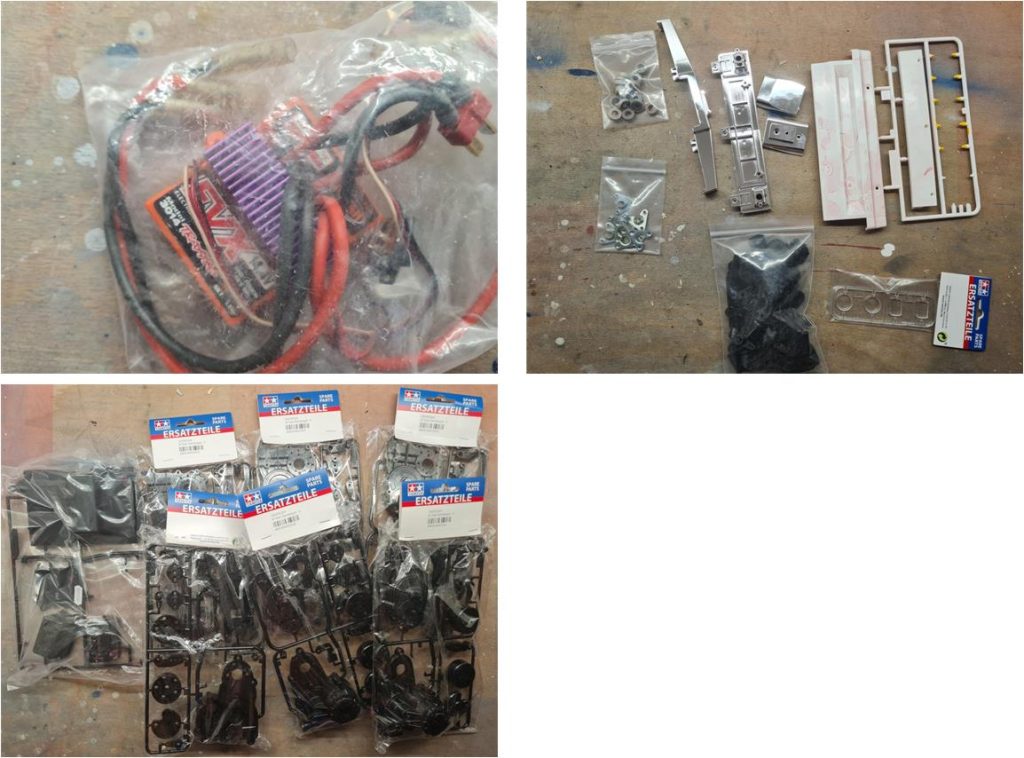
These are the components that remained unused in this restoration: the electronic speed controller with dual‑motor speed control (image on the left of the first row), several optional body accessories (image on the right of the second row), and some chassis parts (image in the second row).

Restored model

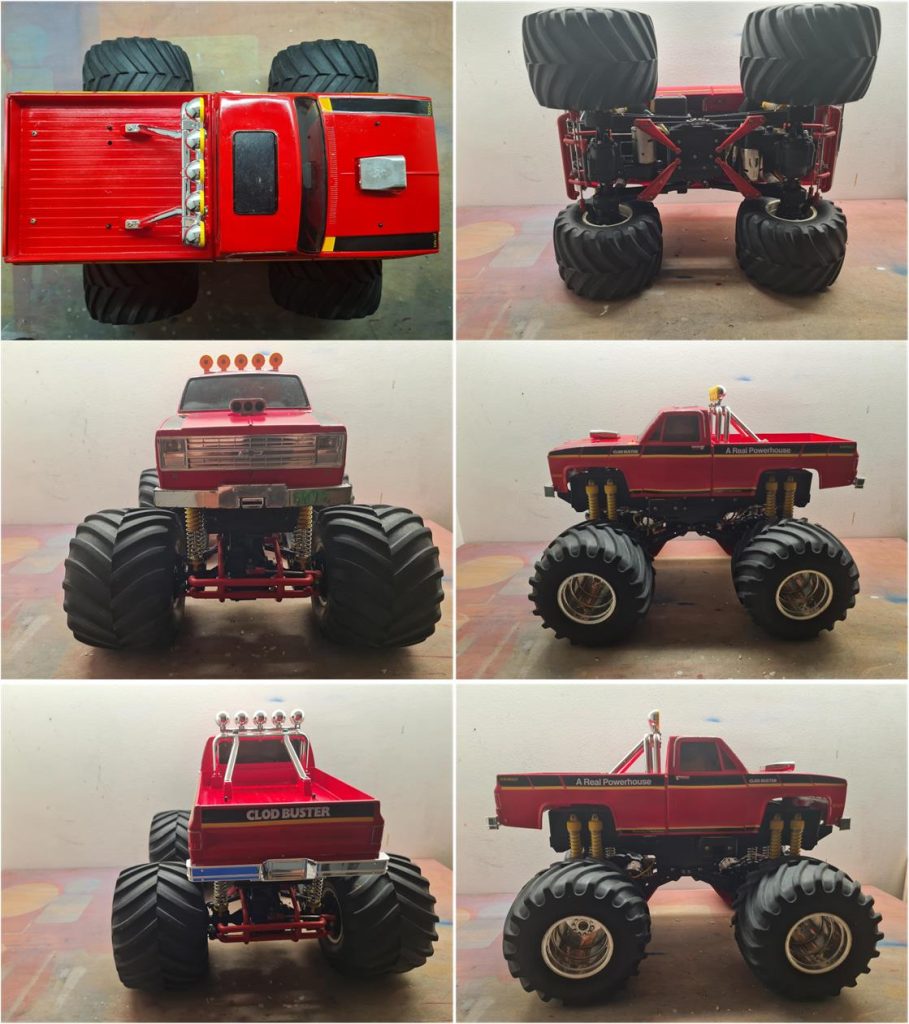
Images showing the completed model.

Tamiya, original figure, box art, guide book and catalogue are of TAMIYA INC, which does not endose or sponsor www.tamiyaclassic.com. Any brands, logos and trademarks represented on this website are the copyright of their respective owners.