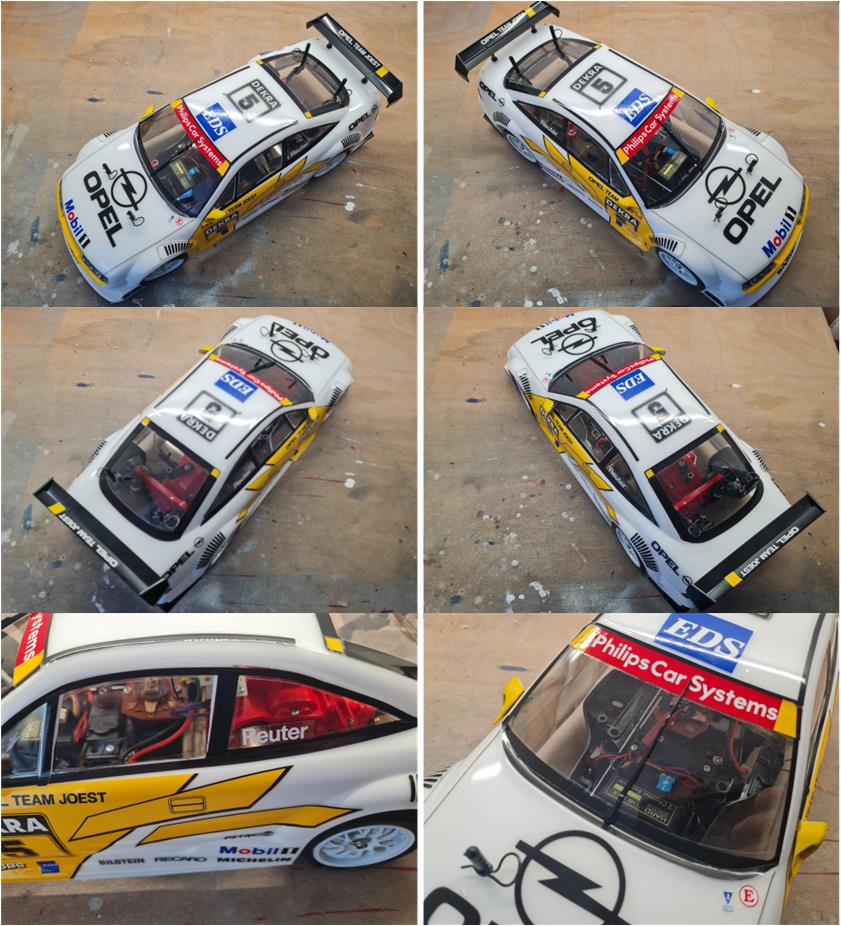
Model Tamiya Opel Calibra V6 DTM, model number 58150, released in 1995 and available on the market until 1996. Lexan body; rear wing, front wiper, driver‑side mirror and passenger‑side mirror in black styrene. TA‑02 chassis. From 1994 to 1996, the real racing car that inspired this model competed in the touring car championship; the race car derives from the road‑going Opel Calibra, the coupé of the German manufacturer. The race version is equipped with:
– a 2.5‑liter 75° V6 engine modified by Cosworth engineers, delivering by the end of the 1996 season a maximum output of 500 hp at 13,000 rpm. The engine was developed starting from the unit used in the Opel Monterey, a calm off‑road vehicle, – four‑wheel drive, – electronics that integrate the management of braking system, suspension and traction, – semi‑automatic gearbox with steering‑wheel paddles (like the F1 cars of that era) and – refined aerodynamics developed after more than 200 hours of wind‑tunnel work. The Calibra’s advantage is racing against the Mercedes C‑Class and the Alfa 155. Both competitors are standard sedans with greater ground clearance, making it harder to reduce drag because of their less efficient aerodynamics.
The version chosen by Tamiya for model 58150 is the one raced by the Joest Racing team, which competed in 1995–96 in the ITC (International Touring Car Championship). In 1996, the German DTM championship changed its name to ITC because some races were held outside Germany. Joest Racing was one of the three official teams together with Team Rosberg and Zakspeed. The Calibra won the title in 1996 with Manuel Reuter driving the black‑and‑white Cliff‑sponsored car. The constructors’ title was decided at the final race in Japan, with Opel scoring 349 points and narrowly beating Alfa Romeo and Mercedes‑Benz, which finished with 340 and 305 points respectively. The Opel Calibra drivers achieved 19 podiums in 26 races, with 9 wins shared among 3 drivers: 4 wins for Klaus Ludwig (Zakspeed), 3 wins for Manuel Reuter (Joest) and 2 wins for Strietzel Stuck (Rosberg).
Project
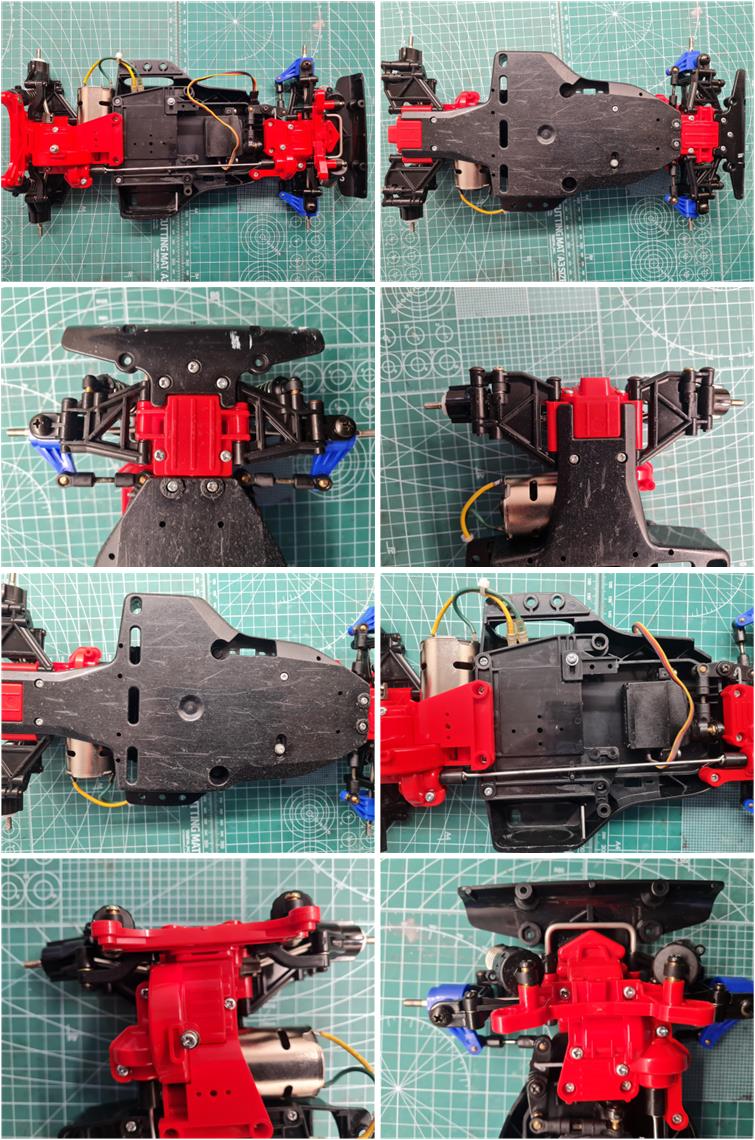
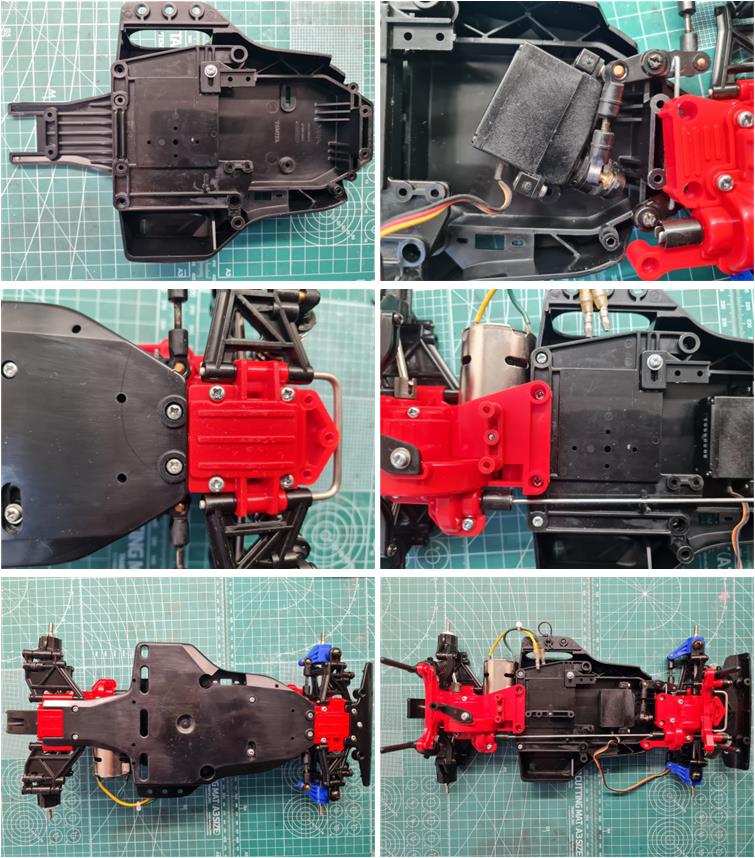
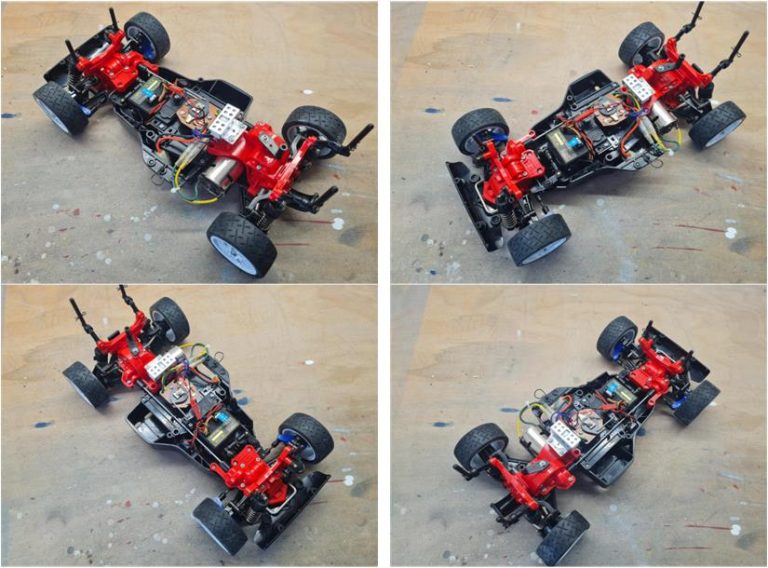
On online auction platforms it was possible to source this TA02 chassis. The chassis appears to have been used, but only for a short time, as the marks on the bathtub‑style plastic tub are relatively few and shallow. All other parts that may come into contact with the ground during use appear to be in good condition with no impact marks: front gearbox housing and lower section of the rear gearbox (second‑row images), lower suspension arms and front bumper. A visual inspection of the other parts does not reveal anything noteworthy except for the absence of the components used to mount the mechanical speed controller. This part is available on the workshop shelves.
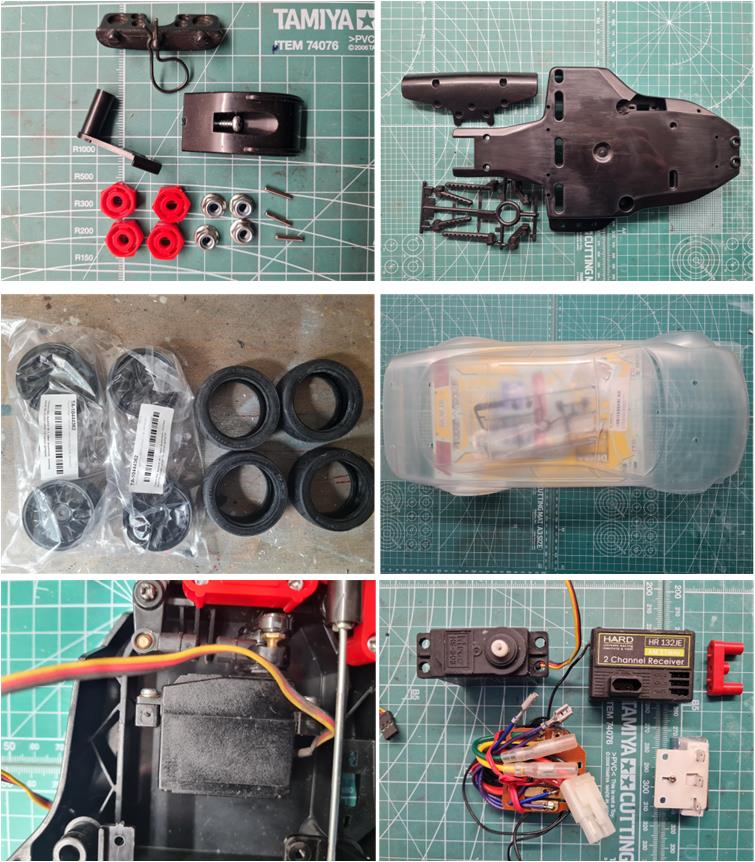
Along with the chassis, the following items are available:
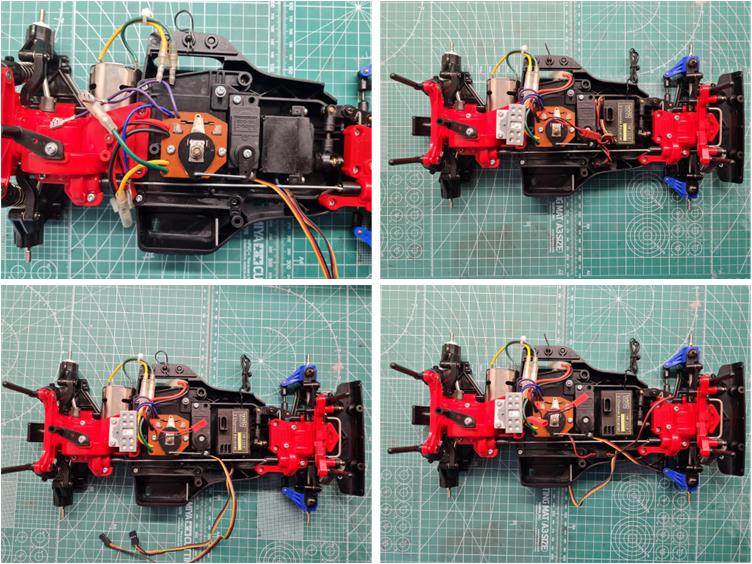
– plastic parts for securing the radio antenna, battery holder, four wheel hexes, three hex pins (the fourth is available on the workshop shelves) and the rear bumper (image on the left of the first row), – new TA02 chassis tub, which today (2026) can be found on the market under code number 19335609, new front bumper and suspension towers (image on the right of the first row), – four rims, set number 10444362 (they are black, whereas the factory‑supplied version is white) and four tires, set number 50810, described as “racing semi slick tyre” (image on the left of the second row), – body complete with decals and black styrene parts (image on the right of the second row). It is not possible to determine whether this body is the original one from set 58150 or the one later produced by Tamiya for set number 58188 (Opel Calibra Cliff with TA03F chassis), set number 58701 (Opel Calibra Cliff with TT01 Type‑E chassis), set number 47461 (Opel Calibra V6 with factory‑assembled TA02 chassis), or set number 84235 (Opel Calibra V6 DTM with factory‑assembled TT01 Type‑E chassis). The decals are also shared among the various Opel Calibra V6 DTM models. electronics include the steering servo, the servo for the mechanical speed controller, the mechanical speed controller itself, the power resistor and the receiver (images in the last row).
The goal of this restoration is similar to that of the Alfa Romeo 155 Ti V6 DTM model number 58128with plastic chassis: to return the model to factory condition without adding any accessories.
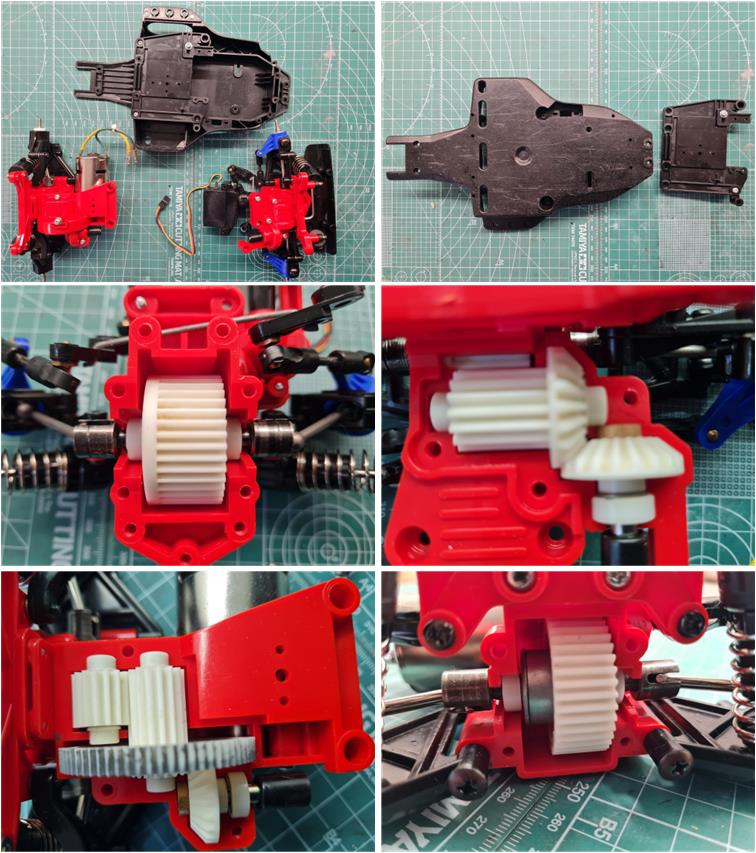
Chassis restoration By examining the assembled chassis, only one conclusion can be reached: the parts are almost all new and the worn ones can be replaced quickly. Opening the front and rear gearbox housings clearly shows that the gears are in excellent condition; even the bushings are new and appear to have never been used. The setup matches the original bill of materials, with a front gear differential and a rear ball differential. The only parts that need replacement are the central bathtub‑style plastic chassis and the upper deck of the central chassis (image on the right of the first row).
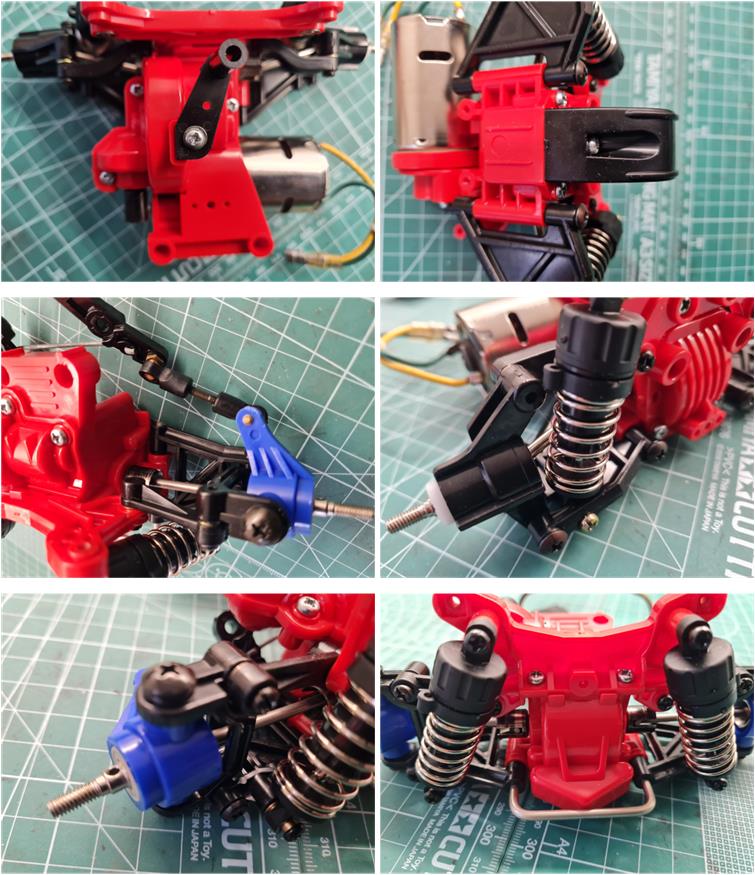
The suspension arms and steering system are in perfect condition. The black CVA plastic dampers are in excellent shape, as if they had been assembled today. The circular double‑tower motor mount plate that secures the electric motor to the rear gearbox is intact. All plastic parts show no visible damage or scratches. The motor appears to be new and even the yellow and green wires show no signs of wear.
Once the front gearbox, rear gearbox, steering system and front and rear suspensions have been serviced, it becomes possible to reassemble the chassis. The central plastic tub is new, a condition that matches perfectly with the front and rear gearboxes. Even to the touch, the plastic parts feel as if they have just come out of the factory. If you want to continue with the next section, you can go ahead, or choose whether to focus next on the chassis assembly or on the body.
The electronics match the basic factory configuration: a mechanical speed controller and two servos, managed by the electronic receiver. The chassis has been assembled with the black plastic mount installed in the center to hold the speed controller and the red plastic mount installed on the rear gearbox to hold the power resistor.
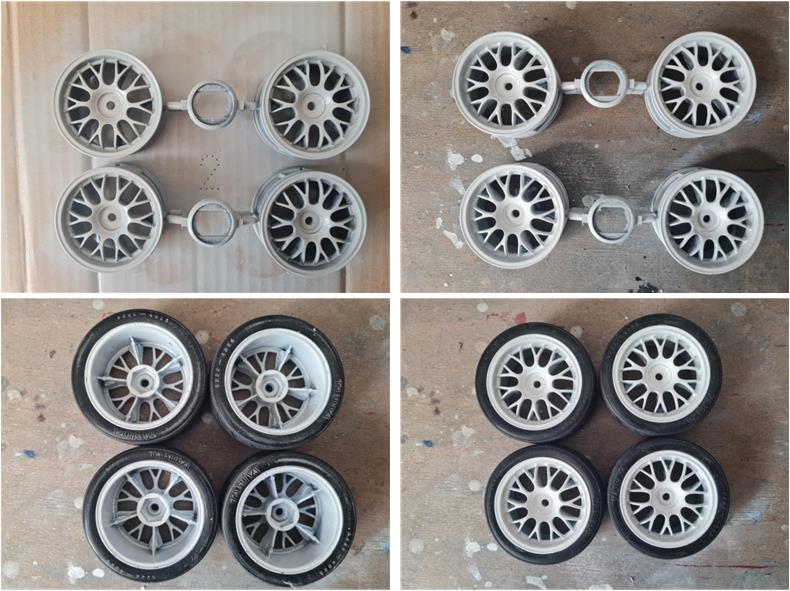
The black rims must be painted white; the first step is to prepare the surfaces by applying two or more coats of fine grey primer. This primer is stronger and more impact‑resistant than the white one. Once the primer has been applied, the white TS26 “Pure White” can be sprayed on. Since the driver‑side and passenger‑side mirrors need to be painted yellow, this is a good opportunity to apply two or three coats of primer to these parts as well.
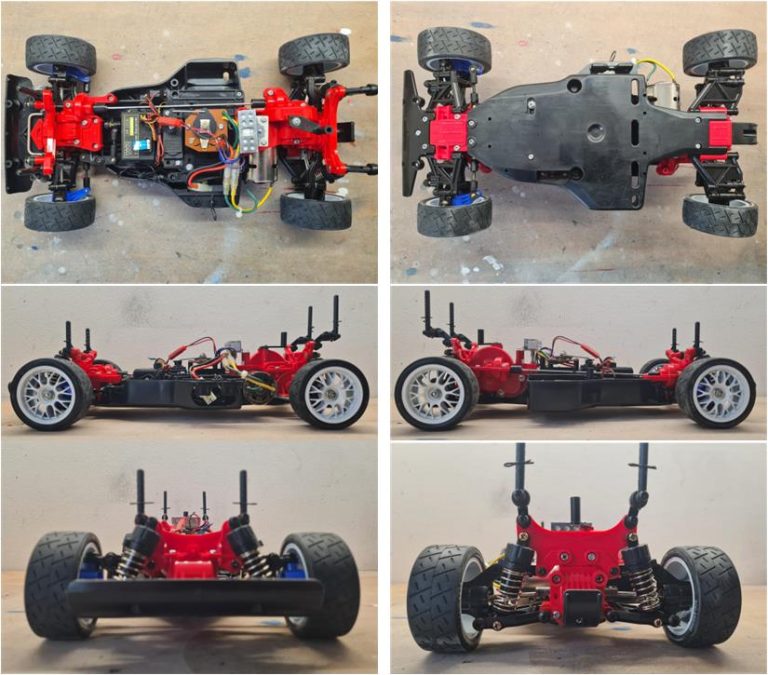
Images showing the completed chassis.
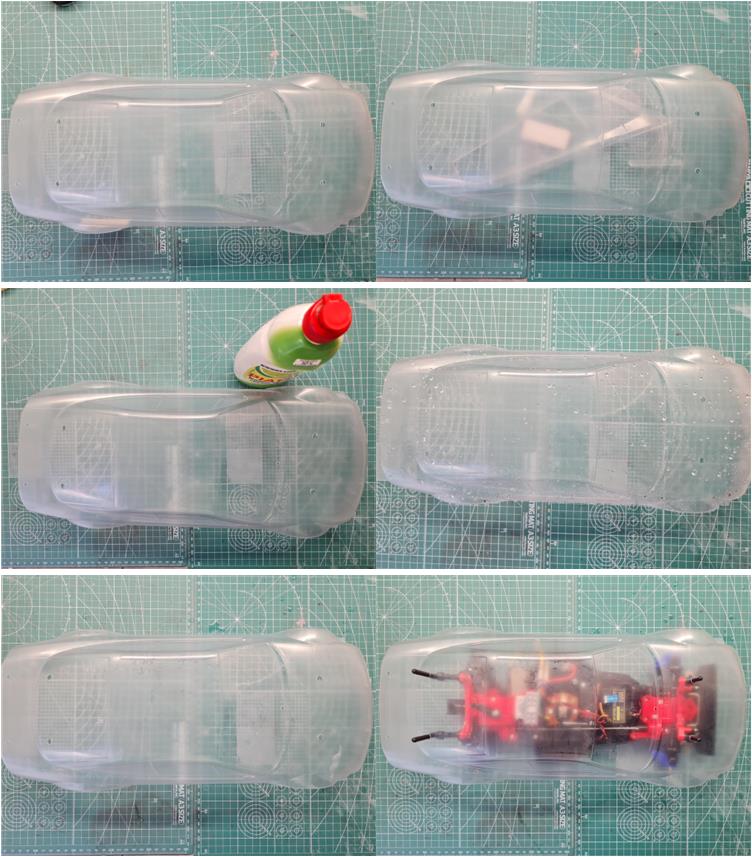
Body The body is new, so the operation to perform is trimming the excess material with long‑blade scissors (image on the right of the first row). The wheel‑arch openings are already cut at the factory. Avoid sharp corners; try to round every line with curves to prevent stress points that could cause cracks in the event of an impact. Remove the residue left by the Lexan forming process: oil. Wash the inside of the body with hot water and soap (second‑row images, left before washing and right after washing). Once finished, the body can be test‑fitted onto the chassis (image on the right of the last row).
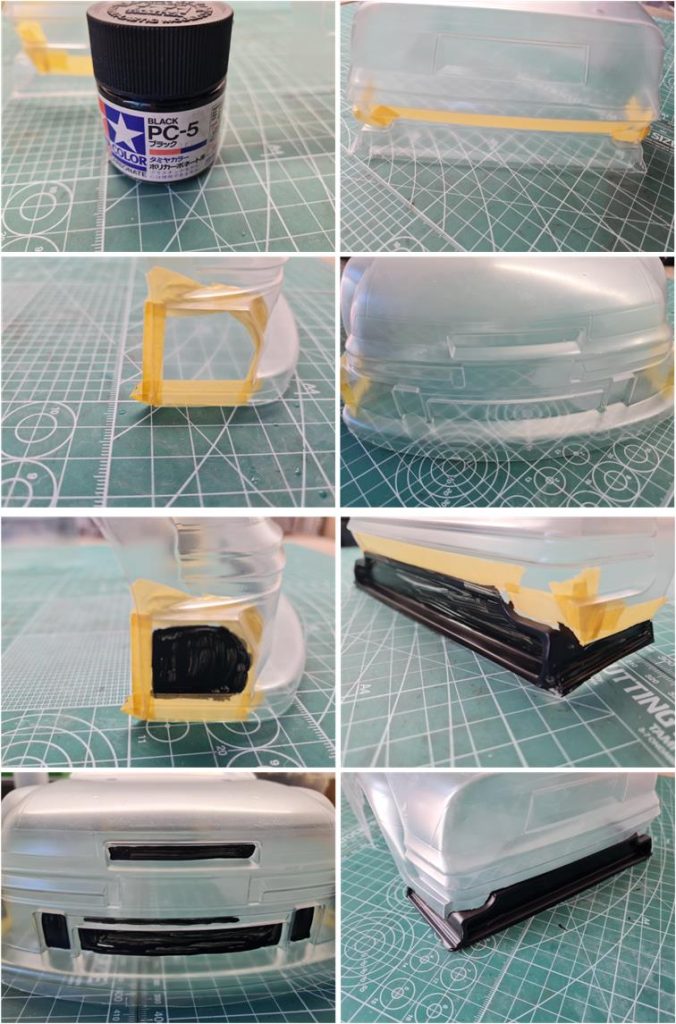
Based on the experience with the Alfa 155 DTM body, for the black areas representing the air intakes it is better to apply PC‑5 black paint rather than using black stickers. The air intakes on this model are different. The rear section (image on the right of the first row) and the two front side intakes (image on the left of the second row) can be outlined with masking tape. The front air intakes are recessed and extremely small, so masking is not possible (image on the right of the second row). Apply two or more coats of paint (third‑row image). Then remove the masking where present (image on the right of the fourth row); the front section (image on the left of the fourth row) had no masking, but the parts are raised and easy to paint.
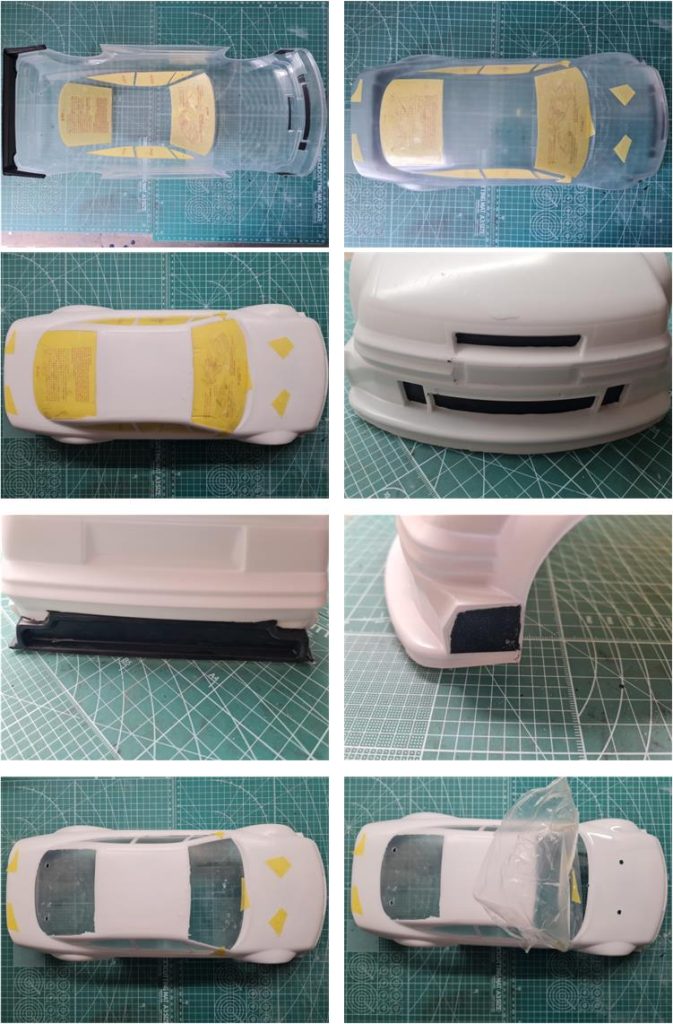
The sticker sheet includes the masking for the interior windows of the cockpit: two large masks for the windshield and rear window and three plus three masks for the side windows. Seal with masking tape the four holes for the body‑mount posts, the two holes for the rear spoiler, the hole for the driver‑side mirror and the hole for the passenger‑side mirror. Apply multiple coats of PS1 white paint from the inside. The first two or three coats should be light, then increase the thickness of the following coats. Once the paint has been applied, remove the outer transparent film and all masking (images in the last row).
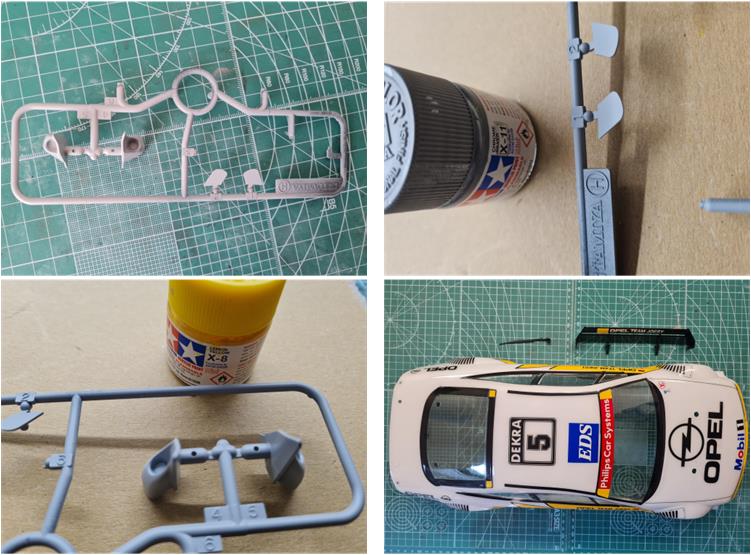
The black styrene parts must be prepared for painting by applying two or more coats of fine grey primer (image on the left of the first row). Apply two coats of X11 grey to the right and left mirrors (image on the right of the first row) and X8 yellow to the outer shells (image on the left of the second row) of the driver‑side and passenger‑side mirrors. The decals can now be applied to the body, after which the body can be completed with the rear‑view mirrors, central windshield wiper and rear spoiler.
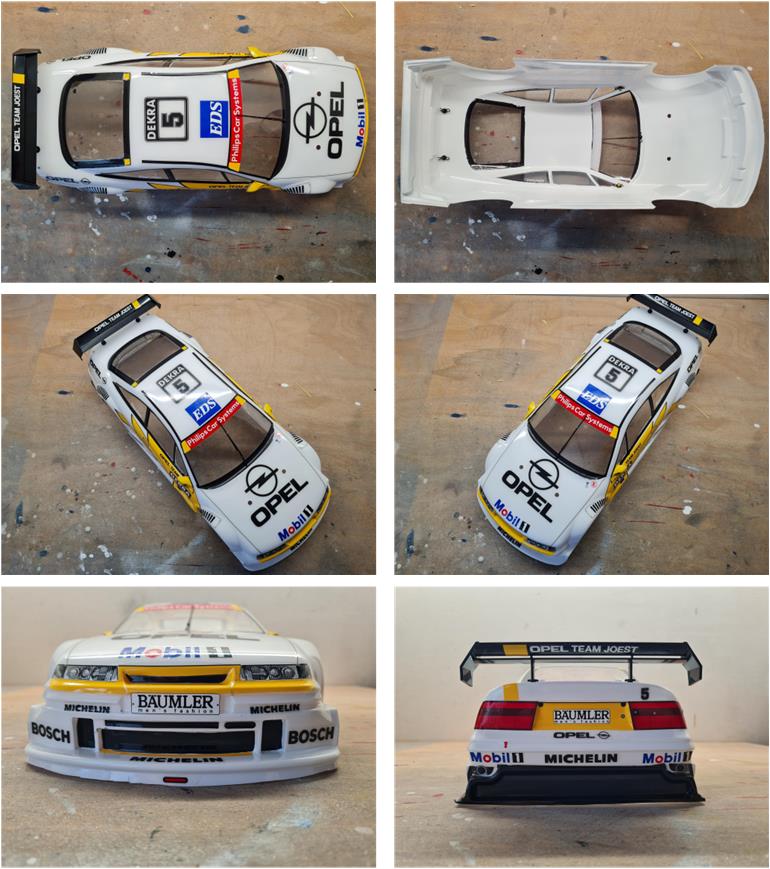
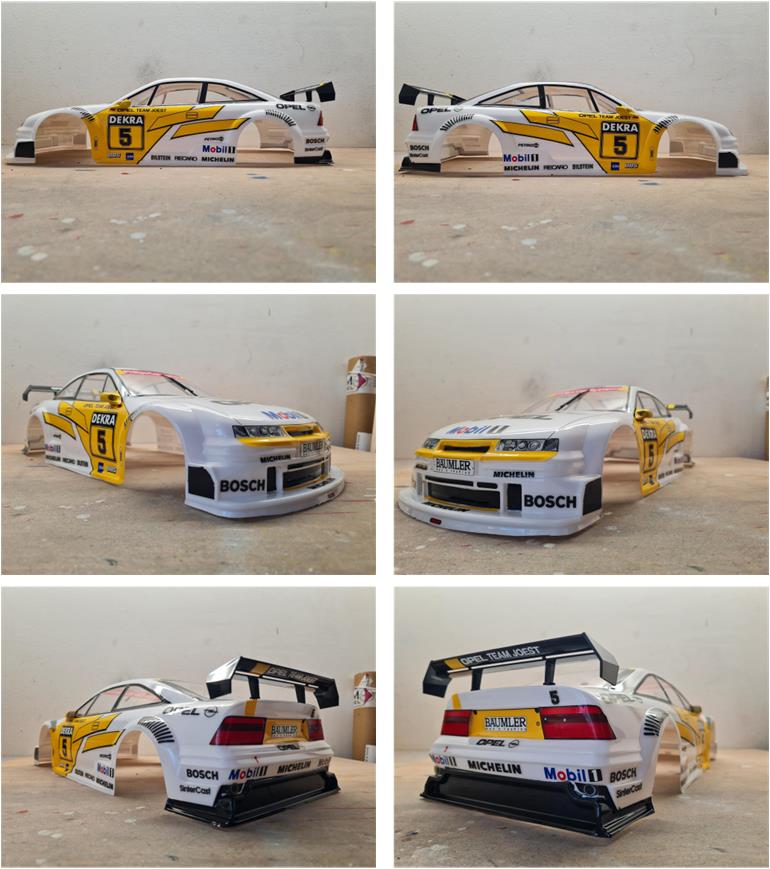
Images showing the completed body.
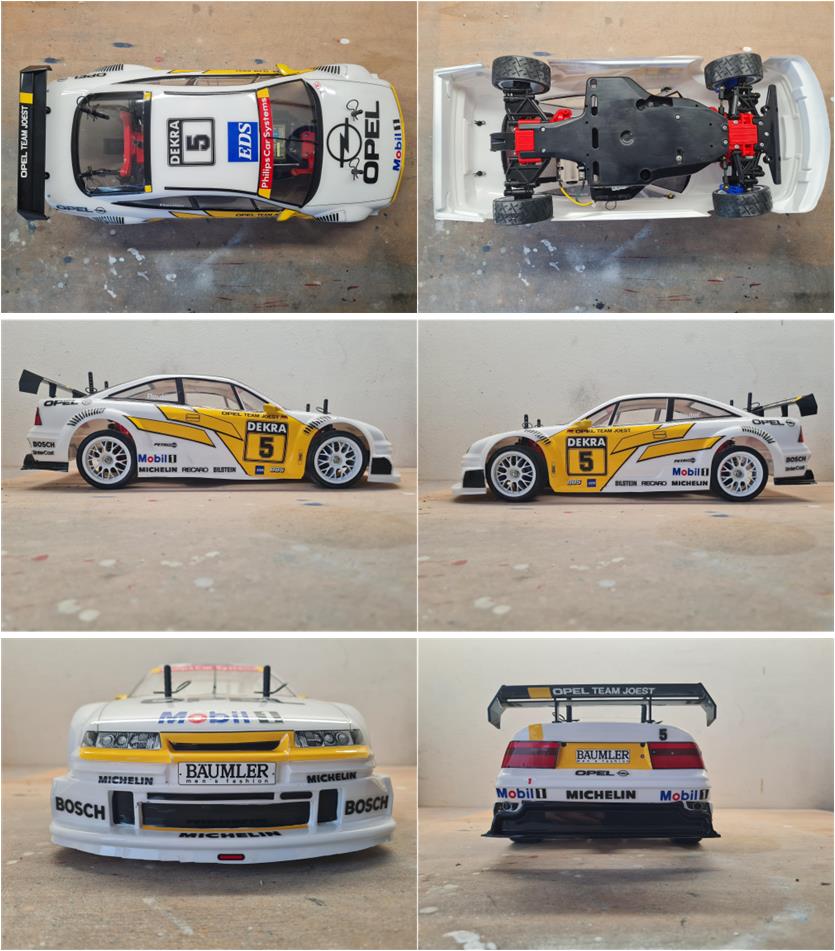
Restored model Images showing the completed model.
Update
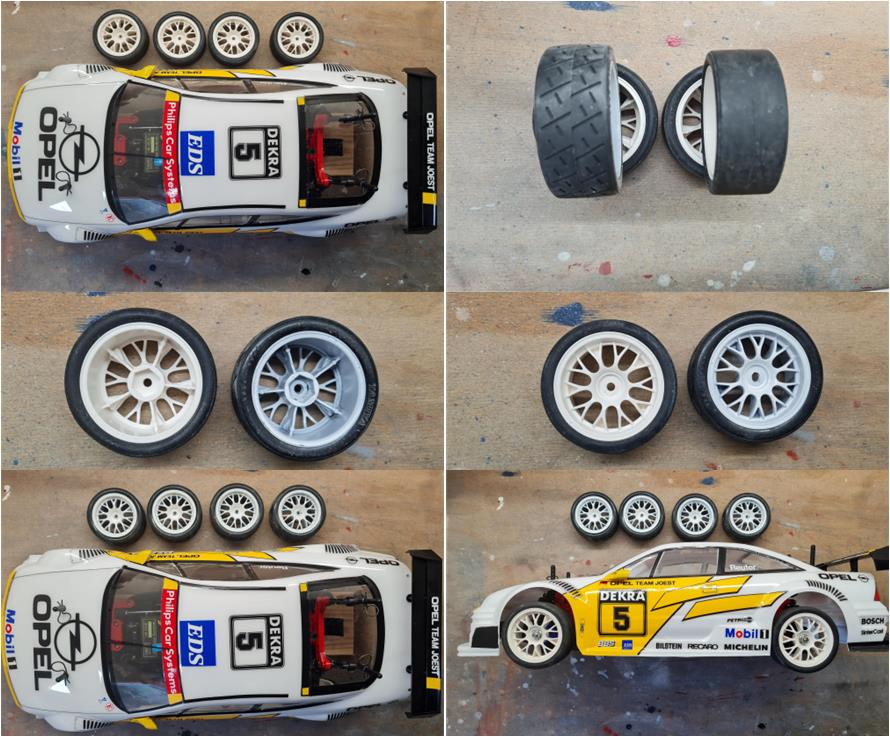
Four white plastic rims (left image in the first row) complete with tires have been found to replace the black plastic rims that had been painted white. The tires also change, switching from semi‑slick to slick (right image in the first row). The white plastic rims (left in the second‑row images) have a different color appearance compared to the black plastic rims painted white (right in the second‑row images).
Tamiya, original figure, box art, guide book and catalogue are of TAMIYA INC, which does not endose or sponsor www.tamiyaclassic.com. Any brands, logos and trademarks represented on this website are the copyright of their respective owners.