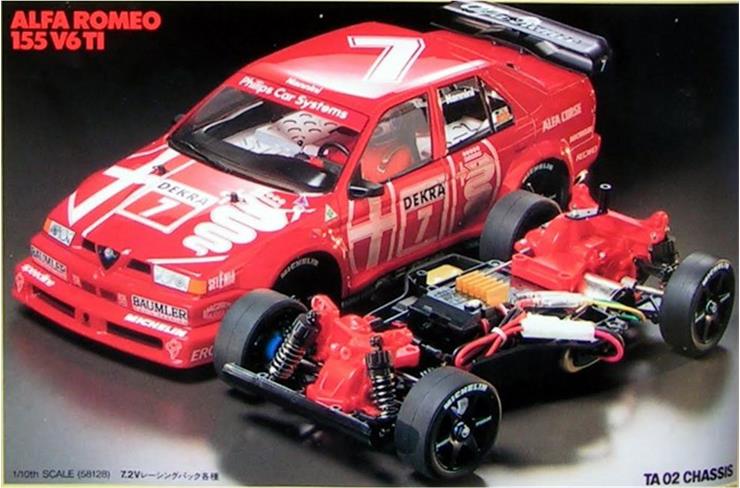
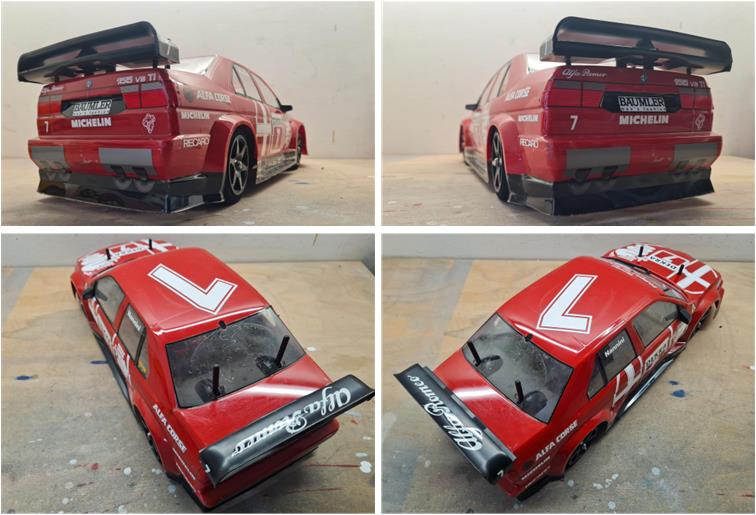
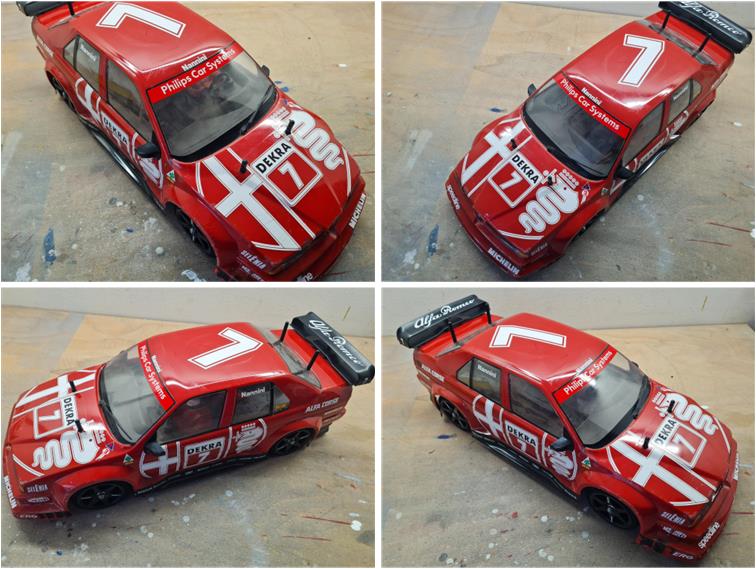
Model Tamiya Alfa Romeo 155 V6 TI, model number 58128, released in 1993 and available on the market until 1996 Lexan body; rear wing, centrally mounted front wiper, driver‑side and passenger‑side black styrene mirrors TA‑02 chassis
Project
On a well‑known German auction site, this set was purchased, consisting of:
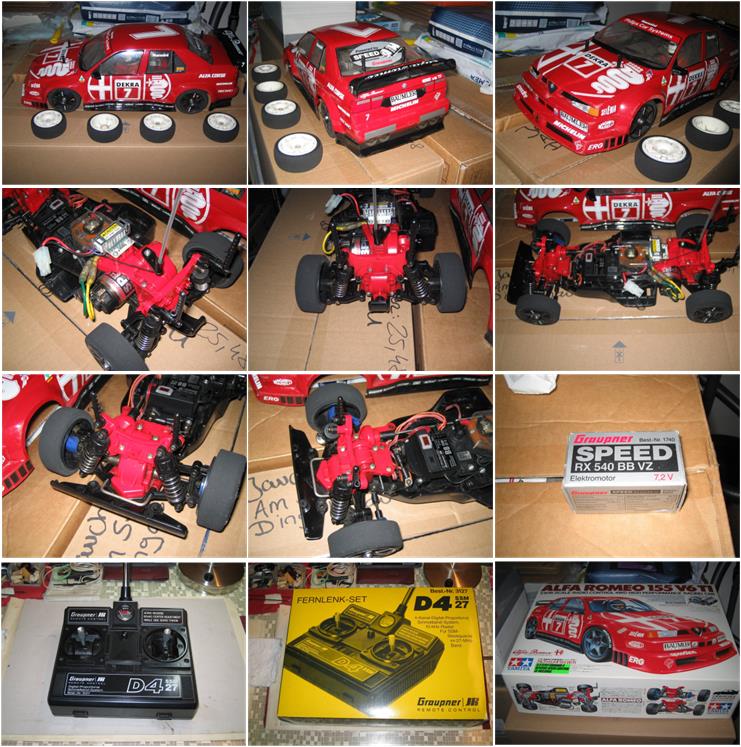
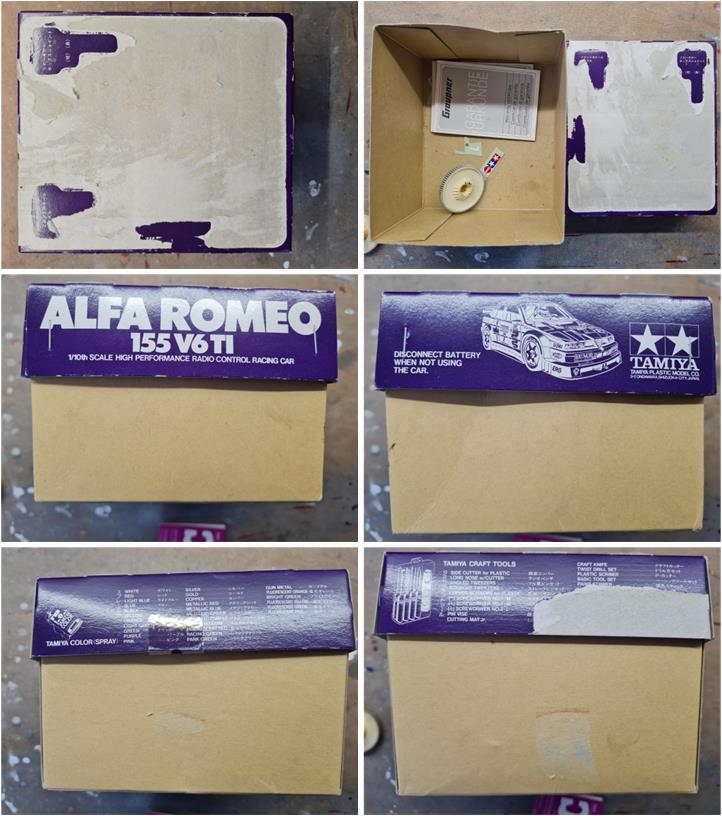
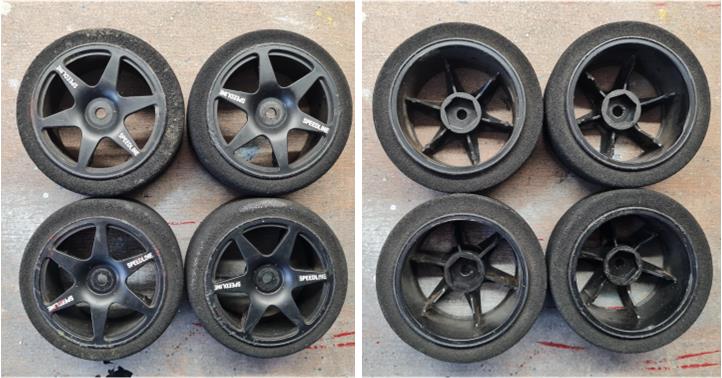
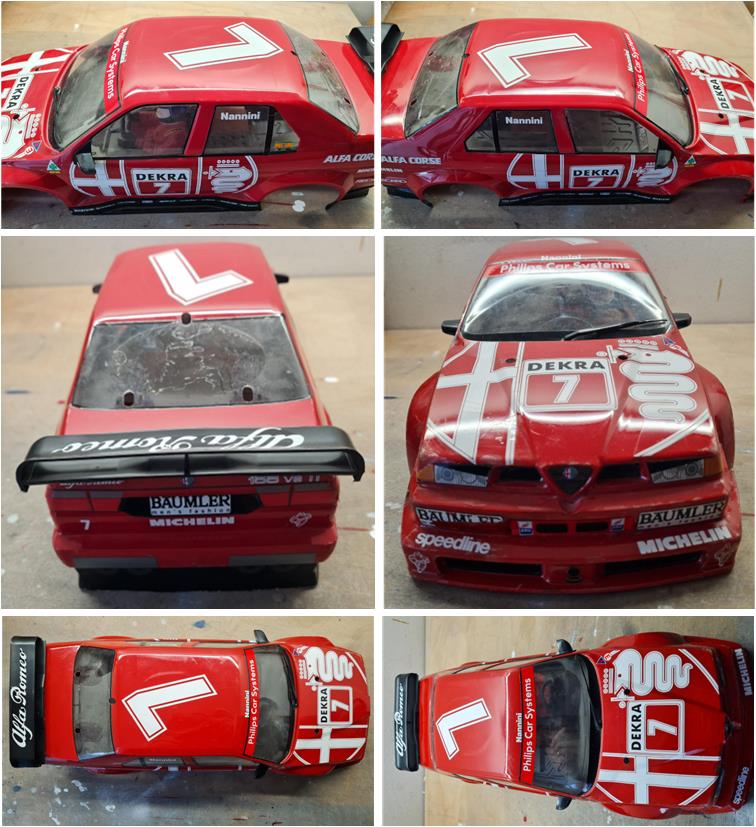
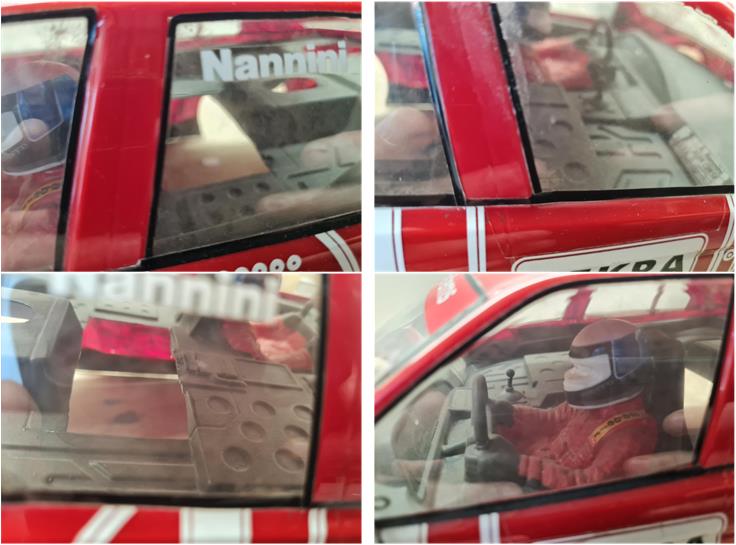
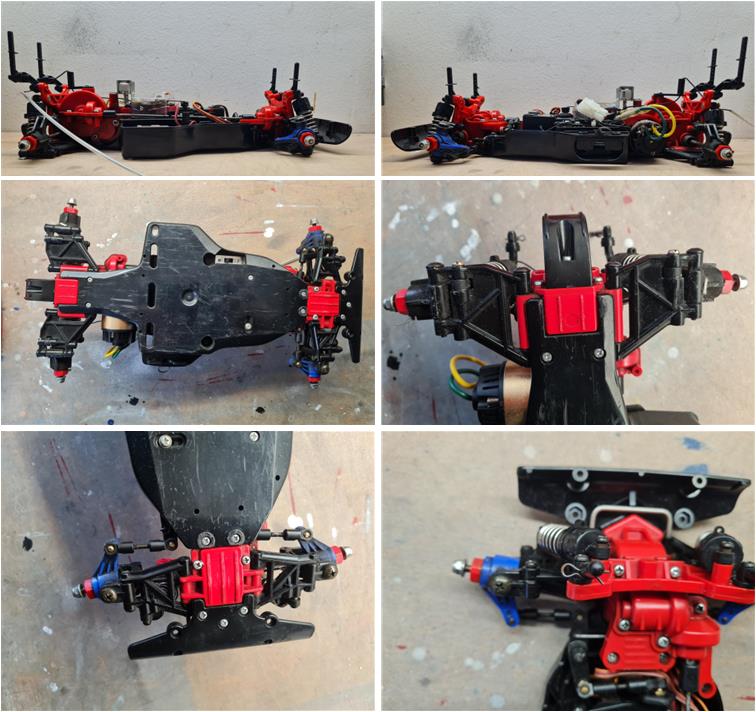
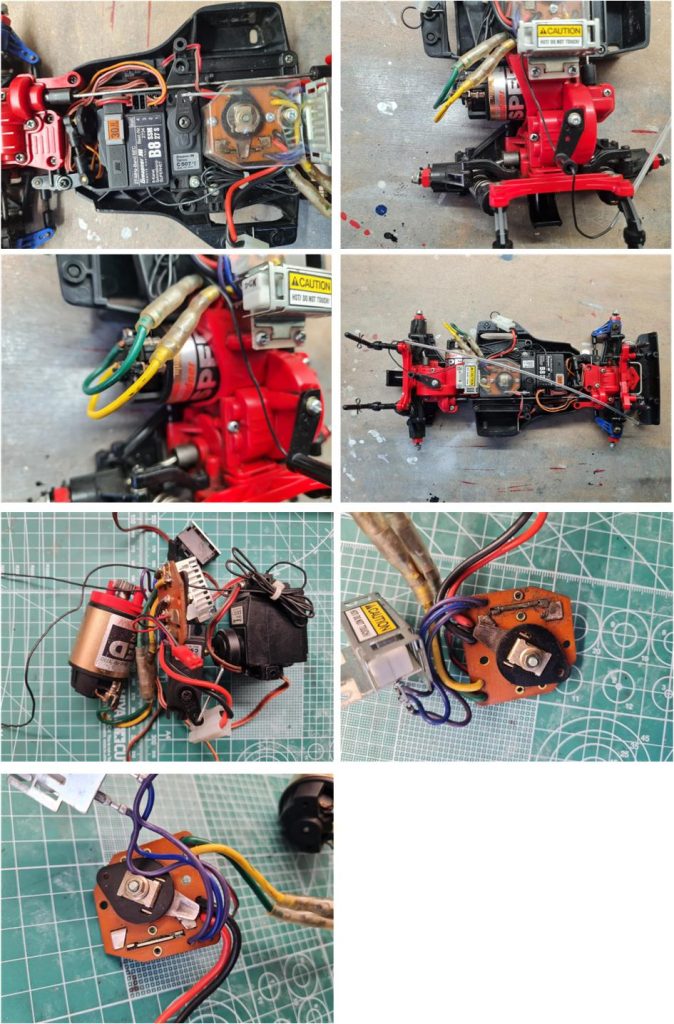
– Alfa 155 Ti DTM body shell (first‑row images) – chassis (second‑row images, plus left and center images of the third row) – remote controller (left image of the fourth row) – Graupner RX540BB VZ high‑performance motor (right image of the third row) – additional set of four complete wheels with the model’s box (right image of the fourth row) – radio controller box (center image of the fourth row)
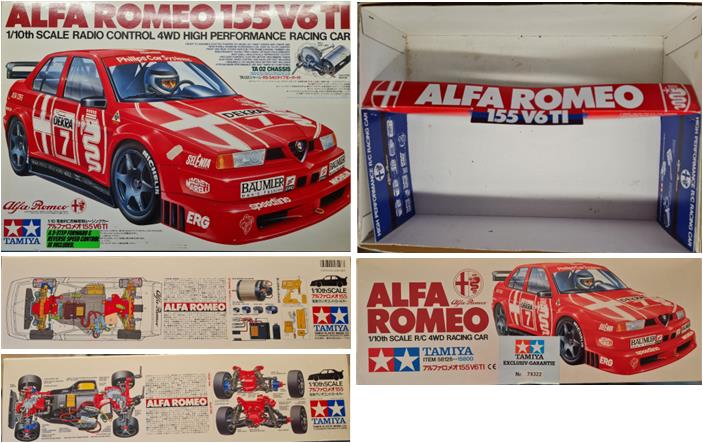
The goal is to bring this model back to the condition in which it left the factory, preserving the standard equipment as much as possible, considering that more than 30 years have passed since this kit was last found on a shop shelf. Once the purchase arrived, the analysis of the various parts began, looking for details that cannot be discovered from simple photos posted online. The model clearly seems to have belonged to someone very meticulous who kept the packaging in excellent condition. The box shows a number, 79.322. Tamiya rarely numbers its boxes; in fact, this is a seal that was applied around the 1990s by the German importer. During that period, online purchasing was starting to take hold and the first direct imports from the US and Japanese markets were appearing. The German importer decided to number the sets sold on the domestic market by applying this numbered seal
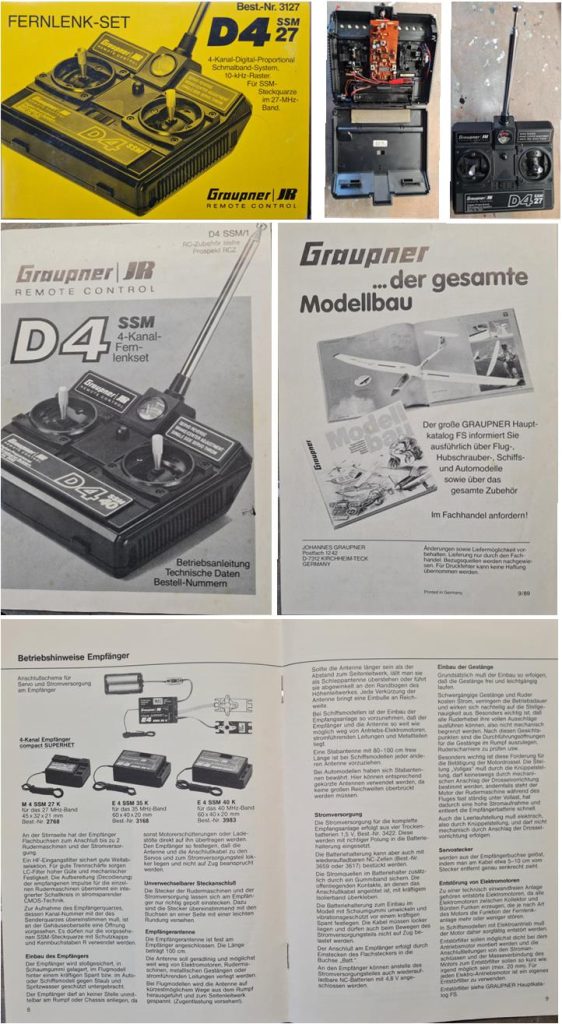
The remote controller is in perfect condition both externally and internally; to insert the batteries it must be opened completely and the level of cleanliness inside is remarkable. The seller included the outer box and the user and maintenance manual with the purchase; all materials are in excellent preservation condition.
The package includes several documents:
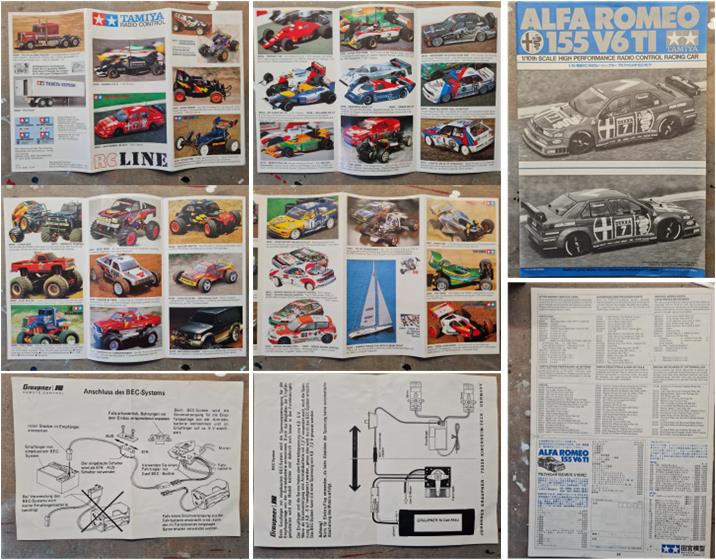
– model assembly manual – Tamiya advertising brochure featuring the mid‑1990s product lineup – Graupner manual for the mechanical speed controller
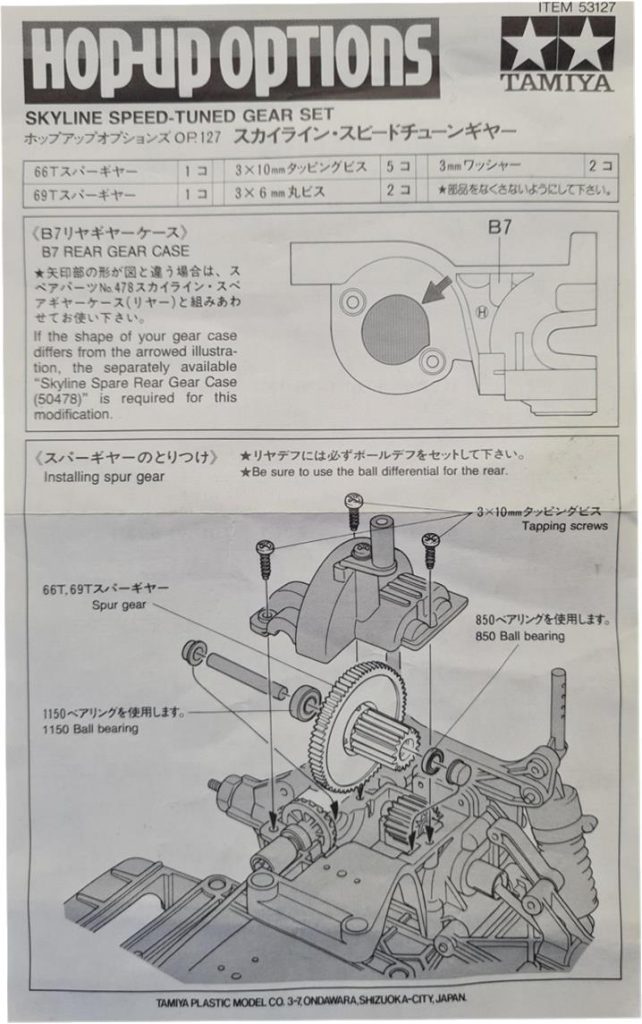
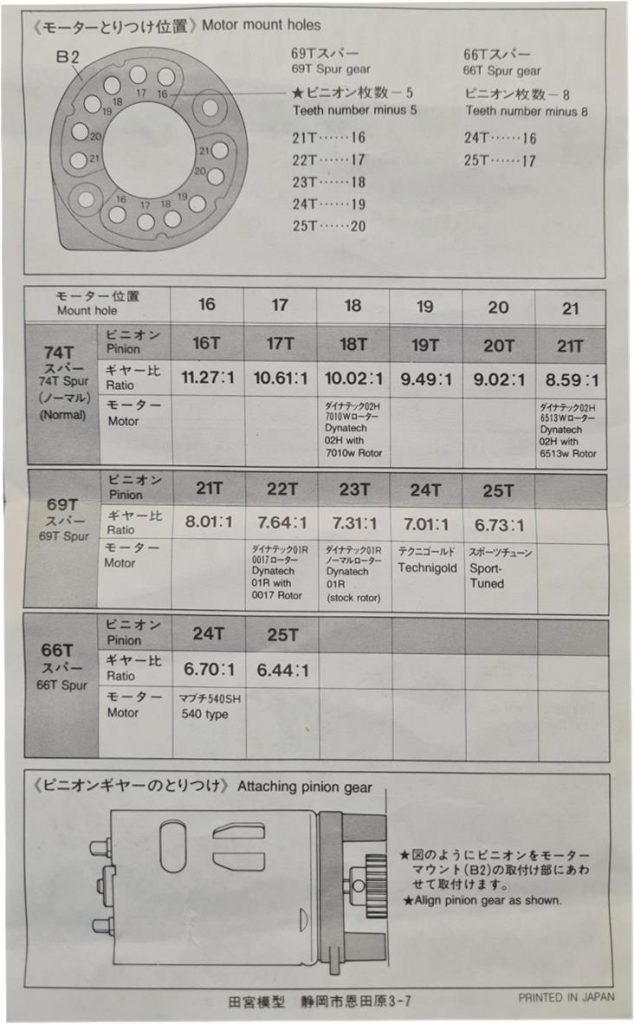
– manual for accessory 53127 described as “Skyline Speed‑Tuned Gear”
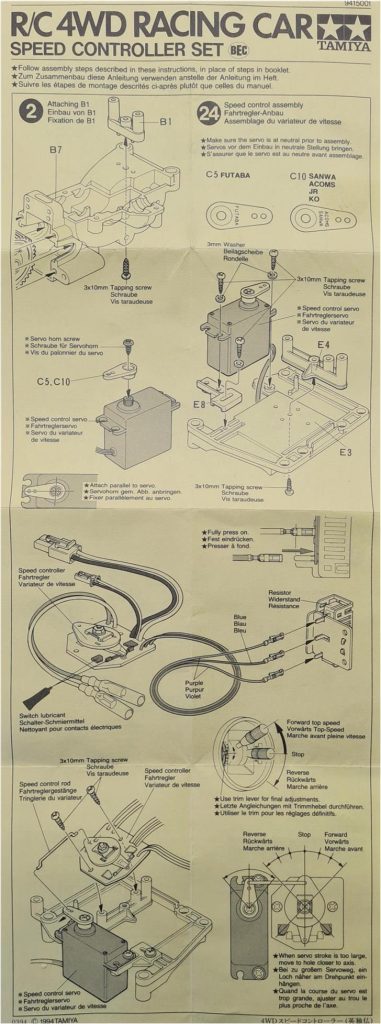
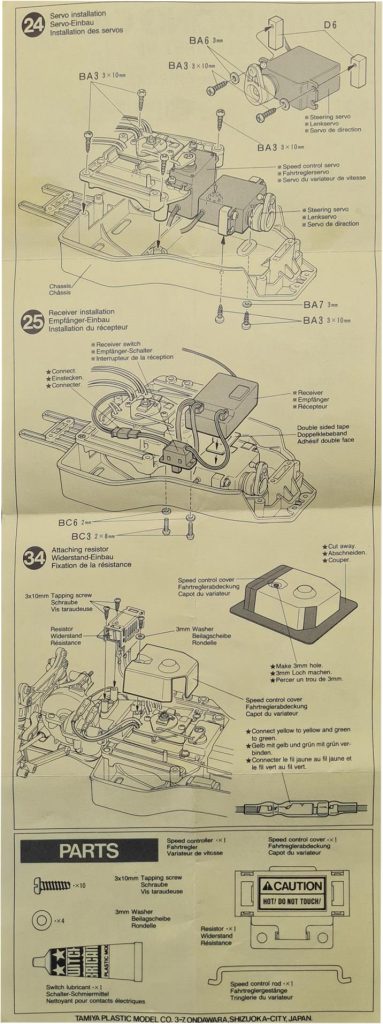
– instructions for set 9415001 described as “TA02 – Speed Controller Bag”: mechanical speed controller complete with accessories, including the Lexan cover used to protect it from dust
All the documentation is in excellent condition and will be stored together with the model. The original package also includes the small‑parts storage box, which is in worse condition; the lid originally held the blister containing the motor, pinion gear, drive shafts and other components. The blister must be removed in order to extract the parts needed to assemble the chassis.
The first surprise in the purchase is the wheels, which are foam rather than rubber; this was a common modification in the 1990s to increase grip. Foam tires offer higher traction but wear out more quickly than their rubber equivalents. To install foam tires, the wheel rim must be modified by removing the internal grooves that are used to hold the rubber tire in place. Although this is not exactly a factory‑original setup, the modification is being kept because today (2026) it is practically impossible to find the black six‑spoke rims specific to this model. The modification was carried out perfectly and the difference between foam and rubber wheels is almost invisible; in fact, it was not noticeable from the photos in the listing.
The exterior of the body shell appears well executed; the decals have been applied correctly and the color choice is accurate. Overall, it looks like excellent work. All black styrene accessories are present and properly installed: rear wing, driver‑side mirror, passenger‑side mirror and the centrally mounted windshield wiper.
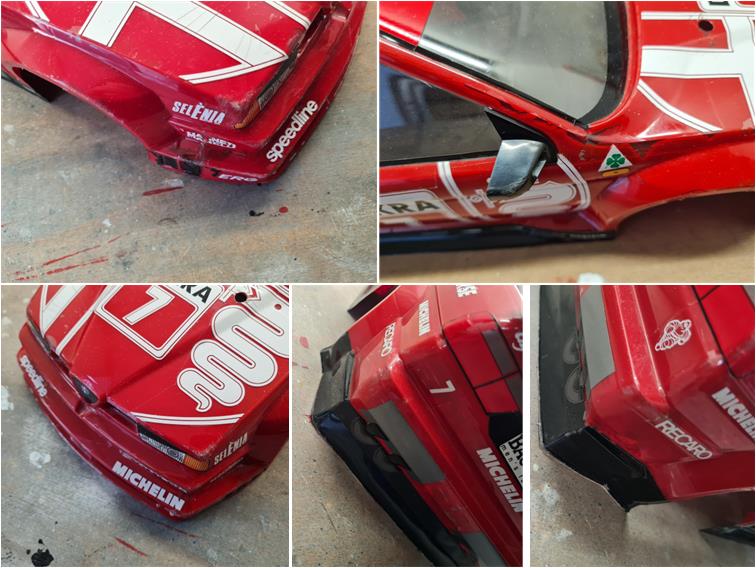
In reality, all four corners of the body shell show signs of impact; even though the scratches are minimal, they have left visible deformations. In addition, the paint on the passenger‑side front pillar (right image of the first row) shows areas where it has detached from the body. These are all imperfections that are acceptable in a model that was clearly used.
The interior cockpit is present and has been painted and the required section has been opened to correctly accommodate the resistor and the two rear posts that allow the chassis to mate with the body shell. The driver’s face, however, has not been finished properly (right image of the second row); the black outline around the visor is missing, as well as the black at the base of the helmet and the coloring of the driver’s face.
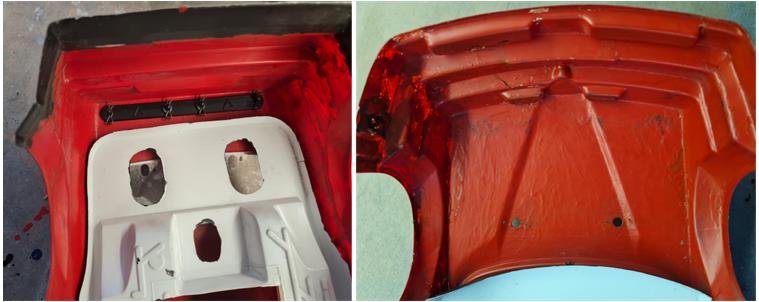
The surprise comes when inspecting the inside of the body shell, something that could not be detected from the photos in the listing. The person who painted the body did not use a spray can or an airbrush, but applied the colors with a brush. This explains why several new or partially used jars of PC05 (black) and PC02 (red) paint were included with the model. These are paints specifically intended for Lexan bodies. Honestly, it would have been better to mention this in the listing or at least include a photo of the inside of the body shell.
Chassis restoration
Visually, the chassis appears to be in good condition and only one intervention is immediately evident: the plastic tub needs to be replaced, as it seems to be the only part that has seen heavy use. The underside shows a significant number of scratches. Since the purchase has already come with a few surprises (foam tires and a hand‑painted body shell), it is best to check whether more hidden issues are present. To perform an accurate assessment, the chassis must be completely disassembled into all its components.
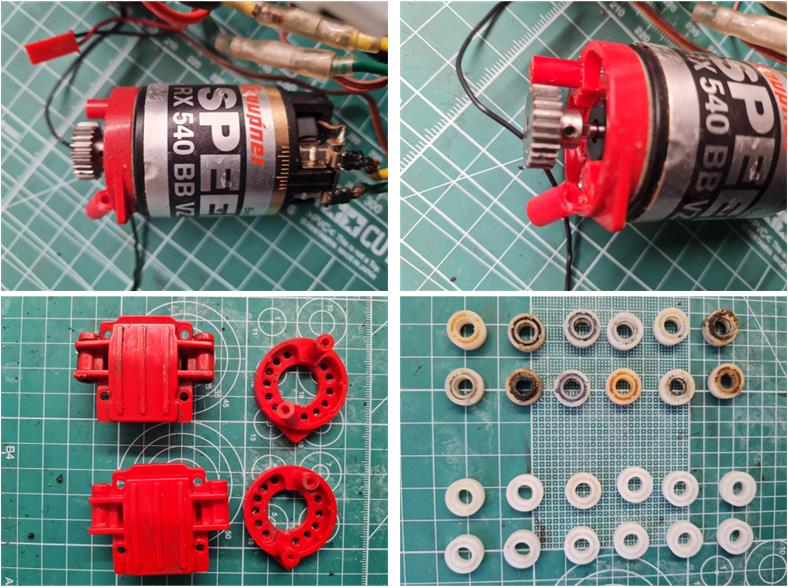
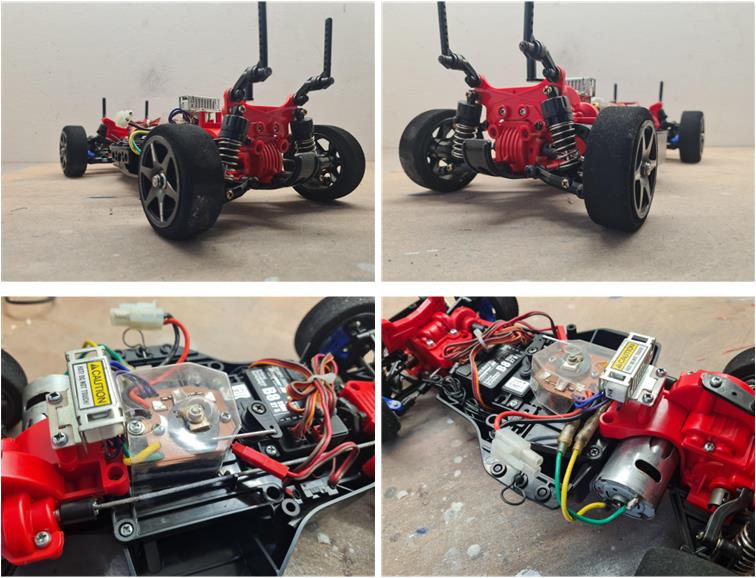
First, separate the electronics from the chassis. The electronic section is complete and the Lexan cover used to protect the mechanical speed controller is present (left image of the first row). The resistor has a caution label applied to its heat sink. The mechanical speed controller is dirty (right image of the third row) and needs to be cleaned with a cloth to remove the grease (last‑row image). Disconnect the motor from the speed controller; the motor must be replaced with an equivalent unit, but in the standard version originally specified in the factory bill of materials.
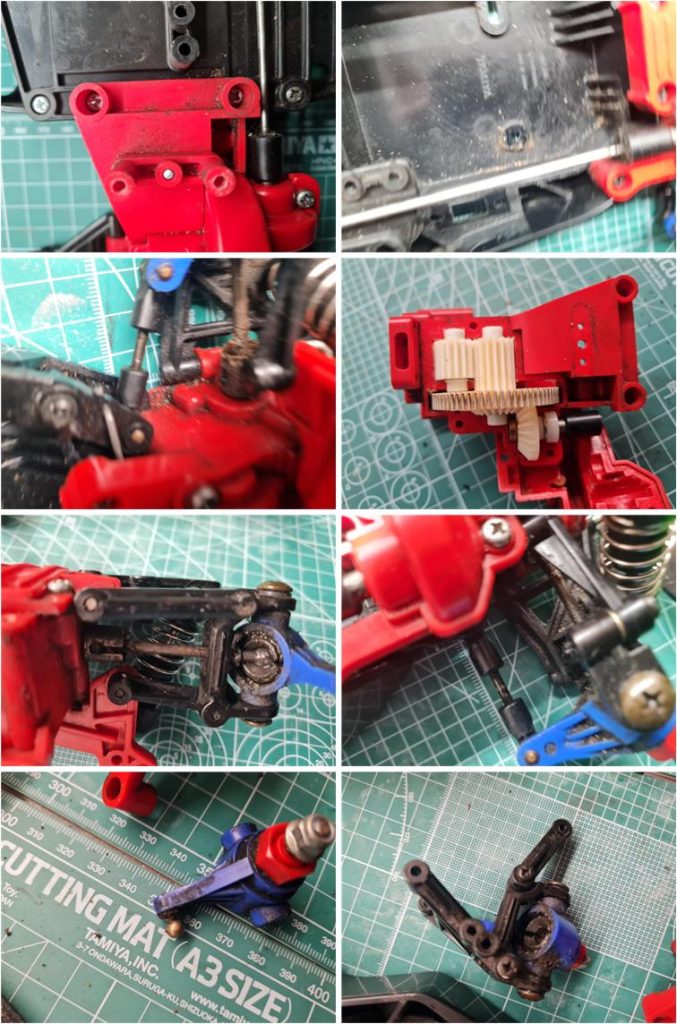
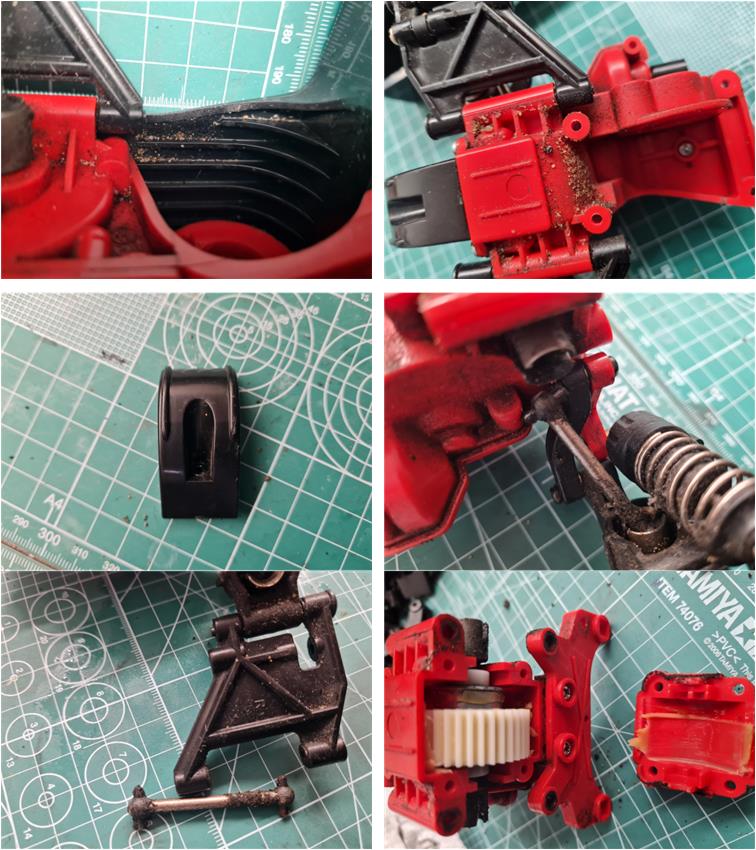
The model must have been used on a surface rich in sand, or directly on a beach. The foam tires show no traces of sand and the alternative rubber tires also show no sand residue. At this point we can only speculate: was the model run on sand using a different set of wheels? It will never be possible to know, but it is necessary to verify whether the sand caused any damage or simply worked its way into every corner. There are sand residues in every part of the chassis. In the front section, sand even made its way inside the tub, beneath the front and rear drive shaft. The sand became embedded in the grease covering the front‑wheel‑drive dogbones, on the axles, in the C‑hubs of the steering system and on the suspension components. By contrast, there is no trace of sand inside the gearbox; the drivetrain is in excellent condition. The front differential is a bevel‑gear type and is in perfect working order.
In the rear section, sand has also worked its way underneath the motor. The sand has mixed with the grease covering the drive dogbones, the axles and the suspension components. By contrast, there is no trace of sand inside the gearbox; the drivetrain is in excellent condition. In addition, both the front and rear bumpers are in perfect condition, without a single scratch. The rear differential is a ball‑type unit and appears to function perfectly. The transmission setup matches the factory‑specified standard configuration.
When disassembling the chassis, several parts were identified for replacement, such as the motor mount plate (first‑row images), the gearbox inspection cover (left image of the second row) and all the Teflon bushings (right image of the second row).
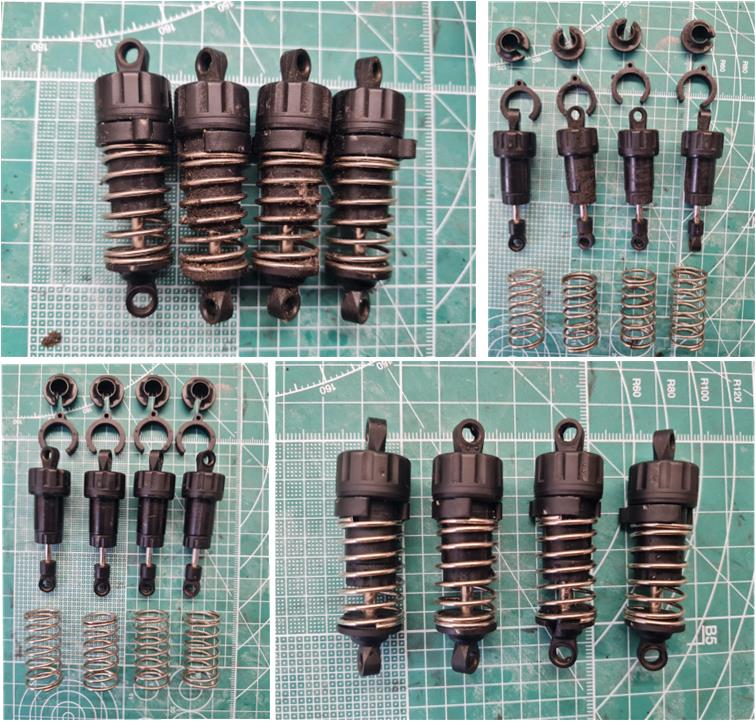
The black CVA shock absorbers need to be cleaned because the oil on their surfaces has trapped a significant amount of dust (left image of the first row). Surprisingly, there is no trace of sand, which further increases doubts about how and when the sand came into contact with the chassis. First, separate all components: spring, shock body, preload spacer and spring retainer (right image of the first row). Clean all parts with a soft cloth and reassemble the shock absorbers.
.
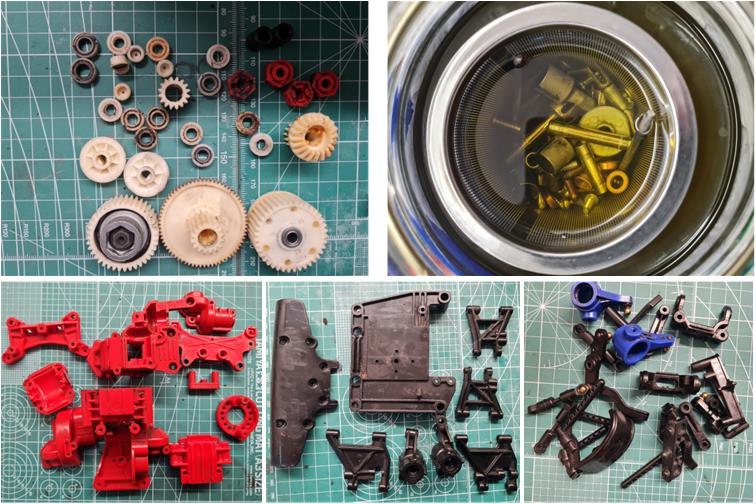
Once the model has been fully disassembled, the parts can be cleaned, each according to the material they are made of. Metal components are placed in a container filled with diesel fuel; the diesel degreases and cleans the parts. In addition to removing oxidation, it leaves a thin oily film on the surfaces that provides protection. Plastic parts are separated based on whether they are entirely plastic or include metal inserts. Fully plastic components are left to soak in water and soap for a week; the surfactants in the soap break down grease and dirt. Mixed metal‑and‑plastic parts are cleaned using a toothbrush, soap and hot water.
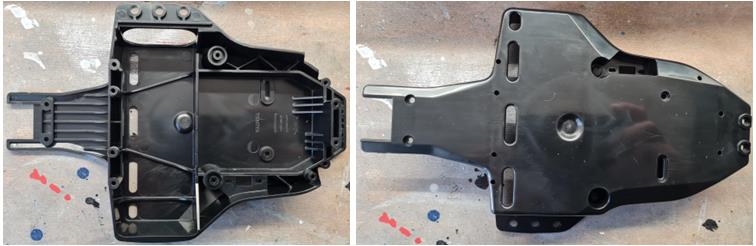
The plastic tub is structurally intact and can be used for test‑fitting the chassis, but it cannot be restored; the impact marks are too deep. A new tub has therefore been sourced on the market. The part number for the TA02 plastic bathtub chassis is 9335609.
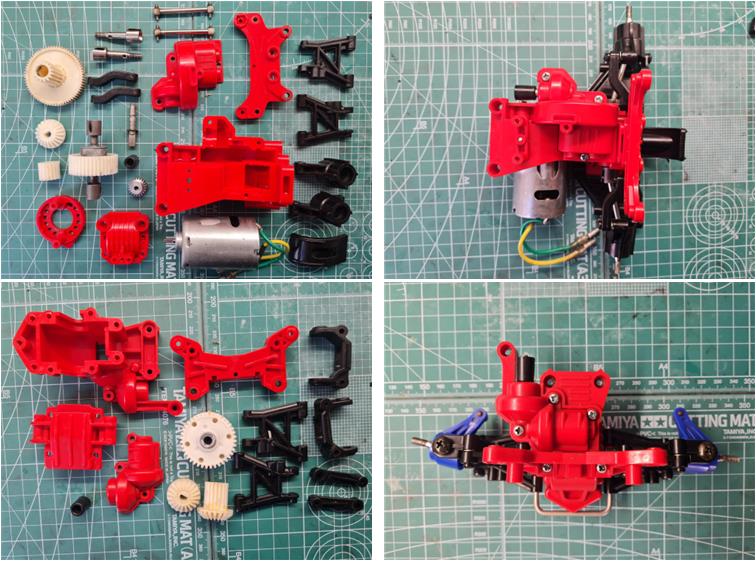
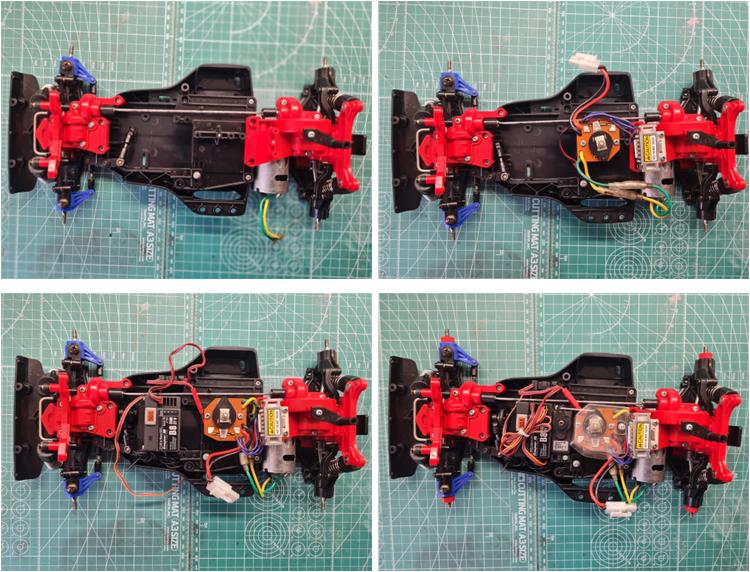
Assemble the rear section (first‑row images), which includes the motor, gears and suspension. Assemble the front section (second‑row images), which includes the steering system, suspension and gears. The bushings have been replaced with new ones and the plastic parts are in good condition, so only the two previously identified damaged components were replaced.
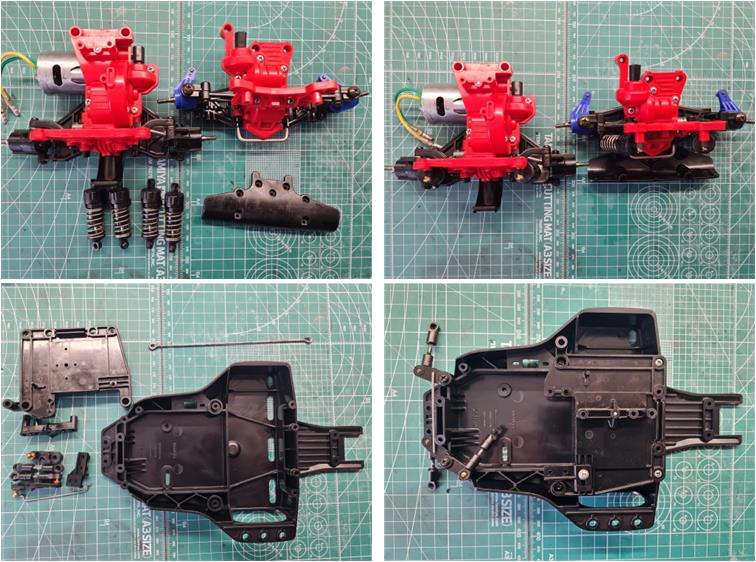
To complete the two sections (first‑row images), the four shock absorbers (previously serviced), the rear bumper and the front bumper must be installed. Prepare the plastic tub that forms the central section of the chassis (second‑row images). The two levers that make up the steering system are installed inside the tub.
Assemble the electrical section, consisting of the speed controller (right image of the first row) with its resistor, the receiver with the steering servo (left image of the second row) and then the Lexan cover for the speed controller (right image of the second row).
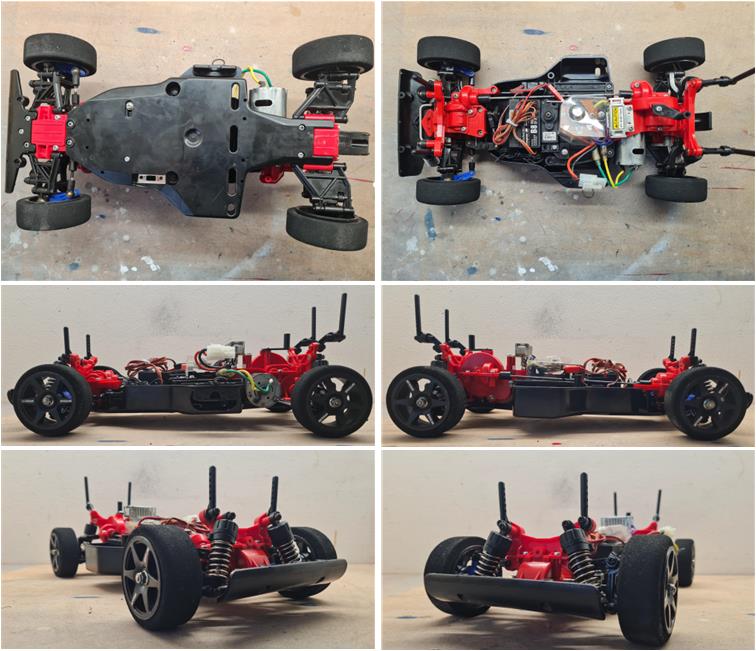
Now the wheels can be installed, along with the body‑mount posts that connect the chassis to the shell. Secure the wiring properly and complete the chassis, which is now ready to be joined with the body.
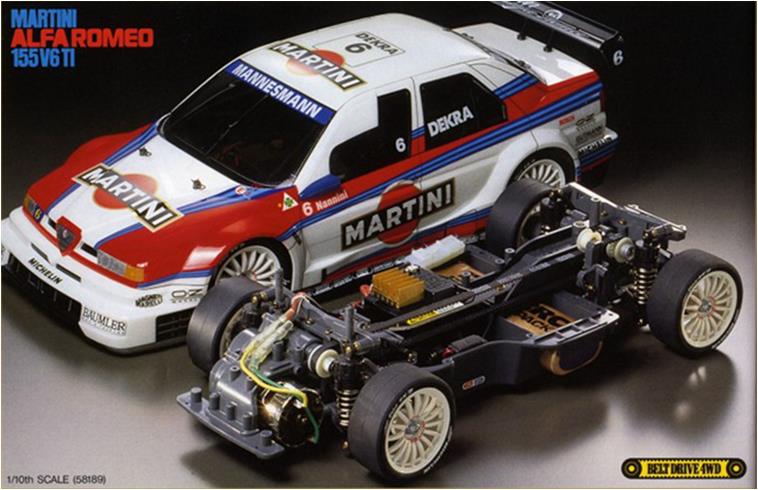
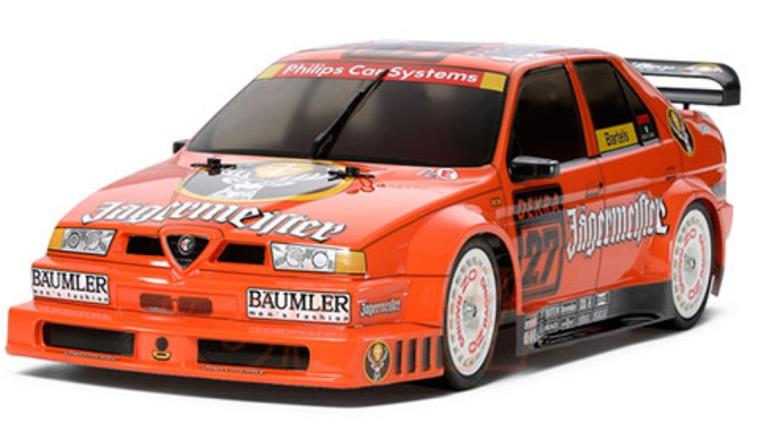
Body restoration There is nothing to restore in the body, just wipe off dust. To date (2024) Tamiya has released these models over the years:
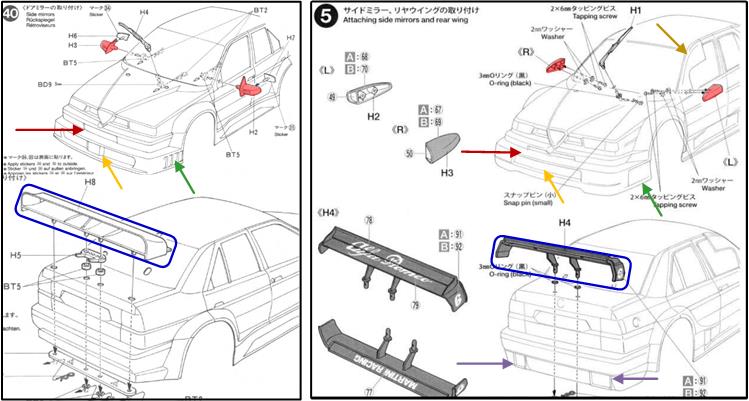
There are two different bodys for the Alfa 155 V6 TI: the first body was used on the red Alfa Romeo and the Jagermeister model and the second body was used on the Alfa Martini and Bosch model. In the image below are excerpts from the body instructions: on the left the first version and on the right the second version. In racing on fast tracks, the biggest problem for Alfa Romeo is poor aerodynamic penetration, which penalises top speed, so Alfa Romeo evolved the body to improve the aerodynamic efficiency of the Alfa 155, which is basically a comfortable middle-class saloon that struggles to compete against coupes like the Opel Calibra that have better aerodynamics and lower ground clearance. The two bodies differ in:
– the shape of the front pillar of the front side windows on the driver’s side and the passenger side (see brown arrow in the second picture on the right). In the second version there is a deflector which has an aerodynamic function to improve the Alfa 155’s penetration coefficient; top speed was one of the points where it lost out to the low Mercedes 190 EVOII and then to the Opel Calibra which was a coupe with better aerodynamics, – the shape of the rear-view mirrors (highlighted in red in both the picture on the right and the picture on the left),
– the shape of the lower air intake on the front bumper (highlighted with an orange arrow both in the picture on the right and in the picture on the left) and the small air intake under the logo on the front (highlighted in dark red both in the picture on the right and in the picture on the left) – the shape of the engine exhausts on the rear bumper which are only present in the second version (double purple arrow on the right in the picture) and – the shape of the rear spoiler (see the two blue boxes in both the image on the right and the image on the left).
Cockpit Cockpit part number 50457 is the version with the single driver and like the body shell, it was completed by the previous owner. It is attached to the body using two strips of double‑sided Velcro. The cockpit has not been removed from the body; this was the only way to avoid the risk that, when detaching the Velcro, the adhesive side bonded to the body might pull off the red paint.
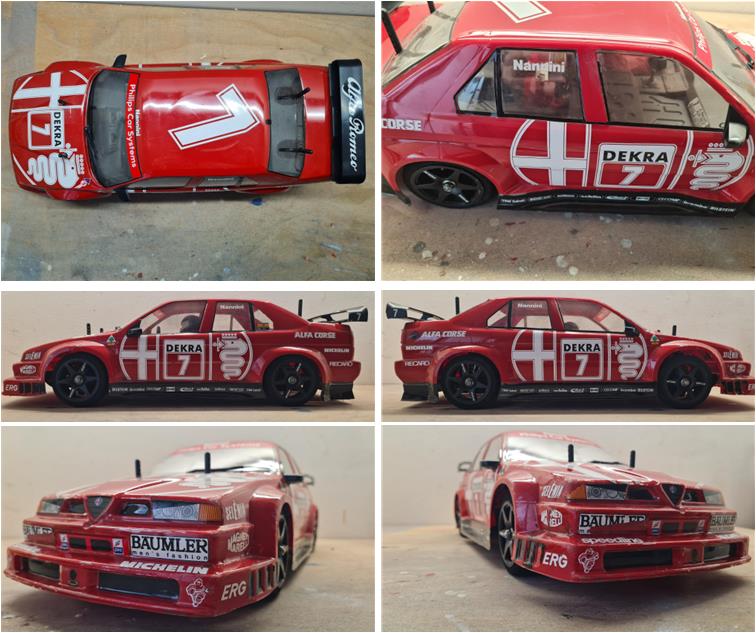
Restored model Images showing the completed model.
Tamiya, original figure, box art, guide book and catalogue are of TAMIYA INC, which does not endose or sponsor www.tamiyaclassic.com. Any brands, logos and trademarks represented on this website are the copyright of their respective owners.