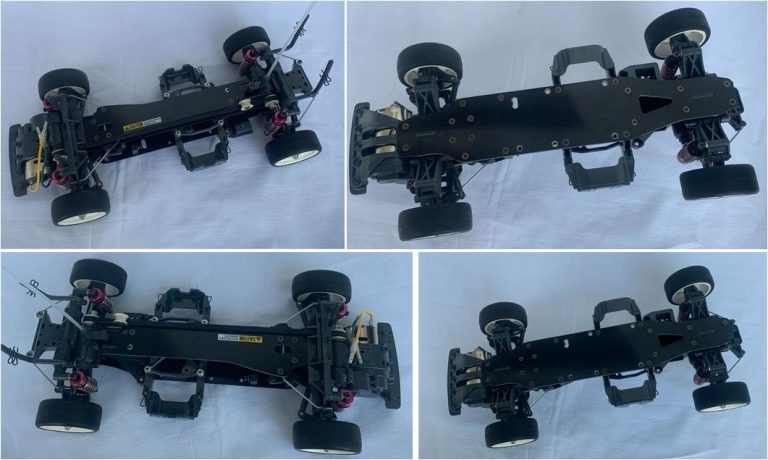
Tamiya TA03F Pro, item number 58177 released in 1999. It is the first chassis of the TA03 family. The abbreviation “F” stands for front and indicates the position of the electric motor. At the time of the release of the TA03F chassis, Tamiya was certainly already designing the mid-rear motor version: TA03R. Otherwise, they would not have indicated the motor position by adding the “F” after the “TA03” family logo. This is the first production chassis with belt drive after Tamiya had always used the shaft drive, as in the previous TA02 and TA01 chassis. Bodywork absent because it is a model supplied as chassis only. TA03F Pro chassis.
Analysis of the model to be restored
From the images of the model listing uploaded on a well-known online sales site, it is evident that the chassis has run very little or not at all: in fact, there are no scratches on the underside of the FRP chassis plate (images on the right side).
Finding a new TA03F Pro chassis is very difficult because those who buy this series aim to race on track. From the images it is clear that the chassis is practically perfect and complete in every part. The only doubt these images do not resolve is which wheels are installed. Upon arrival of the chassis it will be necessary to verify whether they are the characteristic white 5-spoke wheels of this model or something different. The lot does not include motor control electronics or the steering servo.
Chassis restoration
Upon arrival of the lot, the first visual analysis of the chassis confirms what was seen in the listing photos: we are dealing with a chassis that seems to have never raced, with no trace of wear. All the equipment appears to be as specified in the factory bill of materials except for the four low-friction dampers, which are version 53155 replacing the black plastic CVA dampers specified in the factory kit bill of materials. In the list of factory accessories, the correct version is the low-friction dampers 53280; the dampers present in the lot will need to be replaced with the correct ones to remain faithful to the project of restoring the model to the conditions specified in the manual. The wheels are not the correct ones provided by Tamiya as standard equipment for this model.
.
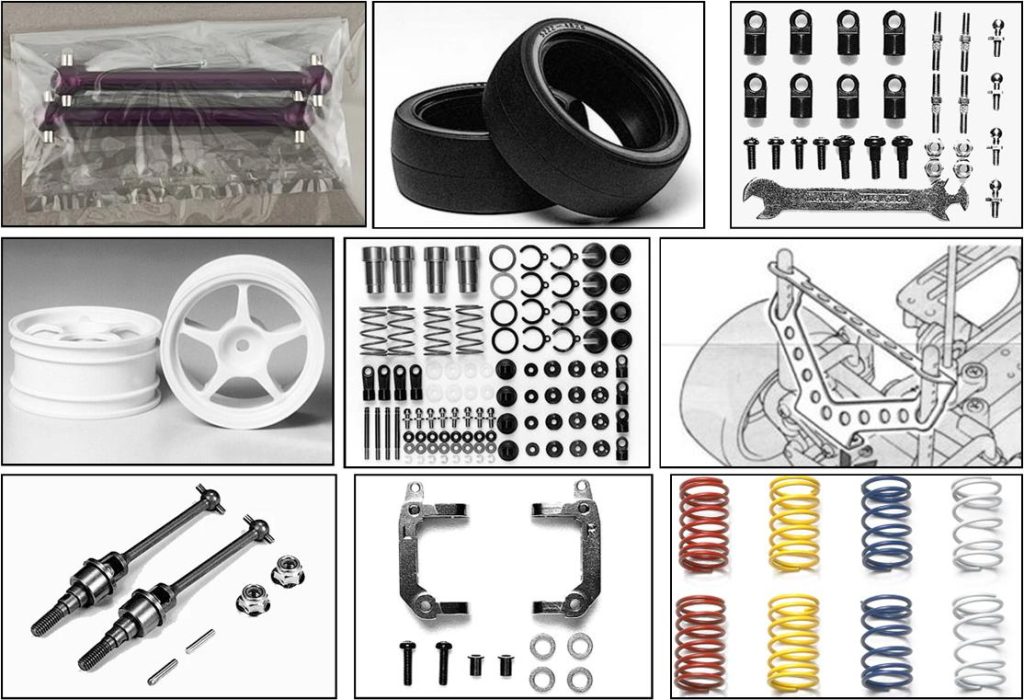
The purpose of this restoration is to disassemble the chassis, check that the equipment is correct, install the few accessories specified in the instruction manual to improve performance and reassemble the chassis. For this reason, the following accessories have been collected:
– code 49091 described as “TA03 Lightweight Drive Shaft purple” – code 50454 described as “Racing Slick Tires”. 2 packages because each set includes only two tires – code 53192 described as “4WD/FWD Upper Arm” – code 53232 described as “One-piece R.Spoke Wheels”, 2 packages because each set includes only two wheels – code 53280 described as “TA03 super low friction damper set” – code 53285 described as “TA03 rear body mount support plate” – code 53310 described as “TA-03 universal drive blue shaft 1 pair” – code 53316 described as “TA-03 Aluminium front hub carrier 1 pair” – code 53440 described as “on-road Tuned hard spring set”
It is possible to see the accessories in the image below, arranged in order starting from the top left corner.
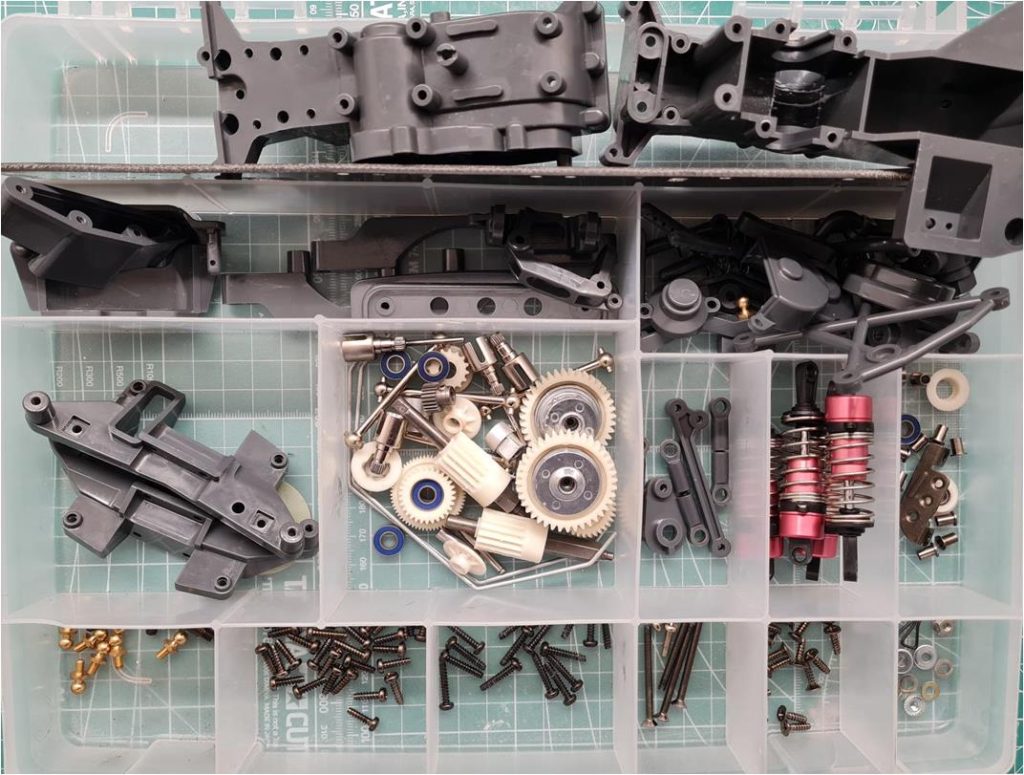
The various parts are in excellent condition, so it is necessary to disassemble the chassis only to check that there are no surprises: missing parts, non-original parts, modified parts, or equipment not compliant with factory specifications. Once the model is disassembled, wash the various parts with hot water and kitchen soap to degrease and remove dust. The areas not easily accessible should be treated with soap, hot water and a toothbrush with hard bristles. The bristles reach the most hidden points. Here are the pieces after treatment with water and soap. This operation is practically superfluous, as the chassis is new and shows no signs of wear.
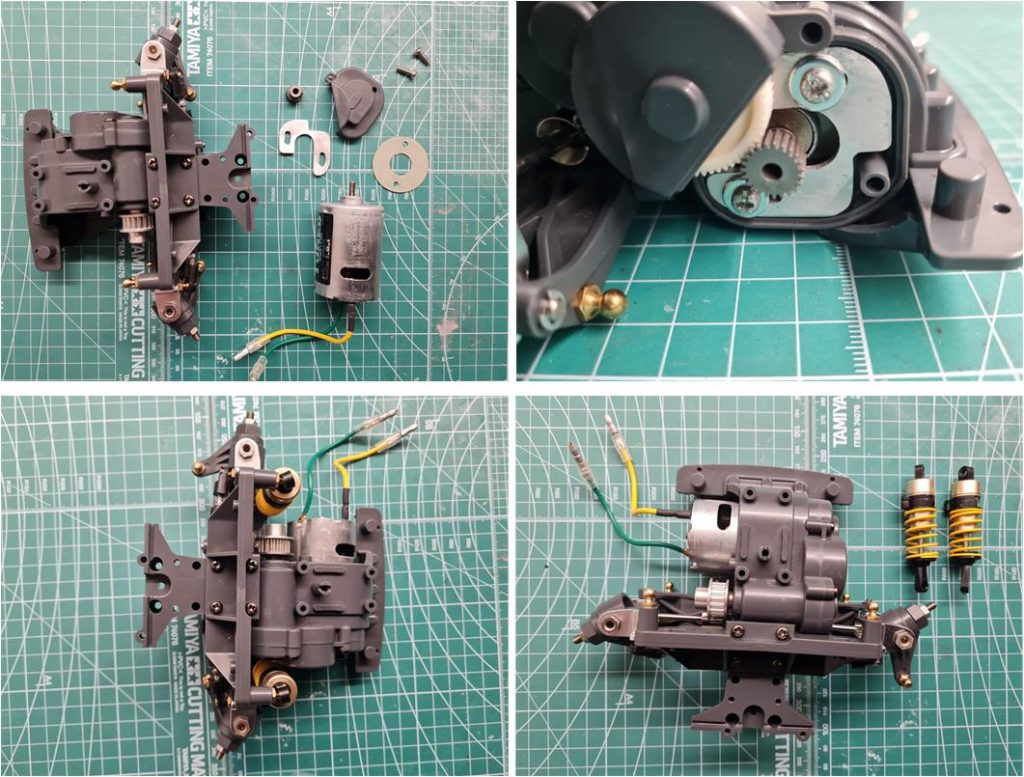
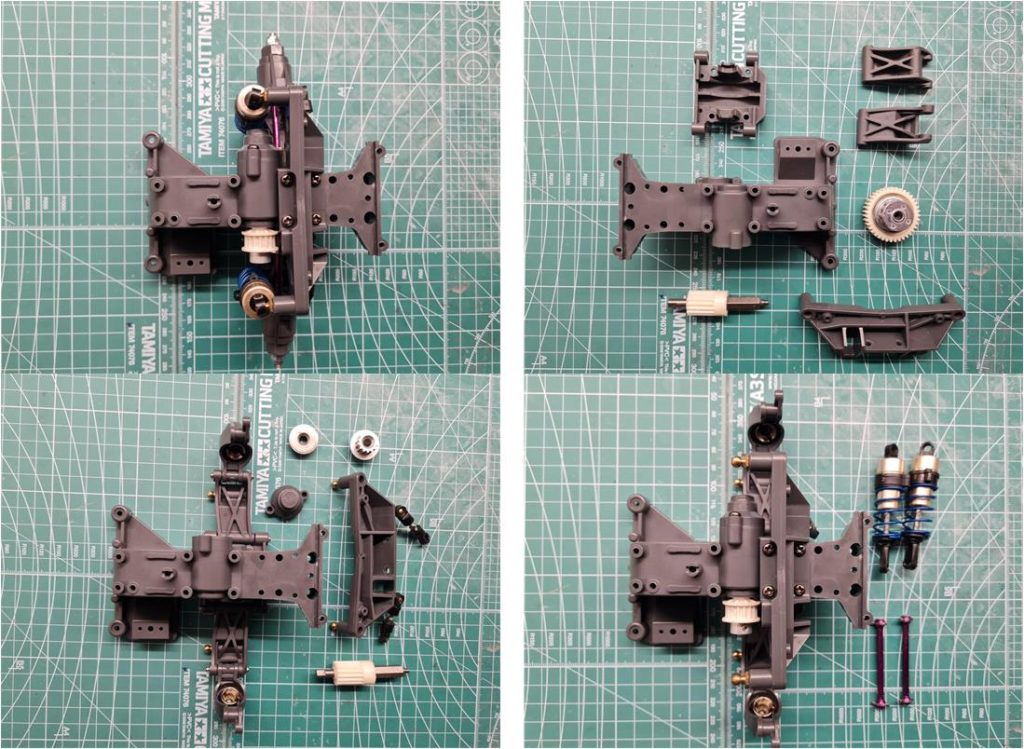
At this point, having collected all the accessories and cleaned the various parts, it is possible to begin assembling the chassis. The manual starts construction from the front section, which includes the gearbox with ball differential, suspension system, steering system, bumper and electric motor. All the plastics are gray as per factory specifications for the TA03F Pro chassis. Only the adjustable upper suspension arms are in black plastic, which are set number 53192 (image on the right of the first row), an accessory to be ordered and installed later because it was not part of the set originally installed at the factory. The original gray plastic arms are in perfect condition and are therefore kept with the chassis, in case they are to be reinstalled in the future. The two front axles in a single piece with blue anodized collar, code 53310 described as “TA-03 universal drive blue shaft 1 pair” (image on the left of the second row), have been used.
To install the motor, the C-shaped aluminum plate was used, which is an accessory to be ordered separately, code 53269 described as “Aluminum Motor Plate” (image on the right of the first row). For the front dampers, yellow springs (medium stiffness, image on the right of the second row) were installed, taken from set code 53440 described as “on-road Tuned hard spring set.”
The manual continues with the rear section, which includes the ball differential and the suspension system. All plastics are gray as per factory specifications for the TA03F Pro model. Only the adjustable suspension arms are in black plastic, which are set number 53192. For the rear dampers, blue springs (high stiffness, image on the right of the second row) have been installed. The two rear shafts have been replaced with reinforced alloy ones in purple, code 49091 described as “TA03 Lightweight Drive Shaft purple” (image on the right of the second row). All four original shafts are kept together with the model, they are in perfect condition and can be reinstalled in the future.
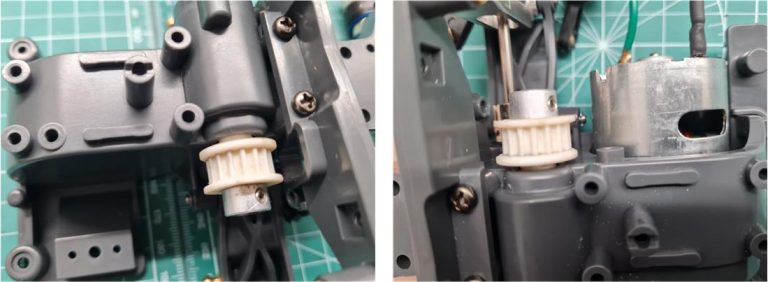
The pulleys were originally intended to be in aluminum, but since one of the two metal pulleys was damaged, the original ones were installed both at the rear (in the image on the left) and at the front (in the image on the right).
The manual continues with the central part, which includes the two F.R.P. (Fiber Reinforced Polymers) plates, the battery holder chassis and the steering servo. All plastics are gray as per factory specifications for the TA03F Pro model. Once the central part is completed, it can first be assembled with the front section, together with the belt and then with the rear section. Only at the end is it possible to install the steering servo and the upper plate.
To complete the chassis, it is necessary to install the front and rear stabilizer bars (image in the first row on the right). This chassis requires the belt tensioner (images in the second row).
Now it is possible to install the electronics and the rear metal body support, an accessory to be purchased separately, code 53285 described as “TA03 rear body mount support plate” (on the right in the image). As the speed controller, the C.P.R. P100F 2-in-1 electronics model was chosen; the speed controller also includes the receiver.
To complete the model, it is necessary to install the four tires complete with wheels; 2 packages of tires code 50454 described as “Racing Slick Tires” and 2 packages of wheels code 53232 described as “One-piece R.Spoke Wheels.”
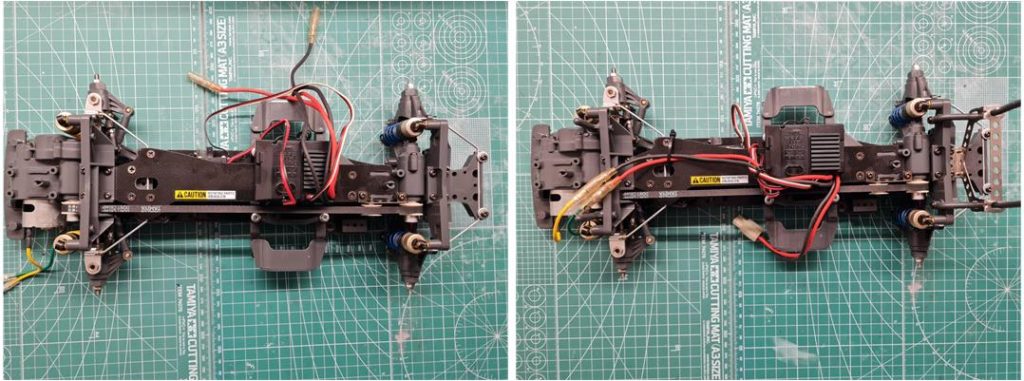
Restored chassis
Images showing the assembled chassis complete with the accessories specified in the instruction manual.
Body construction
As standard equipment, the model does not include a body shell. There are nine body shells that today (2025) can be installed on a TA03F chassis:
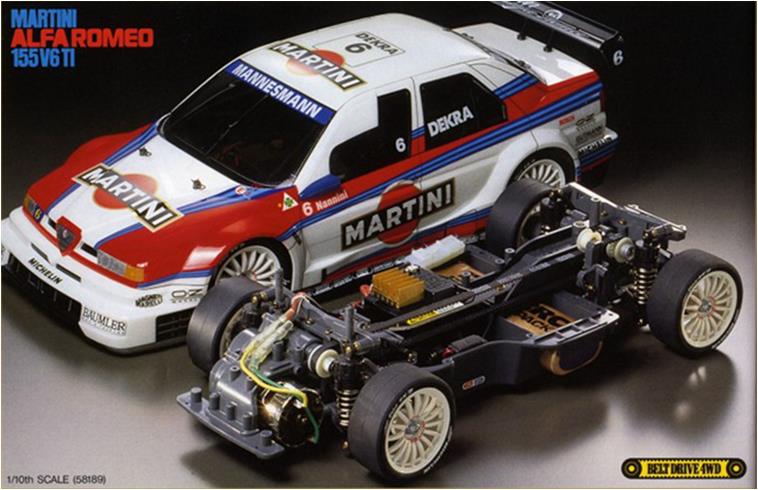
– Audi A4 STW, body shell installed on model number 58182 – Kure Nismo GT-R, body shell installed on model number 58185 – Opel Calibra Cliff, body shell installed on model number 58188 – Martini Alfa Romeo 155 V6 TI, body shell installed on model number 58189 – Mitsubishi Lancer Evolution IV, body shell installed on model number 58199 – Opel Vectra STW, body shell installed on model number 58209 – Subaru Impreza WRC, body shell installed on model number 58210 – Mitsubishi Lancer Evolution V WRC, body shell installed on model number 58225 – Pennzoil Nismo GT-R (R34), body shell installed on model number 58239
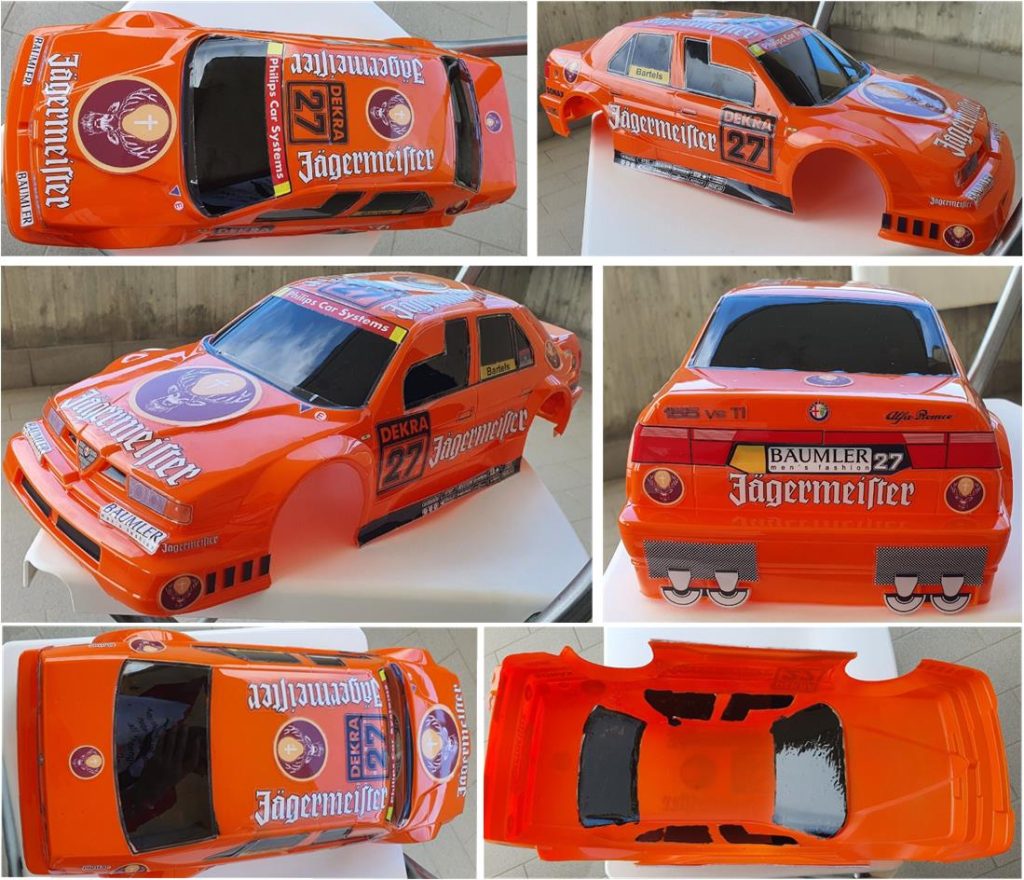
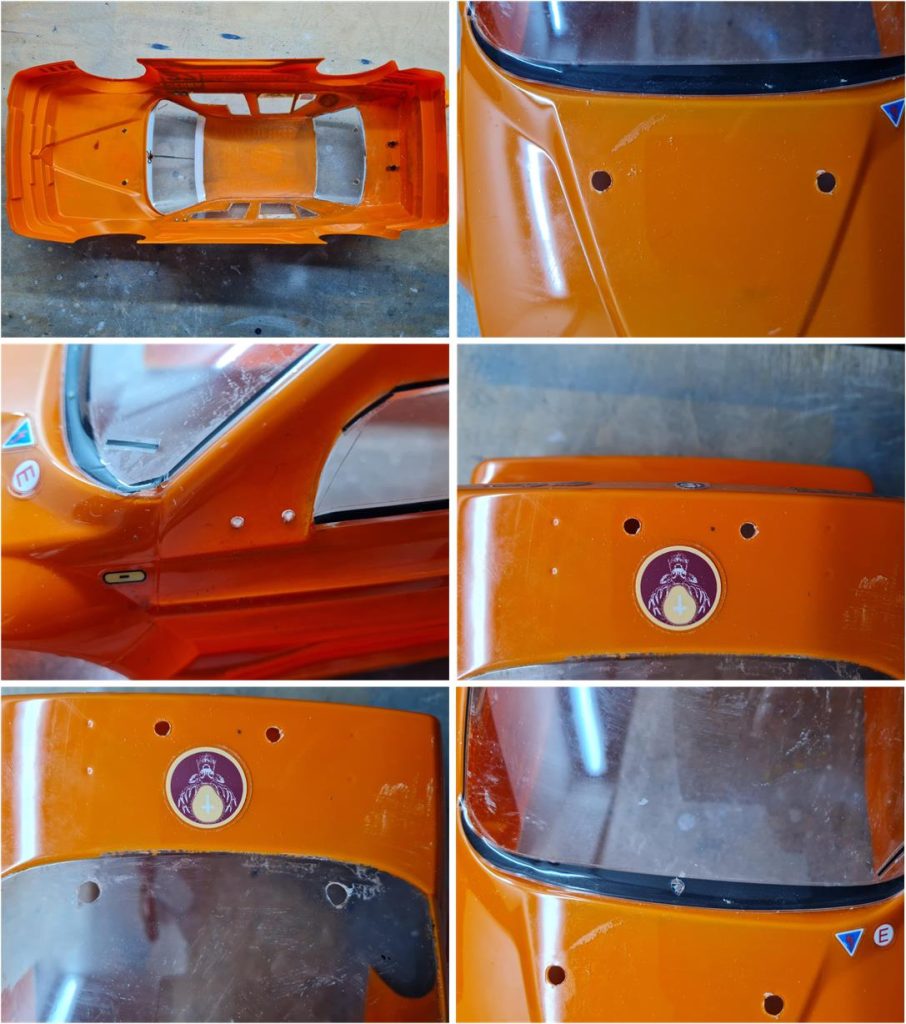
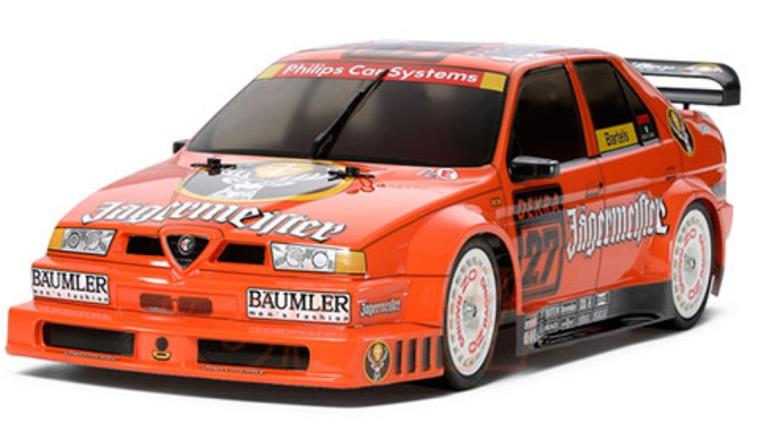
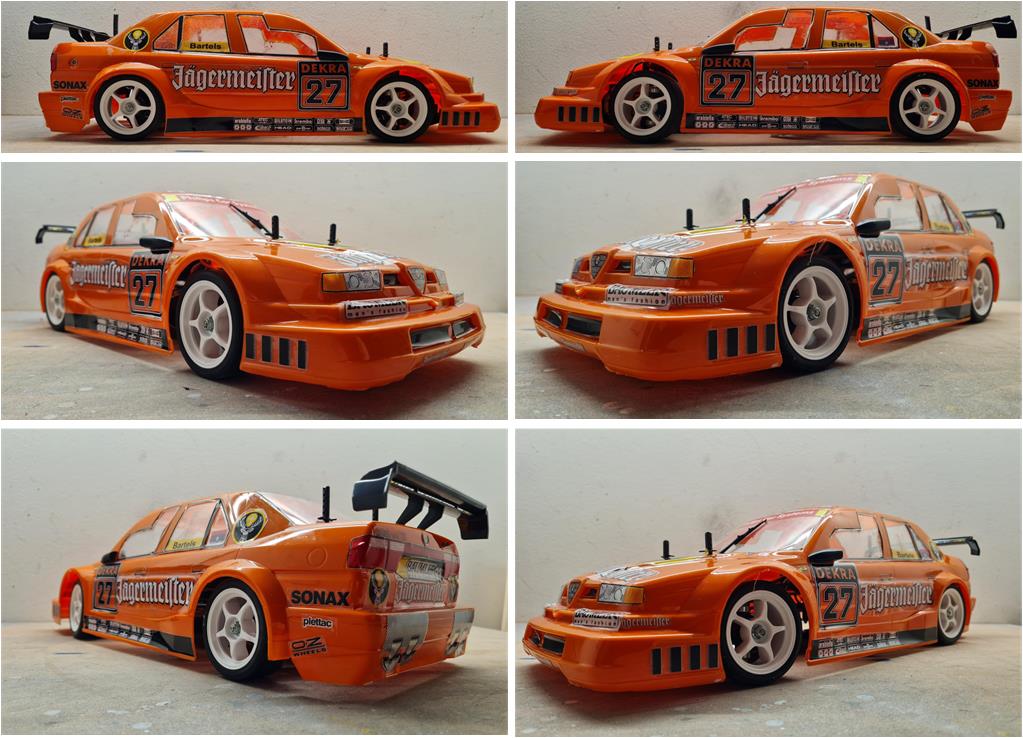
Online, a body shell was found for a model not included in the list above: Alfa Romeo 155 Ti with Jagermeister as the main sponsor and Martini, not as listed above. The body shell is complete with accessories (rear wing, two rear-view mirrors and central rear wiper). The black paint applied to the cabin windows was done with very little “art.” There is also another negative note: the body shell is the more recent version with the latest aerodynamic updates reserved for the last Alfa Romeo 155 V6 that raced in the DTM—side deflectors, teardrop mirrors, rear spoiler and new front bumper. In practice, it is the body shell reserved for the Martini and Bosch version, but with Jagermeister colors and sponsorship.
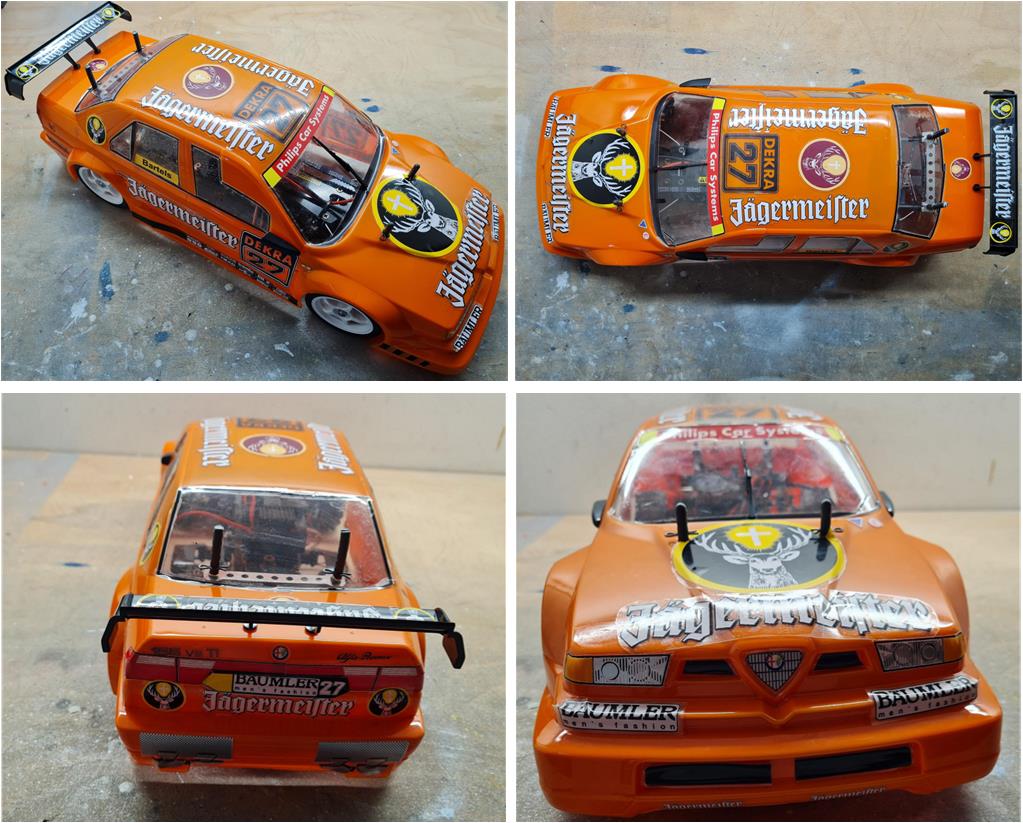
Since the body shell is installed only to complete a chassis without a body, the different aerodynamic design does not change the outcome of the restoration. First, clean the inside of the body shell with a cloth soaked in alcohol to remove the paint applied to the cabin windows (image at the top left). The second operation was to drill, using a self-centering wood bit, the holes for the four towers that allow the body shell to fit the chassis (hole diameter 5 mm), the hole for the central rear wiper (hole diameter 3 mm), two holes on each side for the rear-view mirrors (hole diameter 1 mm) and two rear holes for the wing (hole diameter 3 mm). To avoid deforming the body shell, place a piece of wood inside it so that the drill bit presses against the body shell, which rests on the wood without deforming.
During cleaning with alcohol, some stickers came off as they had deteriorated over time and the glue no longer adhered well. A complete set of stickers was found on the market from a well-known company that produces fairly faithful reproductions. The missing stickers were added.
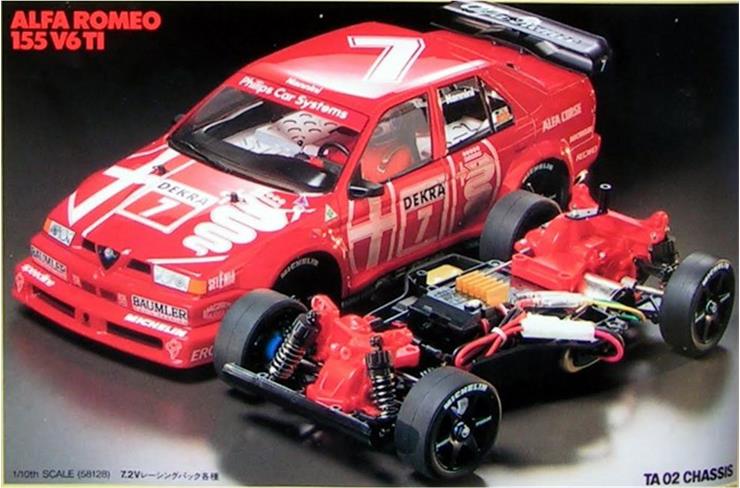
As of today (2025), Tamiya has released these models over the years:
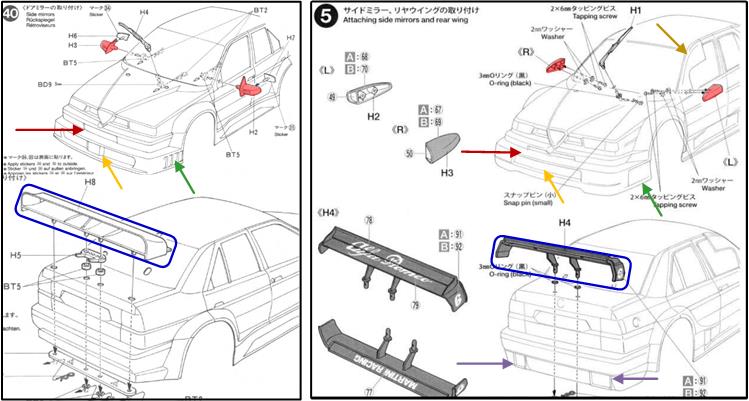
There are two different body shells for the Alfa 155 V6 TI: the first body shell was used on the Alfa Romeo red model and on the Jagermeister model, while the second body shell was used on the Alfa Martini and Bosch models. In the image below, extracts from the body shell instructions are shown: on the left the first version and on the right the second version. In high-speed track races, the main problem for Alfa Romeo was poor aerodynamic penetration, which penalized maximum speed. Therefore, Alfa Romeo evolved the body shell to improve the aerodynamic efficiency of the Alfa 155, which was essentially a comfortable mid-class sedan struggling to compete against coupés like the Opel Calibra, which had better aerodynamics and lower ground clearance.
The two body shells differ in:
– the shape of the front pillar of the side windows on the driver’s and passenger’s sides (see the brown arrow in the second image on the right only). In the second version, there is a deflector with an aerodynamic function to improve the drag coefficient of the Alfa 155; maximum speed was one of the points where it lost out against the low Mercedes 190 EVOII and later against the Opel Calibra, which was a coupé with better aerodynamics, – the shape of the rear-view mirrors (highlighted in red in both the right and left images).
– the shape of the lower air intake on the front bumper (highlighted with an orange arrow in both the right and left images) and the small air intake under the logo on the front (highlighted in dark red in both the right and left images), – the shape of the engine exhausts on the rear bumper, which are present only in the second version (double purple arrow in the right image) and – the shape of the rear spoiler (see the two blue boxes in both the right and left images).
Restored model Images showing the finished model.
Updates
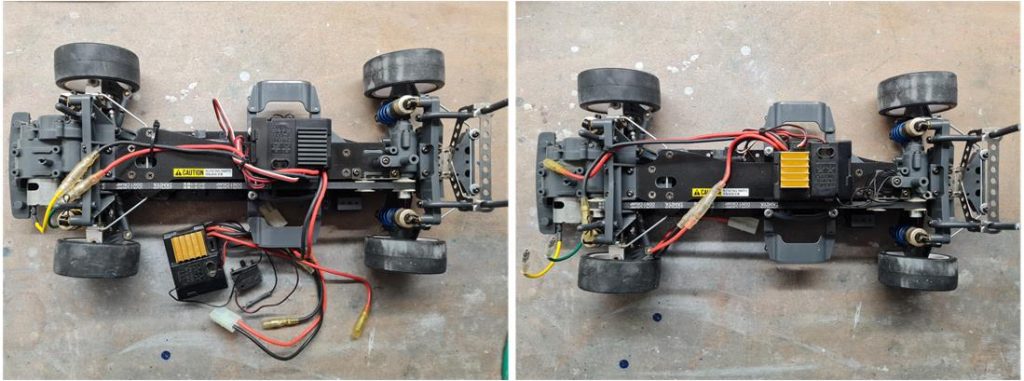
The installed speed controller is the C.P.R. P100F model, which predates the release of the TA03 chassis. According to Tamiya’s documentation, it is intended for use on TA02 and A01 chassis. The better choice is the subsequent model, the C.P.R. P160F. In the image at the bottom right, the modified chassis is clearly visible, where the C.P.R. P100F has been replaced with the C.P.R. P160F.
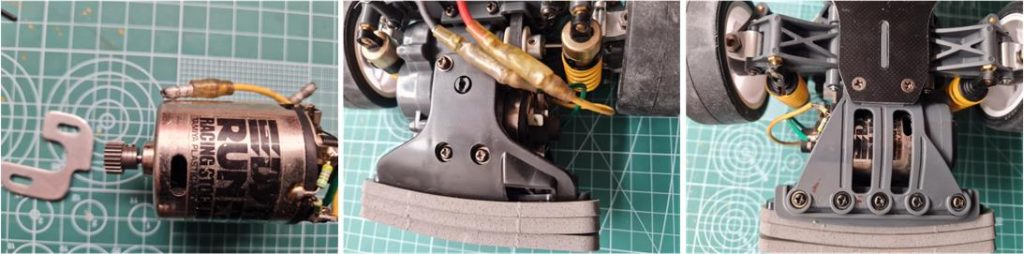
For the TA03F chassis in its front‑motor configuration, Tamiya provides a special black plastic bumper designed to give the motor additional protection from frontal impacts. The front plastic bumper must be completed with three urethane buffer sheets: part number 53268, described as “TA03F Urethane Bumper”. The set includes the hard black plastic bumper and five adhesive‑backed urethane buffer sheets, of which only three are meant to be installed. In the last row you can see the bumper from a top view, where the urethane sheets are stacked and bonded to each other and then adhered to the hard plastic bumper. Note the motor ventilation openings on the right side of the photos.
The motor listed in the manual’s accessory section is the Dyna Run model, item 53272, so the original stock motor has been replaced with this much higher‑performance unit. In the center and left photos, the installed motor with the additional bumper can be seen from above and below. Note that the plastic is black in color
Tamiya, original figure, box art, guide book and catalogue are of TAMIYA INC, which does not endose or sponsor www.tamiyaclassic.com. Any brands, logos and trademarks represented on this website are the copyright of their respective owners.