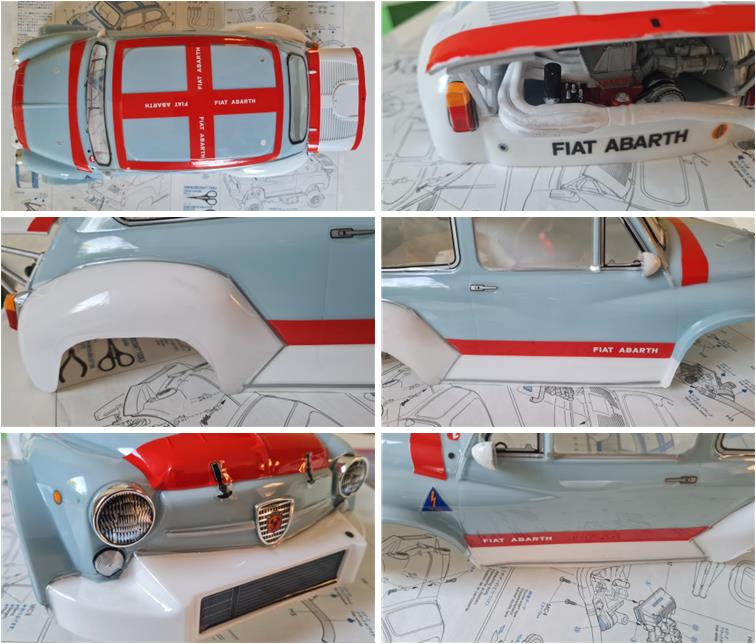
Model
Tamiya Fiat Abarth 1000 TCR Berlina Corsa, item number 58158 released in 1995 and available on the market until 2000. It is the first body equipped with the M-02 chassis, which is an evolution of the M-01 chassis; but with rear-wheel drive.
Lexan body completed with various styrene accessories
M-02 chassis, short wheelbase of 210 mm.
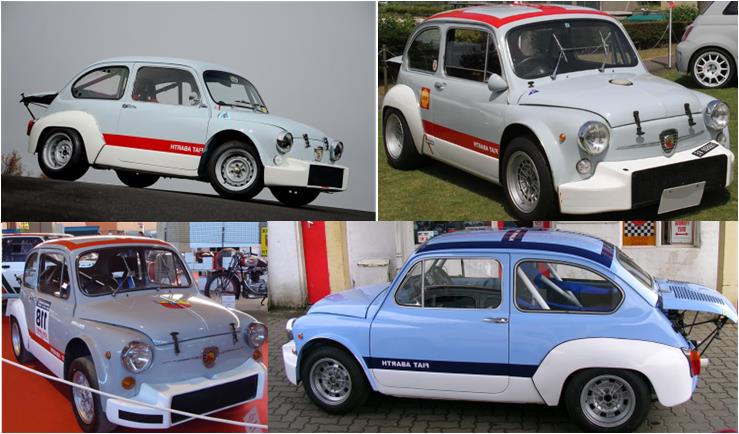
This model reproduces an iconic car in Fiat’s production through the Abarth brand. At that time Abarth was an independent company, not a brand of the Fiat group as it is today.
Since the launch of the Fiat 600, Abarth developed parts to increase performance. Fiat gradually evolved the 600 into the 600D and at the same time Abarth added more kits to the initial modifications, transforming the 600 into a true racing car. In 1962 Abarth developed the Fiat Abarth 850 Berlina into the Fiat Abarth 1000 Berlina. Both models are developments of the Fiat 600D; the engine block of the 600D had already been increased to a displacement of 850 for the Fiat Abarth 850 Berlina. To further increase the displacement, Abarth obtained permission from Fiat to reuse the molds of the engine block from the original 600, which was no longer in production. These molds allowed the bore to be increased to 65 mm from the initial 60 mm and with the new crankshaft the total stroke reached 74 mm, bringing the displacement of the four-cylinder engine to 982 cc.
The exterior appearance of the 1000 version’s body is identical to that of the 850, featuring a large front spoiler integrated directly into the bumper.
The different engine configurations result in the 850 being suitable for track racing and the 1000 for road racing. In 1967, the Fiat Abarth 1000 TCR Berlina version underwent modifications to the engine head (introducing the radial head) and to the rear suspension geometry, allowing for a lower engine installation.
The acronym TCR stands for Turismo Competizione Radiale and this version was used in races starting in 1970.
The gray color used for most of the bodywork is the same paint used for the numerically controlled machines that produced the 600. This paint was purchased by Abarth in large quantities, proving to be cheaper and more durable than the paint normally used for production cars.
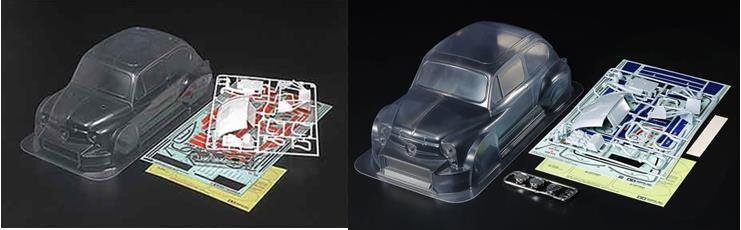
Tamiya developed this body, which is used on M-02, MB-01 and M-05 chassis. There are two different color schemes that share the gray-white base of the bodywork but differ in the livery color, which can be red or blue.
The Lexan body is identical regardless of the color scheme. The accessory set used to complete the body is also the same, differing only in the pigment color used in the plastic.
– Fiat Abarth 1000 TCR Berlina Corsa, item number 58158 with M-02 chassis, gray-red body, released in 1995 and available until 2000
– Fiat Abarth 1000 TCR Berlina Corse, item number 58465 with M-05 chassis, gray-red body, released in 2010 and available until 2013
– Fiat Abarth 1000TCR Berlina Corse, item number 49083 with M-02 chassis, gray-red body, released in 1998, sold complete with electronics and remote control
– Fiat Abarth 1000TCR Berlina Corsa, item number 58721 with MB-01 chassis, gray-blue body, released in 2023
– Fiat Abarth 1000TCR Berlina Corse, item number 47492 with MB-01 chassis, gray-blue body pre-painted and pre-cut at the factory, released as a special edition of item 58721
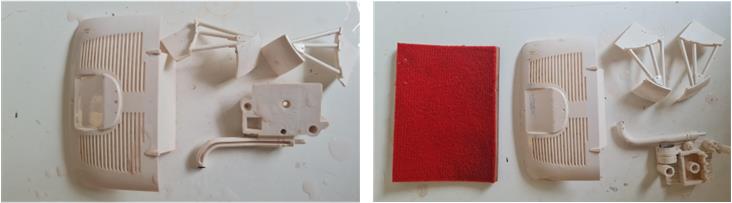
The accessory parts of the body include two rearview mirrors, two front headlights, central front grille and rear engine with open hatch. These parts are identical across all released models, differing only in the plastic color: white styrene for the red-livery model and light blue styrene for the blue-livery model.
The replacement body-only codes are:
– code 50667 Lexan body, white styrene accessories, red livery color (left in the image)
– code 51424 or 11825627 Lexan body, white styrene accessories, red livery color (left in the image)
– code 51709 Lexan body, light blue styrene accessories, blue livery color (right in the image)

Model restoration analysis
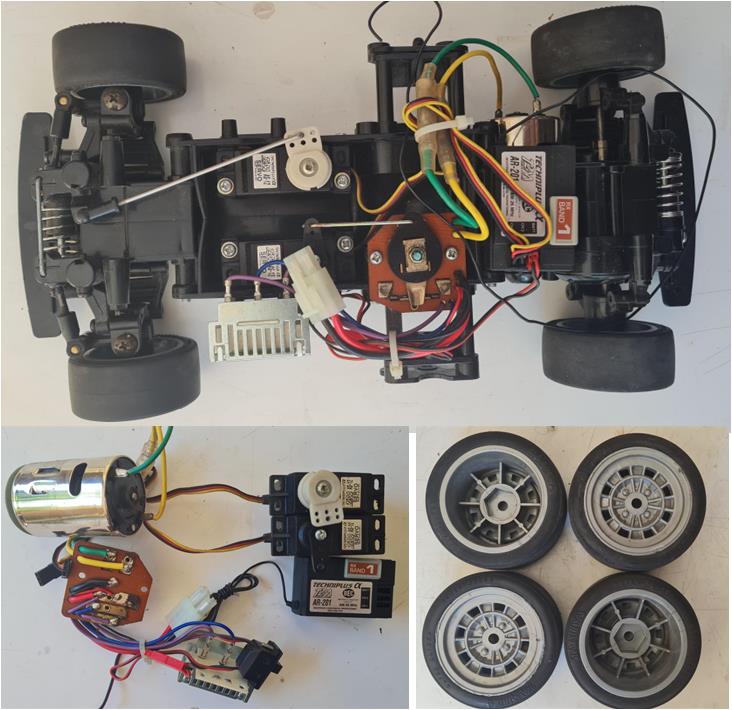
During the online purchase phase, it is only possible to visually analyze the images in the listing; in this case, only the photos shown below are available. It is evident that the model is complete with electronics and a mechanical speed controller, the rims are those of the Fiat 600 TCR Berlina Corsa and the chassis is an M-02. The set includes the instruction manual, a sticker set that has never been applied and parts that complete the bodywork in white styrene.
Chassis restoration
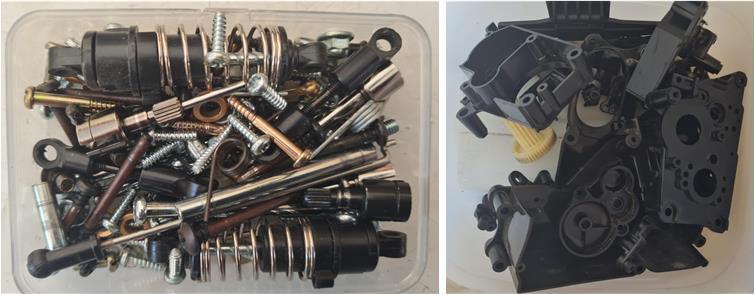
To proceed with the restoration, disassemble the chassis completely, separate the parts by material, look for broken components, check that the small hardware is compliant and identify any type of discrepancy.
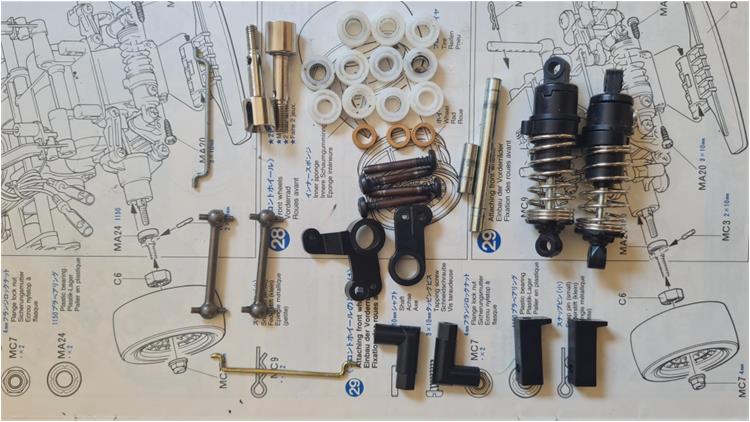
Since this model replicates a real car that dominated road and track racing for years, it makes sense to upgrade the chassis by adding performance-enhancing accessories. First, these components need to be sourced:
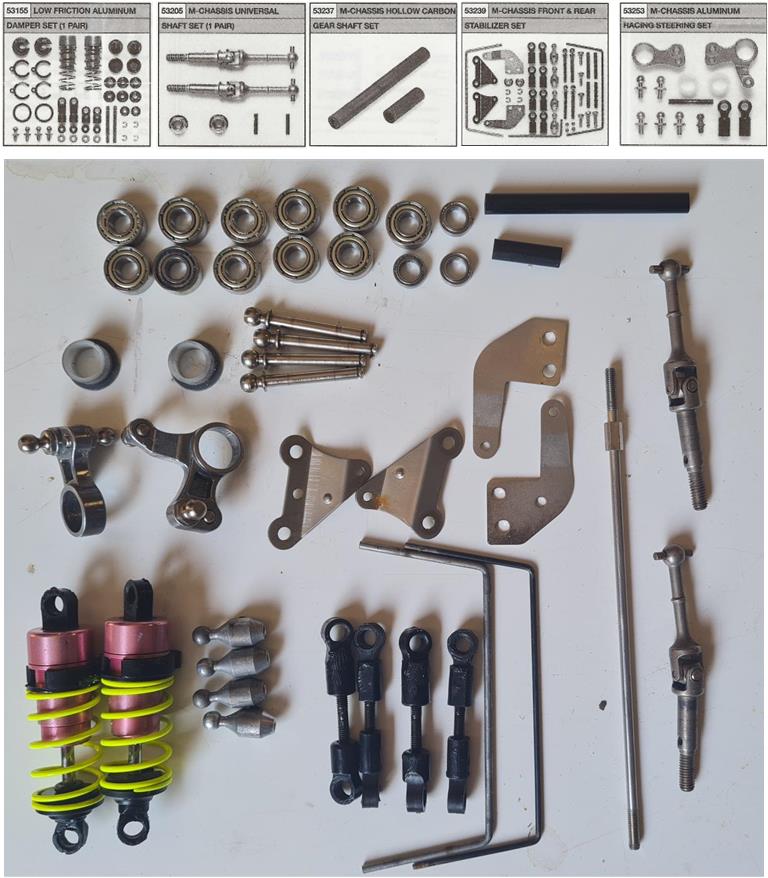
– 53155 described as “Aluminium Dampers 4WD/FWD and Rally Car 2 pcs”
– 53205 described as “Drive shaft (2) M-01/ M-02 / M-03 / M-Chassis, 2 pcs”
– 53237 described as “M-Chassis Hollow Carbon Gear Shaft Set”; follow the assembly instructions if this part is unavailable on the market
– 53239 described as “M-Chassis Front and Rear Stabilizer”
– 53253 described as “M-Chassis Aluminium Racing Steering Set”
– Complete ball bearing set: 11 bearings size 1150 and 3 bearings size 850
The accessories are shown in the image below, arranged from left to right.
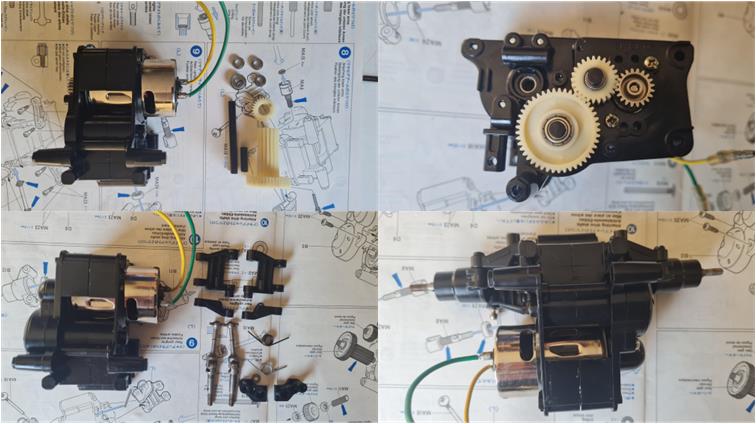
Assemble the rear gearbox, which includes the transmission unit, electric motor and rear suspension. Use the 53205 drive shafts described as “Drive shaft (2) M-01/ M-02 / M-03 / M-Chassis, 2 pcs,” the carbon shafts 53237 described as “M-Chassis Hollow Carbon Gear Shaft Set,” and install the ball bearings.
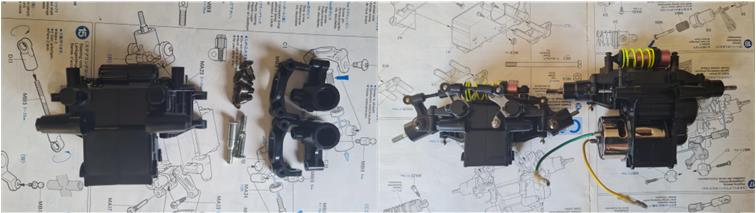
The front gearbox is much simpler than the rear one and includes the dual-lever steering system (code 53253 described as “M-Chassis Aluminium Racing Steering Set”) and the suspension. The front and rear suspension arms are identical and use a single shock absorber; install code 53155 described as “Aluminium Dampers 4WD/FWD and Rally Car 2 pcs” both at the front and rear.
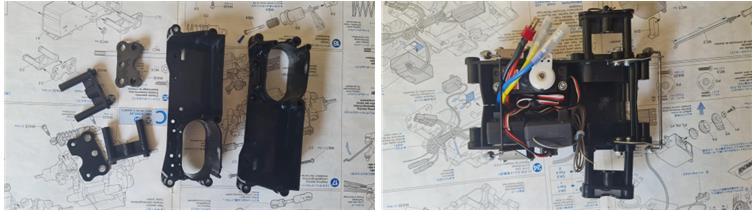
The central part of the chassis allows for the installation of electronics; the mechanical speed controller has been replaced with an electronic speed controller, which improves battery efficiency and allows for better speed regulation with motor brake management. Given the presence of so many accessories to enhance mechanical performance, it is reasonable to also upgrade the electrical components.
The three main parts of the chassis are ready to be joined: front gearbox, rear gearbox and central frame. First, assemble the rear section with the central part, also installing set 53239 described as “M-Chassis Front and Rear Stabilizer.” To complete the chassis, attach the front section. The rims and tires are in excellent condition; no glue was used to bond the two parts forming the wheel and a foam insert is placed inside.
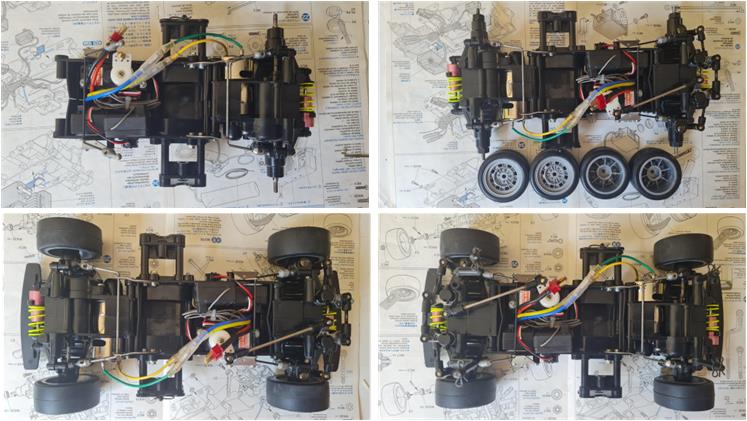
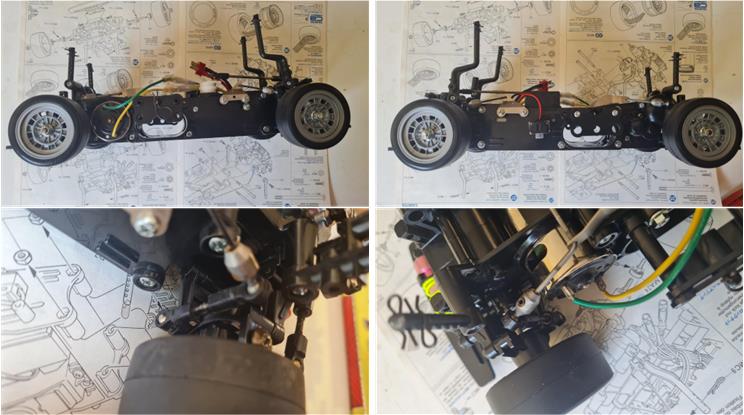
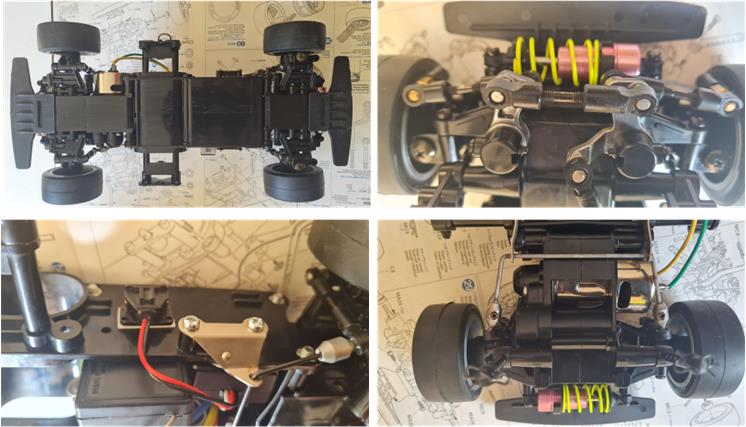
The chassis is now complete and ready to be joined with the body; here are some images of the final result. The underside of the chassis has been treated with abrasive paste to remove marks left by road debris and then polished with black shoe wax.
The parts that were replaced with performance-enhancing accessories have been preserved and will accompany this model to allow a future return to the factory configuration.
Body restoration
The body is completely missing, but the decals and all the white plastic parts are present, confirming that it was originally a set 58158. The styrene parts are slightly damaged and scratched; treat the surfaces with wet 2000-grit sandpaper to remove the scratches.
The body is completely missing, likely destroyed during a typical racing incident. As of today (2025), it is possible to purchase set 51709, which includes blue-series decals; fortunately, the previous owner provided a brand-new original decal set.
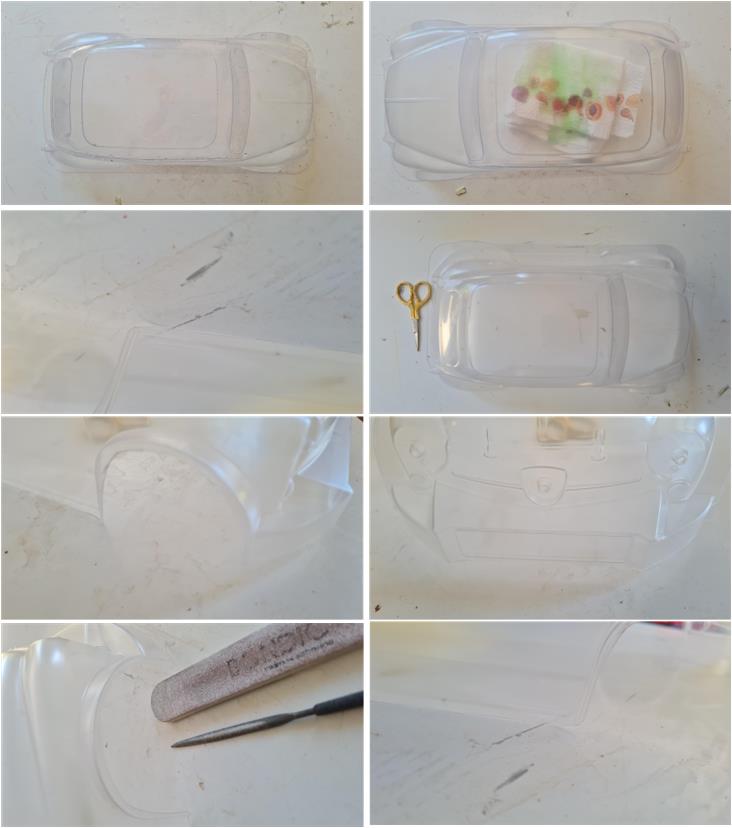
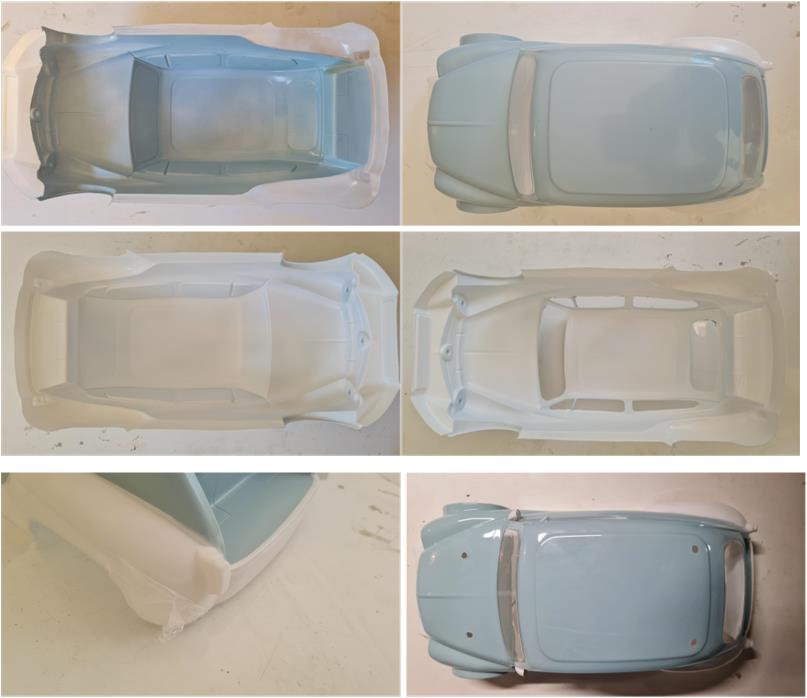
The first step when working with a Lexan body is to wash the inner surface using kitchen degreasing soap (right image, first row). It is essential to remove any traces of oil or lubricant used during the molding process.
Next, trim the excess material from the body. The cutting lines are molded into the shell (left image, second row), making it intuitive to identify where to cut. Use short-blade scissors for curved sections (right image, second row) and long-blade scissors for straight edges.
When trimming, leave a small amount of excess material, which will later be removed using metal files (images in the second-to-last row). For curved sections, leave more material to work with the files; for straight sections, cut as close as possible to the ideal line. This method ensures accurate trimming without removing parts that should be preserved.
Use flat files for straight edges and curved files for areas with a radius (left image, last row).
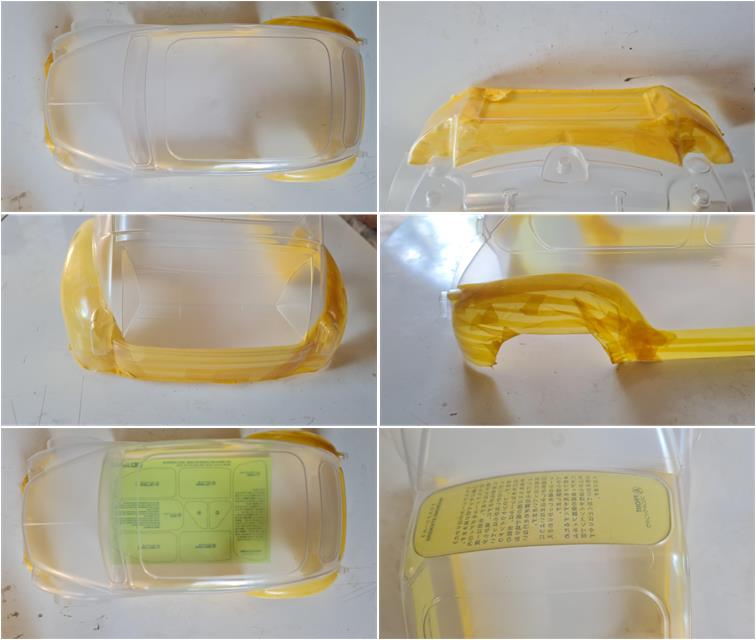
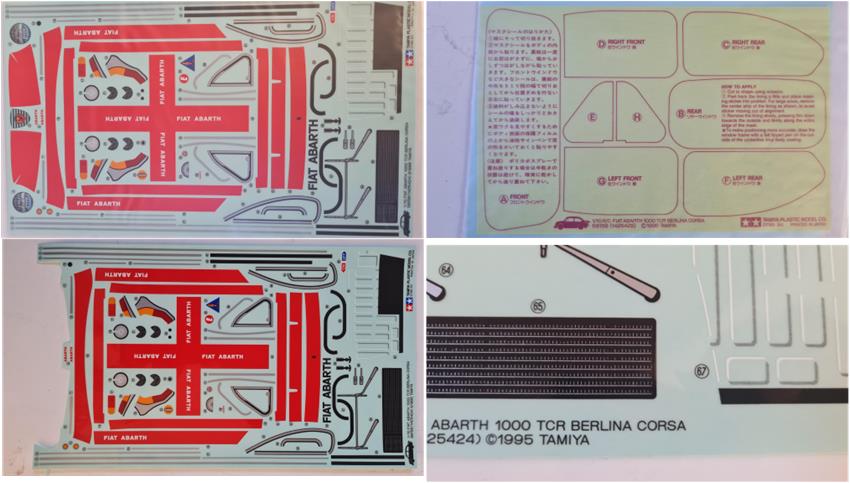
For Lexan bodies, apply dark colors first and then light ones; this prevents dark shades from affecting the appearance of lighter ones. Refer to the guide on how to apply paint to Lexan bodies. The colors used are racing gray PS32 and white PS1. Before applying the racing gray, mask all areas that will be painted white and apply the window masks. The window masks are included in the decal set.
To apply the window mask: start by partially removing the transparent film from one side, position the sticker on the body (left image), once the exposed adhesive holds the sticker in place, peel off the rest of the protective backing (blue tab in the center image) and finally the mask will adhere to the body, covering the window area (right image).
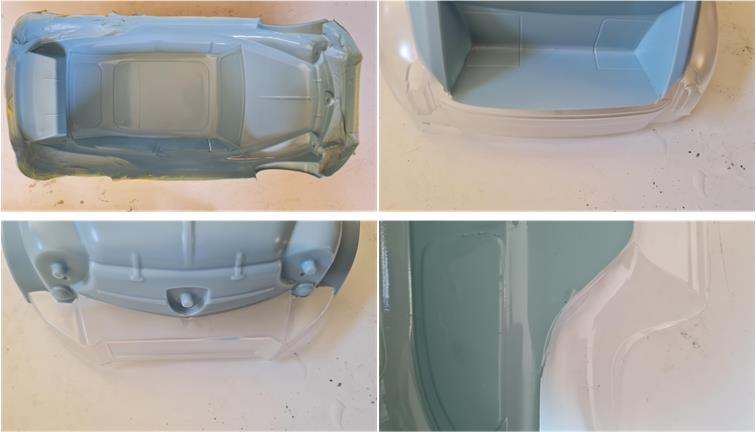
After applying the final coat of racing gray, wait at least 2 hours and no more than 4 hours before removing the mask from the white areas; do not remove the window masks.
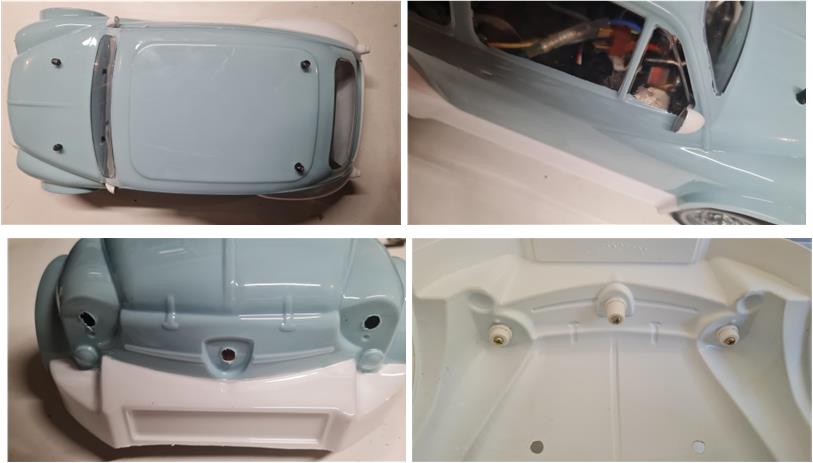
The body is ready to receive the white paint. After applying the final coat of white (left image, second row), wait at least 2 hours and no more than 4 hours before removing the window masks (right image, second row). Now you can remove the outer protective film from the body (left image, last row). Using a metal tip, drill the holes for the posts that connect the body to the chassis (right image, last row); the body features four small dots indicating where to drill for the posts.
Now the body can be test-fitted onto the chassis (left image, first row) and some accessories can be installed, such as the rearview mirrors (right image, first row). From the front end, cut the three cones (left image, second row) of the two front lights and the central grille to install these accessories (right image, second row).
Applying the decals requires a long and meticulous effort: the numbering goes up to 67, but in reality there are many more, as decals on the right and left sides often share the same identification. The set also includes the sheet with masks for the windows and windshield, which have already been used during the painting process.
Up to four hours of work may be needed to carefully cut and position the decals. Begin from the top section, as shown in the left image of the second row, which includes the front decals. Then proceed downward, applying the decals that correspond to the rearward sections of the body.
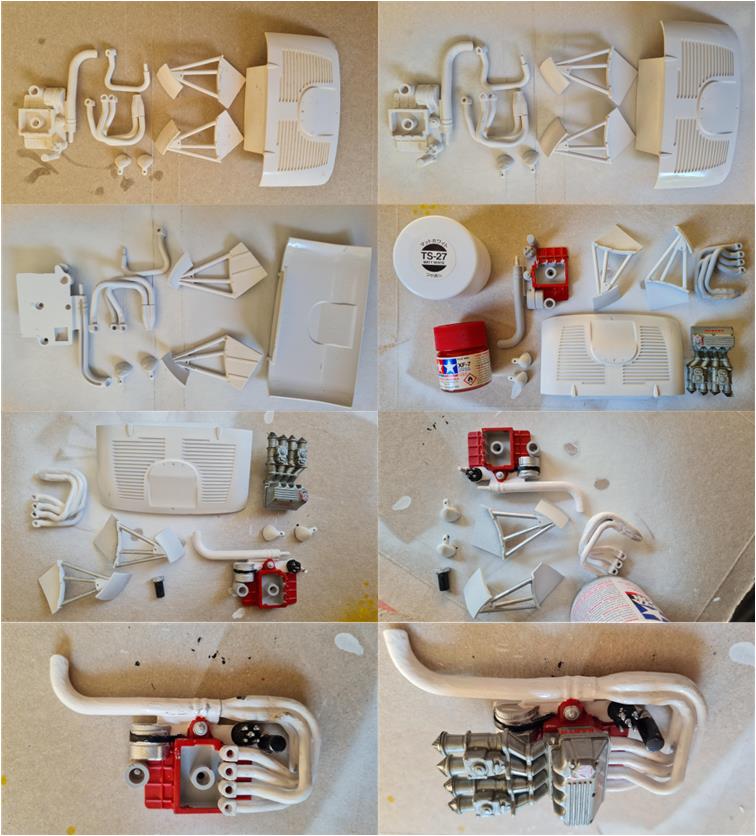
The rear engine with the open hatch is made from white styrene parts (in model 58158, left image of the first row). Before applying paint, a primer coat must be applied (right image of the first row). Assemble the various parts of the exhaust manifold to prepare it for painting using white TS27, red XF7, black XF1 and gray XF53. Once painted, the engine assembly can be completed with decals. The engine group is fully detailed: red cylinder head, muffler with white exhaust manifolds, black filter, gray alternator with black belt and gray engine support.
Install the rearview mirrors, the hood, the engine, the two front headlights and the central front Abarth emblem. Now the body is ready to be mounted onto the chassis.
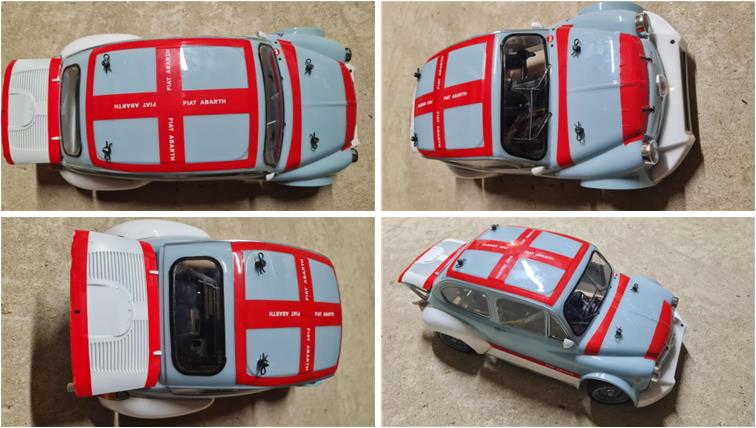
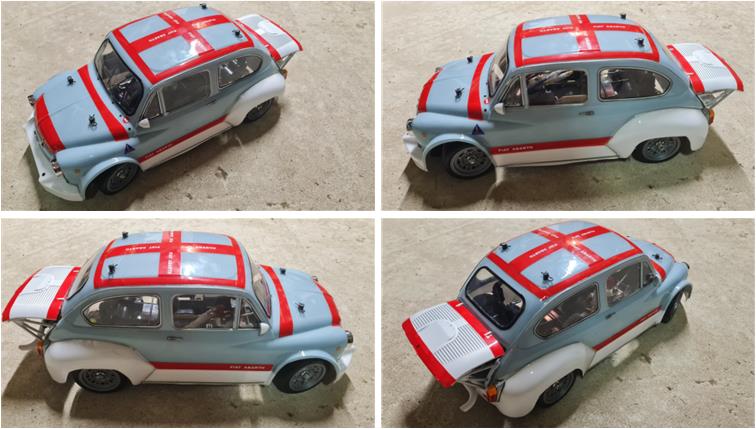
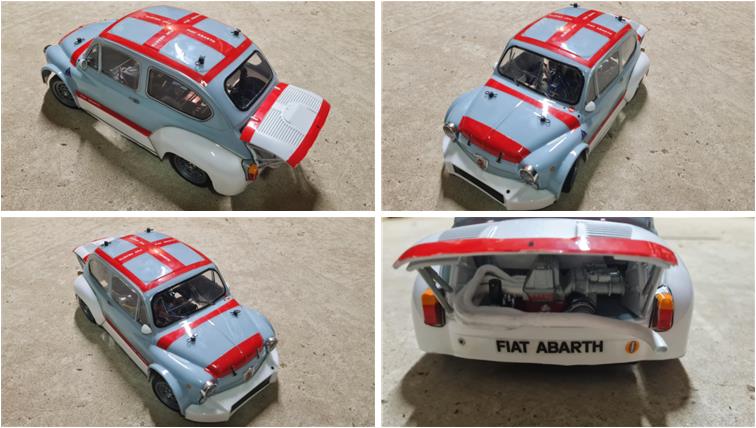
Restored model with body
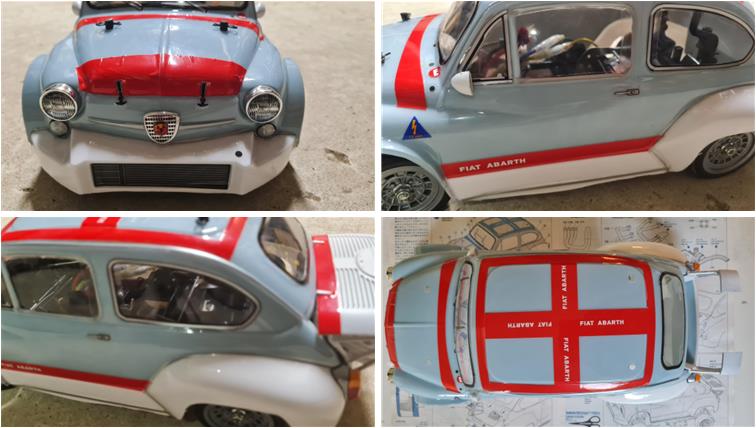
Images showing the completed model with body.